Monday, July 5, 2010

Raspberry Chocolate Tart with Gingersnap Crust


Oooh... This one is utterly evil. I once saw a show on TV that explains the science of why some foods taste so good together. But I really don't need science to know that the balance of the bitter and sweet of the chocolate, the tartness of the raspberries, and the spiciness of the ginger are perfect complements to each other.

Apart from looking really pretty, the way the flavours layer on your tongue and mouth is also amazing. As you bite down, the raspberries hit your tongue with the tartness, then the bittersweet of the chocolate explodes all over the place, finally finishing off with the spicy crunch of the gingered crust.

To die for...

  • About 40 gingersnaps (to yield 1 1/2 cups finely ground)
  • 4 tablespoons melted unsalted butter
  • 3 ½ cups fresh raspberries
  • 8 ounces semisweet or bittersweet chocolate, finely chopped if not using chips or buttons
  • 1 ¼ cups heavy cream
  • Raspberry jam (optional)
  • Small pinch salt

Preheat the oven to 160C and grease the sides and bottom of a 9 1/2-inch fluted tart pan with a removable bottom.

In a food processor, grind the gingersnaps until they're the texture of sand. Transfer to a bowl, add the melted butter, and work it in by squishing the mixture together with your hands. Press into the sides and bottom of the greased tart pan.


A little trick to get the crust evenly flat in the pan is to use a glass cup. Press the glass cup down gently, smoothing out the bottom of the crust as you squish the excess to the sides of the tin. Then press the cup against the sides for a perfectly flat side. Voila!

Refrigerate the crust for 20 minutes until firm, then bake the tart crust on the baking sheet until fragrant and light golden brown, about 15 minutes Make sure you check and rotate if needed to make the sure the crust doesn't get too dark. Set on a rack to cool

Meanwhile, whizz 1 cup of the berries through a food processor. Strain the pulp through a strainer to get rid of the seeds and bits. You'll have about 1/2 cup puree; set it aside and discard the contents of the strainer.

Put the chocolate in a medium bowl. Heat the cream just until boiling. Pour the hot cream over the chopped chocolate and whisk to blend. Stir in the raspberry puree and the salt.


Spread a thin layer of raspberry preserves on the bottom of the cooled tart shell, then pour in the chocolate mixture (known as a ganache).

Refrigerate until the ganache is fairly firm, about 1 hour. Arrange the remaining raspberries on top of the ganache; they should completely cover the surface. Chill until the ganache is completely firm, about 30 minutes, and serve.

Homestyle Carrot Cake with Lemon Cream Cheese Frosting


Moist, spicy and tangy... It's like a party in your mouth!

This is a long-time favourite from way back when. The secret to making this cake go from good to OMFG is using freshly grated whole nutmeg. The aroma is so heady that it makes you want to plunge headfirst into the batter.

The second secret is using good cream cheese for the frosting. Resist the urge to get a huge block of generica on the cheap. Use original philly and you'll taste the difference.

Finally, don't be shy about the frosting. Slap it on thick and good. But if you don't want frosting, the carrot cake is good on its own too.

Makes an 1-inch/ 20cm cake:

For the cake:
  • 1 ²∕₃ cups sugar
  • 1 tsp salt
  • 1 ¼ cups flour
  • 2 ¼ tsp cinnamon
  • 1 tsp nutmeg
  • ½ tsp allspice
  • 1 tsp vanilla extract
  • 1 tsp baking powder
  • ½ tsp baking soda
  • 3 (60g) eggs
  • ²∕₃ cup vegetable oil
  • 1 ½ cup grated/chopped carrot
  • ½ cup roughly chopped walnuts or pecans

For the frosting:
  • 500g cream cheese, softened
  • 170g unsalted butter, softened
  • 1 ½ cups icing sugar, sifted
  • 1 ½ tsp vanilla extract
  • 1 lemon, grated zest and juice

Preheat oven to 175C. Grease 2 springform round tins and line bottom with parchment paper.

Sift together  flour, cinnamon, nutmeg, allspice, salt and baking soda and baking powder. Set aside.


For easy wash-up, chop carrot in food processor. When fine, chuck in nuts and pulse till roughly chopped.


Whip eggs and sugar until thick to till light yellow and runs off your beater like a fat ol' ribbon. Gradually add oil until evenly blended.


Fold in sifted flour mixture gently. Add grated carrots and nuts until well mixed.


Divide the batter between the 2 cake tins and bake for about 45-50 minutes. You'll know it's done when a toothpick inserted in the middle comes out clean. Let cool completely before you start frosting.

On to the frosting:


Blend cream cheese till nice and smooth. Add cubes of butter, blending well in between.


Sift in icing sugar and blend till fully incorporated.


Finally, mix in vanilla, lemon juice and zest. You should get a smooth creamy icing with no lumps. Cover with cling wrap and chill for an hour to let it firm up a bit.


To assemble the cake, spread a layer of icing between the two cake layers and frost all over. Chill for 2 hours in the fridge so the icing sets firm.

For a step-by-step picture guide on cake frosting, click here.


If you can resist, eat it the next day. This cake just seems to taste better when left overnight. It also keeps well. Up to 4-5 days if whole. However, if you've already sliced it, make sure you cover it so that it doesn't dry out in the fridge.

Cake Frosting Basics

Frosting can be a little daunting for first timers, but hey, a cake that tastes good no matter how ugly it looks. Don't worry about it looking perfectly smooth the first time. The more you practice, the better you'll get.

A few tips to make it easier:
  • A rotating frosting plate helps you turn the cake more easily and creates smoother surfaces.
  • Always make sure the cake is completely cool before cutting or frosting. Chilling in the fridge makes the cake firmer, easier to handle and less likely to break.
  • Always slice your cake with a serrated bread knife, not a regular knife.
  • An icing knife is a must.

The first step is the prepare the cake for frosting. What you want to achieve is a relatively flat and crumb-less surfaces.

Place a plate over one cake tin and flip over. Remove paper from the bottom of the cake. Place a cake board over the bottom of the cake and flip over again. Now you have the first layer sitting nicely on the cake board.


If the cake has risen in such a way that the top is domed, use a bread knife to level it out. Brush off crumbs and set aside.

Do the same for the other cake layer and set aside.

No sweat so far?

To create the sandwich layers, slap a quarter of the icing onto the bottom layer, using an icing knife or spatula and spread evenly.


Place the top layer flat side up, sandwiching the icing between the two layers of cake. Basically, the two slightly domed sides go in the middle, with the icing filling up the gaps in between. There are 2 reasons for this. First, it gives you a stable flat bottom and a pretty flat top. Second, the gaps hold lots of icing so it makes for a generous iced center.

In this demonstration, I've baked a single cake and sliced it in half. If you're doing the same, place the top half of the cake flat side down on the cake board. This means the slightly domed side is the one you ice.

Spread on a thick layer of icing, making sure you put more icing on the sides to create a flat surface.

Then place the other layer flat side up. This means that the cut side is touching the frosting.


The first thing we do in icing the outside of the cake is to "seal" the cake. This means we place a very thin layer of icing on to seal the crumbs, then place in the fridge to set. Then, a thick final layer of frosting goes on. This is done so that the final frosted cake is smooth and crumbless.

Spread a very thin layer of icing on the top of the cake surface. You'll see the crumbs mix in with the icing. Don't worry about it at this point.

With your icing knife, take globs of icing and spread onto the sides. Just make sure the sides are coated and don't worry about it being a little uneven for now.

Place into the fridge for 30 minutes and you're almost there...


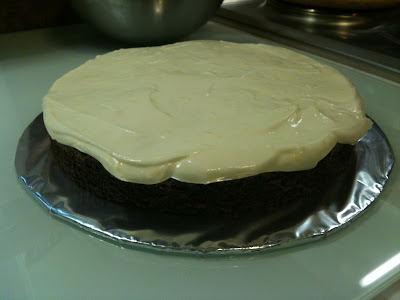
When the "sealed" cake has set, take half of the remaining icing and spread it evenly across the top of the cake. As you spread and smoothen, some of the icing should ooze over the sides.

Use a paper towel and clean off your icing knife.

Take small globs of icing with your knife and coat the sides, making sure the icing layer is straight.

Once you've got a layer of icing onto the whole cake, you can now start smoothing and evening out the whole thing.

OK... start with the top. Sweep the knife in long strokes so it's evened out. Wipe down knife again.

For the sides, place the tip of the knife onto the cake board, holding it parallel to the cake. Run it along the cake in a continuous stroke around a quarter of the cake, being careful not to exert too much pressure. You don't want to mash and scrape off all the icing, so a light touch to smooth it out is all that's needed.

Wipe down knife again and repeat quarter by quarter.


There you go, a decently iced cake!

Saturday, July 3, 2010

Mussels in white wine broth


I can't stand forking out obscene amounts of money to eat this at restaurants when I know I can make a much better version at home for much less.

It's my pimp-fabulous take on a classic and takes just minutes to prepare. Perfect for nibbly appetizers for 4 or eat an entire pot by yourself.

  • 20 large or 30 medium mussels, cleaned
  • 1 white onion, finely sliced
  • 1 stalk celery, finely sliced
  • 2 cloves garlic, finely minced
  • 1/4 teaspoon each of cumin, oregano and paprika
  • 1/2 bottle dry white wine
  • 1 cup cream

In a large pot, heat up 2 tablespoons of olive oil and fry onion and celery till soft and fragrant. Add garlic and fry till just soft, taking care not to burn it. Season with spices, pepper and salt.

Pour in white wine and let simmer, adding the cream as it comes to a boil. Turn down the heat and let simmer till the broth is reduced by half.

When that happens, chuck in the mussels, cover with a lid and cook for 3-5 minutes until done. Mussels cook fast, so be careful not to overcook them.

Take off heat and serve directly in the pot. Some crusty baguette is awesome to soak up the broth. Yum yummy yum yummmm.

See the rest of the BBQ Bonanza menu here:

Mediterranean Salad


This brings the best of everything mediterranean into one big-ass bowl.

The tartness of the tomatoes is complemented with the milky saltiness of the feta cheese and enhanced with the smokiness of the olives and sundried tomatoes.

You can use ready made italian dressing or any of your favourites. But if you have time, home made dressing is always the yummiest.

Here's what you need for 8 people:
  • 10 - 12 ripe roma tomatoes
  • 10 basil leaves, thinly sliced
  • 1/2 cup olives
    1/2 cup sundried tomatoes, thinly sliced
  • 1 block greek feta cheese, cubed
  • 1/2 cup olive oil
  • Juice of 1 lemon
  • 1 tsp tomato paste
  • 1 tsp Italian herb mix (Chop or pound basil, oregano, thyme and parsley into a superfine mix, almost resembling a paste. Alternatively, you can buy the paste in tubes at Cold Storage.)

To make dressing, whisk together olive oil, lemon juice, tomato paste and Italian herbs until emulsified. If you don't have a wire whisk, shaking the ingredients in a jar with a screw-on cap works just as well.

Toss all the ingredients in a large bowl, pour on the dressing and mix well with your hands.

That's pretty much it. Hassle-free and utterly deliciouso!

See the rest of the BBQ Bonanza menu here:

Roasted garlic mashed potatoes

I'm a carb junkie. No carbs and I'm as cranky as a menopausal 50 year old refusing hormone replacement therapy. I tried the Atkins Diet a few years ago... and made it for a grand total of 2 days before I broke down, and ate an entire baguette slathered in butter and chased it with a tub of Ben and Jerry's. 'Nuff said.

It's one of favourite comfort foods, and I confess I used to eat a whole pot of this while sitting in front of the TV. Needless to say, I gained 16kg, but that's a whole other story altogether.

For 1 serving, 1 potato per person:
  • 1 russet burbank potato, peeled and cut into half
  • 1/3 cup fresh cream
  • 1 tablespoon butter
  • 1 teaspoon roasted garlic paste (you can replace this with 1/2 clove finely minced raw garlic)
  • Freshly ground pepper and salt to taste

Boil potatoes until soft and tender. You'll know when it's done when a fork slides easily into the potatoes.

Drain and place into a bowl. Mash using a masher or fork, leaving a few chunky bits of potato for some texture. Chuck in roasted garlic paste and butter, mixing well. Pour in cream until the texture is smooth and season with pepper and salt to taste.

This goes great with meats... steaks, roast chicken or lamb. Or you can eat it out of the pot in front of the TV and get fat and happy.

See the rest of the BBQ Bonanza menu here:

    Munchy Lunchy


    Joy is a no-cook lunch when the rain eases up. Crusty warm baguette, pork rillettes, sundried tomatoes and a slice of brie. Earthy, rustic and delightfully simple, I'm a real happy bunny right now.

    Fish in lemon, butter and dill sauce

    This was inspired through sheer laziness and a burning desire to have as little to wash up as possible.

    Not pots, pans or real cooking required, it combines the freshest ingredients in one itty bitty parcel of fishy fabulousness.

    As the fish cooks, the butter melts and combines with the lemon juice. The liquid steams the fish to perfection and all the flavour and juices is sealed into the foil packet. When you open it, the aroma of lemon, butter and dill hits you, and you get a morsel of just-cooked fish, swimming in a buttery, lemony, herby sauce. OMFG.

    For 8 servings:
    • 2 fillets of firm fleshed white fish
    • 4 sprigs of dill
    • 1 lemon, sliced
    • Juice of 1 lemon
    • 250g butter
    • Freshly ground pepper and salt


    Cut the fish fillets into 4 pieces each. Place on a piece of tin foil and season with pepper and salt. Squeeze a little lemon juice on.

    Lay one or two slices of lemon and 1/2 a sprig of dill on each piece of fish and wrap tin foil tightly.


    Barbecue for 10 minutes or bake in a 200C oven.


    See the rest of the BBQ Bonanza menu here:

    Strawberries and Fresh Cream Cake


    Food porn alert!

    I could wax lyrical about this cake ad nauseum. Especially since it's a miserable rainy day, the thought of light fluffy vanilla-scented butter cake, sandwiched between layers of fresh cream and tart-sweet strawberries is enough to lighten my mood.

    The cake is delicate, using egg whites instead of yolks or whole eggs to give it a lightness. The butter and milk moistens the cake and gives it a rich flavour.

    The fresh cream frosting is pure unadulterated and shameless. Simply pure cream, with sugar, a hint of vanilla and some cornstarch to stabilise it for frosting, it's so good you can eat it straight from the bowl.

    For the cake, you'll need:
    • 135g egg whites (from approximately 4 eggs)
    • 1 cup milk, separated into 1/4 and 3/4 cups
    • 2.5 tsp vanilla extract
    • 300g sifted cake flour
    • 300g caster sugar
    • 1 tbsp + 1 tsp baking powder
    • 3/4 tsp salt
    • 170g butter, softened and cubed

    Preheat oven to 180C.

    Grease two 9-inch round springform cake tin and line the bottom with parchment or greaseproof paper.

    In a medium bowl, lightly whisk together egg whites, 1/4 cup of milk and vanilla.


    Add the butter and remaining 3/4 cup milk and mix on low speed until the dry ingredients are moistened. Increase speed to medium and beat for another 1.5 minutes. This adds air to the batter and helps create the volume and structure of the cake. As you beat, make sure to keep scraping down the sides.


    Gradually add the egg mixture in 3 batches, beating for about 20 seconds after each addition. Don't forget to keep scraping down the sides!


    Pour 1/3 of the batter into one tin and 2/3 into another. Smooth the surface with a spatula. Bake for 25 - 30 minutes or until a skewer inserted into the middle comes out clean.

    Let the cakes cool on racks for 10 minutes. You'll notice that the sides will shrink away from the tin as it cools. Once the cakes are cool enough to handle, run a knife or spatula around the sides of the cake to make sure nothing sticks.

    Remove the springform sides, and transfer to a cake board.

    Now, on to the strawberries and cream:
    • 500g of fresh small strawberries
    • 40g icing sugar
    • 3 teaspoons cornstarch
    • 3 cup cream
    • 1.5 teaspoon vanilla

    Slice thinly or dice half the strawberries. This will go in between the layers so if you prefer chunks, dice them instead of slicing. Trim off the leaves of the other half and cut into halves. This will be used to decorate the top of the cake.


    To make the whipped cream, refrigerate your mixing bowl and beater in the fridge for at least 15 minutes. Cold equipment ensures the stability and integrity of the whipped cream. Ever seen melted whipped cream? Pretty nasty...

    Mix sugar and cornstarch together in a small saucepan, then gradually add one quarter of the cream, using a wire whisk to mix out all the lumps. Transfer to stovetop on medium heat. Keep stirring, and stirring, and the mixture will thicken. Remove from heat and let cool to room temperature.

    In a mixing bowl, beat the remaining cream and vanilla until traces of beater marks begin to show distinctly.

    Be careful not to overbeat or what you'll end up with is literally butter. Which, isn't all that bad... if that happens, just add fine caster sugar and keep going until you see it form a curd-like mass. Pack it all into a pot and you have homemade clotted cream (which is like a creamy butter). Oh yes, and start on the whipped cream all over again, and this time, pay attention!

    Add the cornstarch and sugar mixture in a steady stream to the whipped cream, beating constantly. Beat until stiff peaks form when you raise the beater.

    Chill in fridge for 30 minutes.

    OK, now to assemble the cake. Frosting beginner? Click here for a step-by-step picture guide on frosting cakes.


    Slice the thicker cake into 2 layers.

    Lay the thinner cake on a cakeboard and spread with a layer of cream. Place a layer of sliced or diced strawberries and cover with the next layer. Repeat until you have 3 berry creamy layers.


    Once the layers are assembled, brush off extra crumbs off the top of the cake. Then frost all over with cream. Decorate with strawberry halves and chill for another hour to set the cake before serving.

    Thursday, July 1, 2010

    Roasted Garlic


    Roasted garlic is my secret power ingredient. Roasting takes the "bite" out of raw garlic, caramelizes the sugars and gives it a deep rich flavour like no other. Add it to any dish and watch it come to life.

    I like making large batches every now and then, mash into a paste and store it in the fridge.

    You can pop it out of the skin and eat it, spread it on toast, make hummus, it's versatile to the nth degree.

    To make the roasted garlic, simply remove the outer skins from a whole head of garlic and cut off the top.

    If you have muffin pans, place one in each hole, drizzle with olive oil and cover with tin foil. If you don't, toss them in olive oil and wrap each head in foil.


    Bake in the oven for 35-40 minutes at 200C.

    The paste keeps well in an airtight container in the fridge for up to 2 weeks, and in the freezer for up to 4 weeks.

    Honey, Mustard and Herb Beef Kebabs

    The spicy bite of mustard. The crisp green flavour of herbs. The sweetness of honey. It's a combination that complements the meaty flavour of beef rump perfectly.

    Makes 8 large kebabs:
    • 800g of beef (use tender grill cuts like rump or sirloin)
    • 2 tbsp wholegrain mustard
    • 1 tbsp dijon mustard
    • 2 tbsp honey
    • 2 tbsp olive oil
    • Italian herb mix (Chop or pound basil, oregano, thyme and parsley into a superfine mix, almost resembling a paste. Alternatively, you can buy the paste in tubes at Cold Storage.)
    • Freshly ground black pepper
    • 1/2 tsp salt
    • 1 capsicum, seeded and sliced into 2x2cm squares
    • 1 onion, peeled and sliced into 2x2cm squares

    Dice beef into small cubes, about 2x2cm. You don't want the cubes too large as it will take the beef too long to cook on the barbeque. Also, smaller sized cubes absorb more of the marinade which makes them uber tasty.


    Add all seasonings except the salt and mix well. Cover with cling wrap or store in an airtight container and marinate in the fridge for at least 3-4 hours, or overnight preferably.

    When ready to cook, season with salt. Skewer onto metal or wet bamboo skewers, alternating with 1 slice of onion and capsicum between each piece of meat. Be sure to pack each piece firmly against each other to prevent any rolling around while you turn them on the grill. Skewers should hold about 5-6 pieces of meat.


    The small size of the meat pieces means that these babies cook real fast. Slap one on the blazing hot grill and the moment it starts to colour, flip it around and let the other side colour, and you're ready to eat. The beef will be done medium to medium rare.

    See the rest of the BBQ Bonanza menu here:

    Singaporean BBQ Chicken Wings

    This is a must-have at any BBQ, and this is my mum's recipe - with a few of my modifications of course.

    If you're not going to barbeque these chicks, then roasting in the oven at 180C for 30-40 minutes till golden brown works well too. For a deeee-lish beer snack, deep fry the wings and serve with a sweet Thai chilli sauce.

    Smoky, spicy, caramelly and absolutely to die for, the trouble of starting up the barbeque will be well worth it.

    For 8 wings with drumlet attached:
    • 2 tbsp peanut oil
    • 1 tsp sesame oil
    • 2 tbsp chinese rice wine
    • 1 tbsp honey
    • 1 tsp five spice powder
    • Freshly ground black pepper
    • 2 tbsp ginger juice (Pound ginger and squeeze out juice. Ginger is a natural meat tenderizer so your chicken wings will be melting off the bone when cooked. Plus it gives it a spicy zing.)
    • 1 tsp dark soy sauce
    • 1 tsp light soy sauce
    • 1 tbsp Japanese teriyaki sauce (optional)

    Wash and dry chicken wings and marinade with all ingredient except the soy and teriyaki sauces. Cover with cling wrap or place in airtight container and marinate for at least 3-4 hours, or overnight ideally.


    The reason why you should only add the soy sauce or any salt to any marinated meat just before cooking is that salt leaches the juices out from the meat and causes it to toughen. Now you know.

    Before cooking, add soy sauce and skewer onto metal or wet bamboo skewers. Soaking the skewers in water prevents it from burning when on the barbeque. Skewering them opens out the wings and helps the meat get crisp and brown evenly. It also makes for faster cooking which is always welcome at a barbeque.


    As you barbecue the wings, use the leftover marinade to baste for extra flavour.

    See the rest of the BBQ Bonanza menu here: