A few tips to make it easier:
- A rotating frosting plate helps you turn the cake more easily and creates smoother surfaces.
- Always make sure the cake is completely cool before cutting or frosting. Chilling in the fridge makes the cake firmer, easier to handle and less likely to break.
- Always slice your cake with a serrated bread knife, not a regular knife.
- An icing knife is a must.
The first step is the prepare the cake for frosting. What you want to achieve is a relatively flat and crumb-less surfaces.
Place a plate over one cake tin and flip over. Remove paper from the bottom of the cake. Place a cake board over the bottom of the cake and flip over again. Now you have the first layer sitting nicely on the cake board.
If the cake has risen in such a way that the top is domed, use a bread knife to level it out. Brush off crumbs and set aside.
Do the same for the other cake layer and set aside.
No sweat so far?
To create the sandwich layers, slap a quarter of the icing onto the bottom layer, using an icing knife or spatula and spread evenly.
Place the top layer flat side up, sandwiching the icing between the two layers of cake. Basically, the two slightly domed sides go in the middle, with the icing filling up the gaps in between. There are 2 reasons for this. First, it gives you a stable flat bottom and a pretty flat top. Second, the gaps hold lots of icing so it makes for a generous iced center.
In this demonstration, I've baked a single cake and sliced it in half. If you're doing the same, place the top half of the cake flat side down on the cake board. This means the slightly domed side is the one you ice.
Spread on a thick layer of icing, making sure you put more icing on the sides to create a flat surface.
Then place the other layer flat side up. This means that the cut side is touching the frosting.
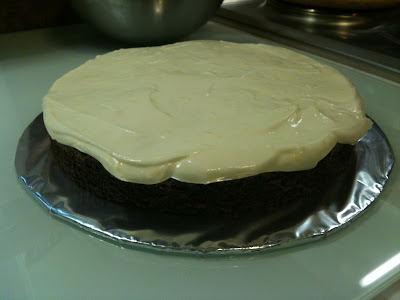
The first thing we do in icing the outside of the cake is to "seal" the cake. This means we place a very thin layer of icing on to seal the crumbs, then place in the fridge to set. Then, a thick final layer of frosting goes on. This is done so that the final frosted cake is smooth and crumbless.
Spread a very thin layer of icing on the top of the cake surface. You'll see the crumbs mix in with the icing. Don't worry about it at this point.
With your icing knife, take globs of icing and spread onto the sides. Just make sure the sides are coated and don't worry about it being a little uneven for now.
Place into the fridge for 30 minutes and you're almost there...
When the "sealed" cake has set, take half of the remaining icing and spread it evenly across the top of the cake. As you spread and smoothen, some of the icing should ooze over the sides.
Use a paper towel and clean off your icing knife.
Take small globs of icing with your knife and coat the sides, making sure the icing layer is straight.
Once you've got a layer of icing onto the whole cake, you can now start smoothing and evening out the whole thing.
OK... start with the top. Sweep the knife in long strokes so it's evened out. Wipe down knife again.
For the sides, place the tip of the knife onto the cake board, holding it parallel to the cake. Run it along the cake in a continuous stroke around a quarter of the cake, being careful not to exert too much pressure. You don't want to mash and scrape off all the icing, so a light touch to smooth it out is all that's needed.
Wipe down knife again and repeat quarter by quarter.
There you go, a decently iced cake!


No comments:
Post a Comment