Showing posts with label French. Show all posts

Thursday, September 16, 2010

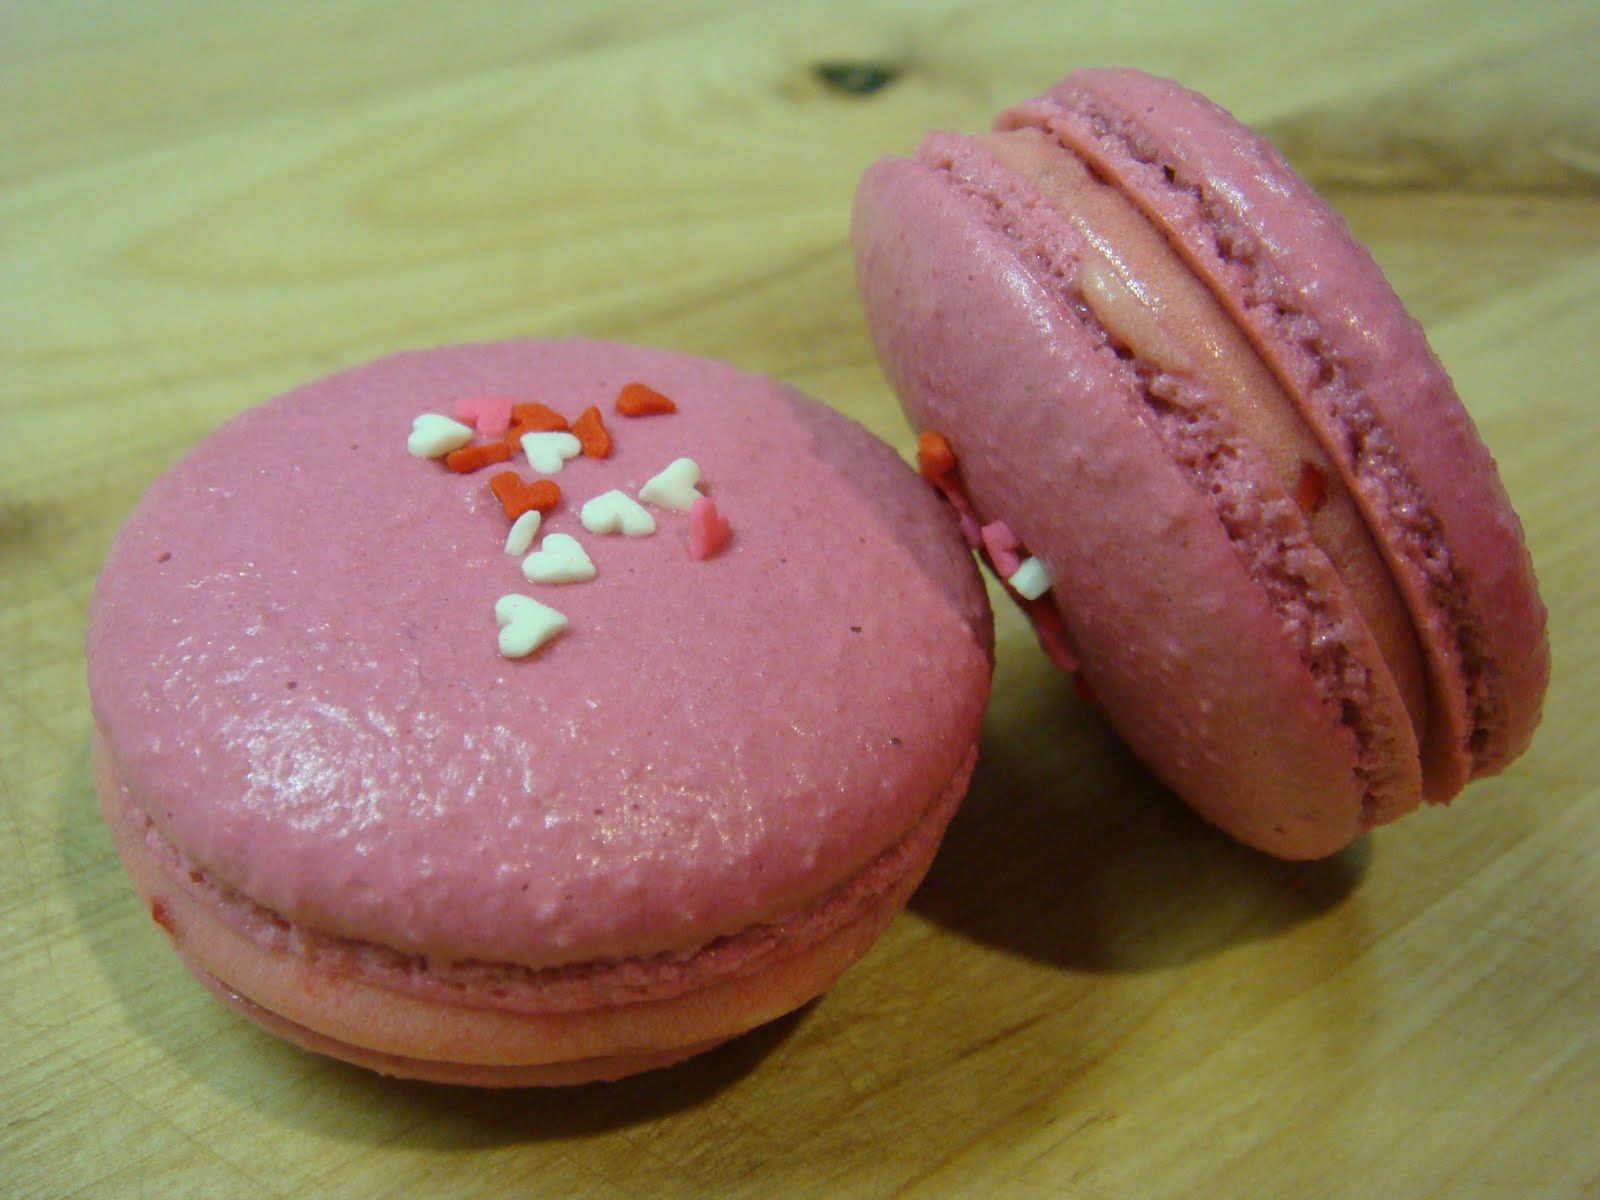
Pretty in Pink Raspberry Macarons


I'm reduxing raspberry macarons just because they're so yummy. Instead of two-toned shells, It's pretty-in-pink with lots of heart-shaped sprinkles.

Use 2 - 3 drops of red food colouring, and don't forget the sprinkles!
Perfect feet and smooth shiny tops.
Smooth creamy raspberry buttercream
Assembled and ready to eat

Citron Vanilla Macarons


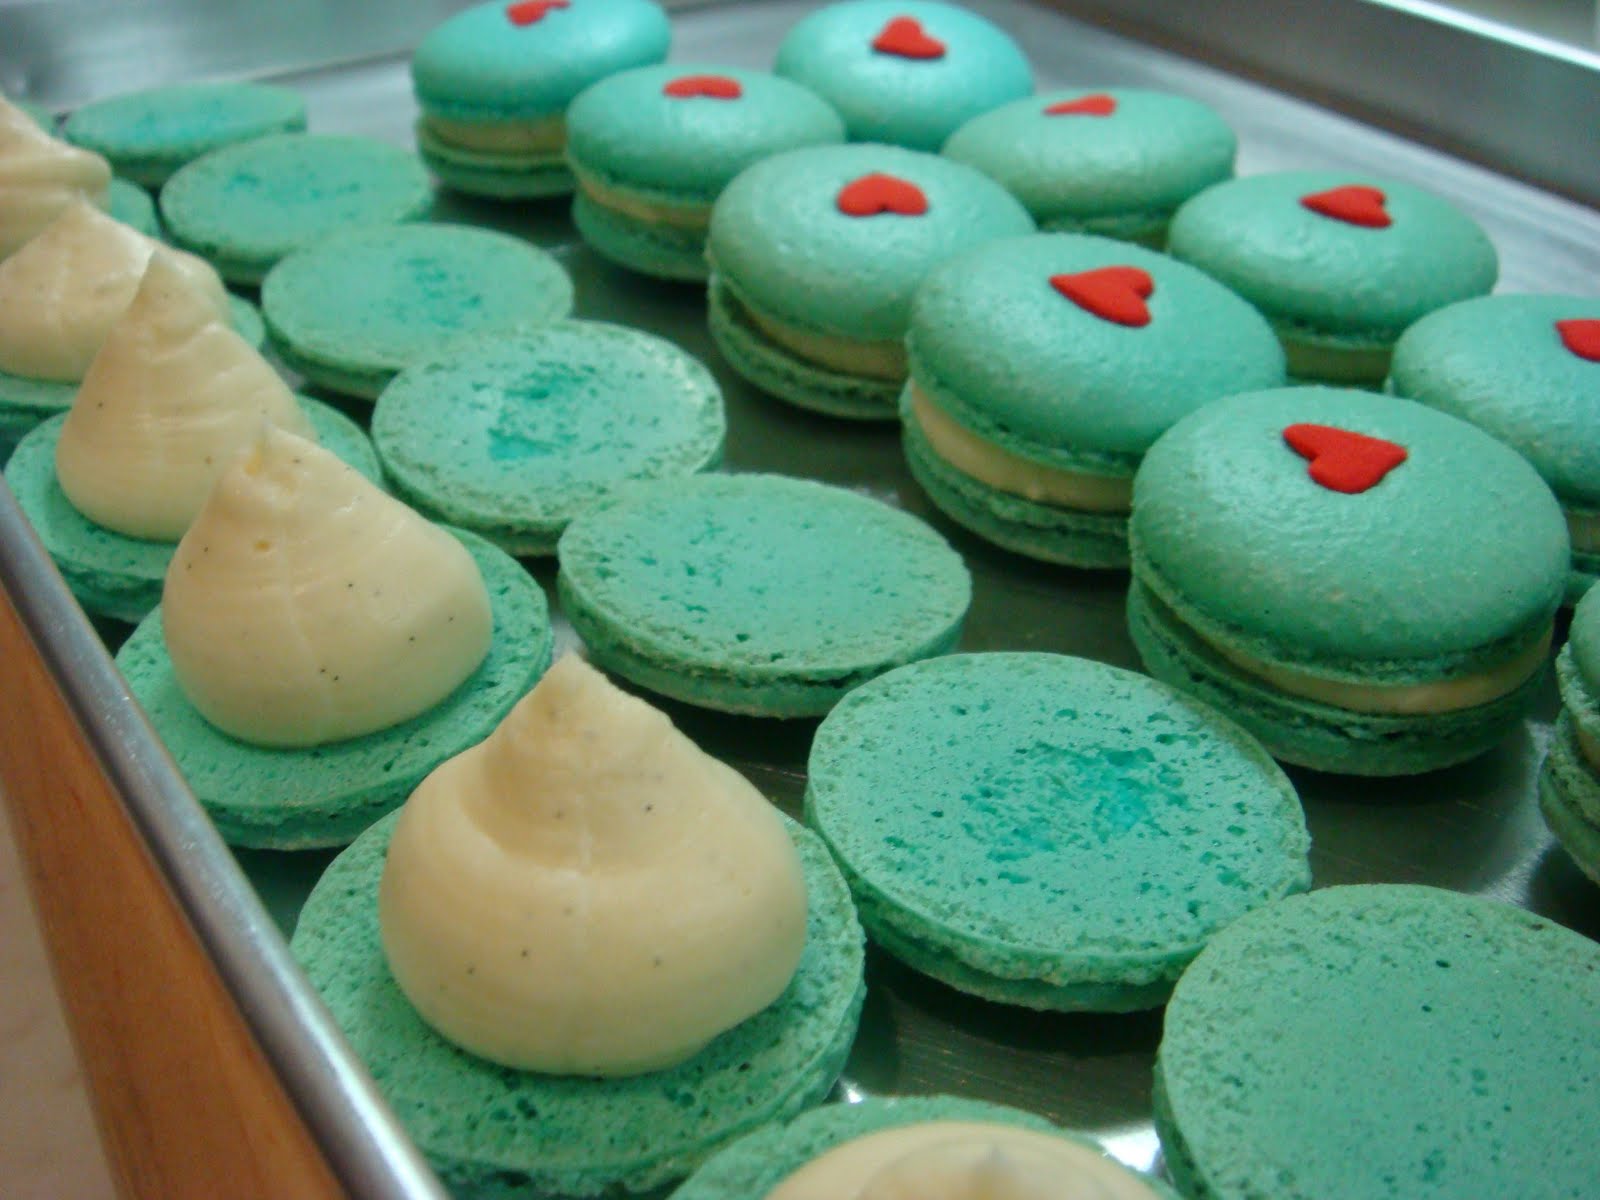
Just in the mood for prettiness today. I'm not going to mess around with new flavours so I'll split the batch and make classic citron vanilla in a Tiffany's shade of blue with white buttercream. With the other half, I'll redux pretty-in-pink raspberry macarons.

Macaron shells:
  • 65g almond meal
  • 80g icing sugar
  • 40g caster sugar
  • 50g egg whites, aged
  • 1/2 teaspoon lemon oil
  • 3 drops sky blue food colouring

Preheat oven to 160C and prepare 2 baking trays lined with silicon sheets.

Sift almond flour and icing sugar in a bowl. Beat room temperature egg whites and caster sugar till stiff peaks form. Add dry ingredients to meringue and mix well until batter is smooth and thick. Add the lemon oil and tint the batter a pastel shade of blue.

From Tiffany's with love
Spoon the batter into a piping bag/gun with a 1/2-inch nozzle and pipe evenly onto the baking trays in 3cm globs, spaced about 4cm apart (the piped batter will spread about 1 cm). Scatter sprinkles of your choice (or none at all) and let the piped batter dry till the skin forms. Bake for 12 minutes.


Buttercream filling:
  • 100g butter, softened to room temperature
  • 150g icing sugar, sifted
  • 2 teaspoons vanilla bean paste

Beat butter till nice and smooth, then add icing sugar and vanilla paste and beat till light and creamy. Spoon into an icing bag and chill for 15 minutes in the fridge.


Pipe a hershey kiss-sized gob onto each shell and sandwich with another. Let sit in refrigerator overnight and warm up to room temperature before eating.

Wednesday, September 15, 2010

After Eights Macarons


Inspired by those thin mint choclates, I'm undecided about whether I'm eating macarons or toothpaste. Some folks love them, some hate them. I guess it all depends on how much you like mint.

A little unconventional as far as macaron flavours go, but what the heck. I like them. They're cute and pretty, and I can skip brushing my teeth afterwards.

I'll be doing the short version here, so for detailed step-by-step instructions and pictures of macaron technique, click here.

Macaron shells:

  • 65g almond meal
  • 80g icing sugar
  • 40g caster sugar
  • 50g egg whites, aged
  • 3 drops green food colouring
  • Green metallic sugar sprinkles

Preheat oven to 160C and prepare 3 baking trays lined with silicon sheets.

Sift almond flour and icing sugar in a bowl. Beat room temperature egg whites and caster sugar till stiff peaks form. Add dry ingredients to meringue and mix well until batter is smooth and thick. Tint the batter a pastel shade of green.

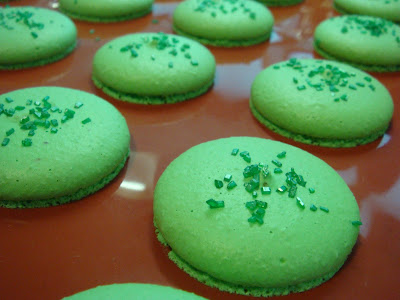
I love those sprinkles.
Spoon the batter into a piping bag/gun with a 1/2-inch nozzle and pipe evenly onto the baking trays in 3cm globs, spaced about 4cm apart (the piped batter will spread about 1 cm). Scatter metallic green sprinkles and let the piped batter dry till the skin forms. Bake for 12 minutes.

Aren't those feet so pretty?
Mint chocolate ganache:

  • 85g fine-quality bittersweet chocolate (60% cacao or more), finely chopped if not using buttons
  • 1/3 cup heavy cream
  • 1 tablespoon unsalted butter, softened
  • 1/2 teaspoon mint extract

Melt chocolate with cream and butter in a metal bowl set over a pan of lightly simmering water (bowl should not touch the water), stirring until smooth.

Remove bowl from heat and let cool a little, then add mint extract and stir well. Let stand at room temperature until cooled completely, spoon into a piping bag and chill for an hour till firm.


Pipe a dollop of ganache onto one side of each shell, the size of a Hershey's Kiss. Gently press down to sandwich the two sides together. Let sit in refrigerator overnight and warm up to room temperature before eating.

Tuesday, August 24, 2010

Leek, Mushroom and Bacon Quiche


Ack. It's the curse of the fridge clean-out day, plus the sheer laziness of not wanting to go to the supermarket.

I thought I'd do quiche again, seeing that the earlier post didn't have too many pictures. And besides, I love quiche, and it will make a good lunch for tomorrow as well. I'm going to do the short version here, so click here for more details on technique and excessive blah blah blah.

For the shortcrust dough:

  • 125g all-purpose flour
  • 1/2 teaspoon salt
  • 110g cold unsalted butter, cut into 1/2 inch bits
  • 1/4 cup iced water, plus more as needed

Dump in all the dry ingredients into the food processor or mixer with a dough hook, throw in the butter and shortening. Whizz it around until the mixture resembles fine breadcrumbs.

Add the water slowly, until the dough starts to clump onto the blade or hook into a single mass. Remove and place onto a floured surface. Knead lightly until it forms a consistent ball. Roll it up into a ball and cover with cling wrap. Chill an hour in the fridge before using.


Preheat oven to 190C and grease a quiche tin. Roll out the dough in a circle 2 inches larger than the quiche tin on a floured surface.


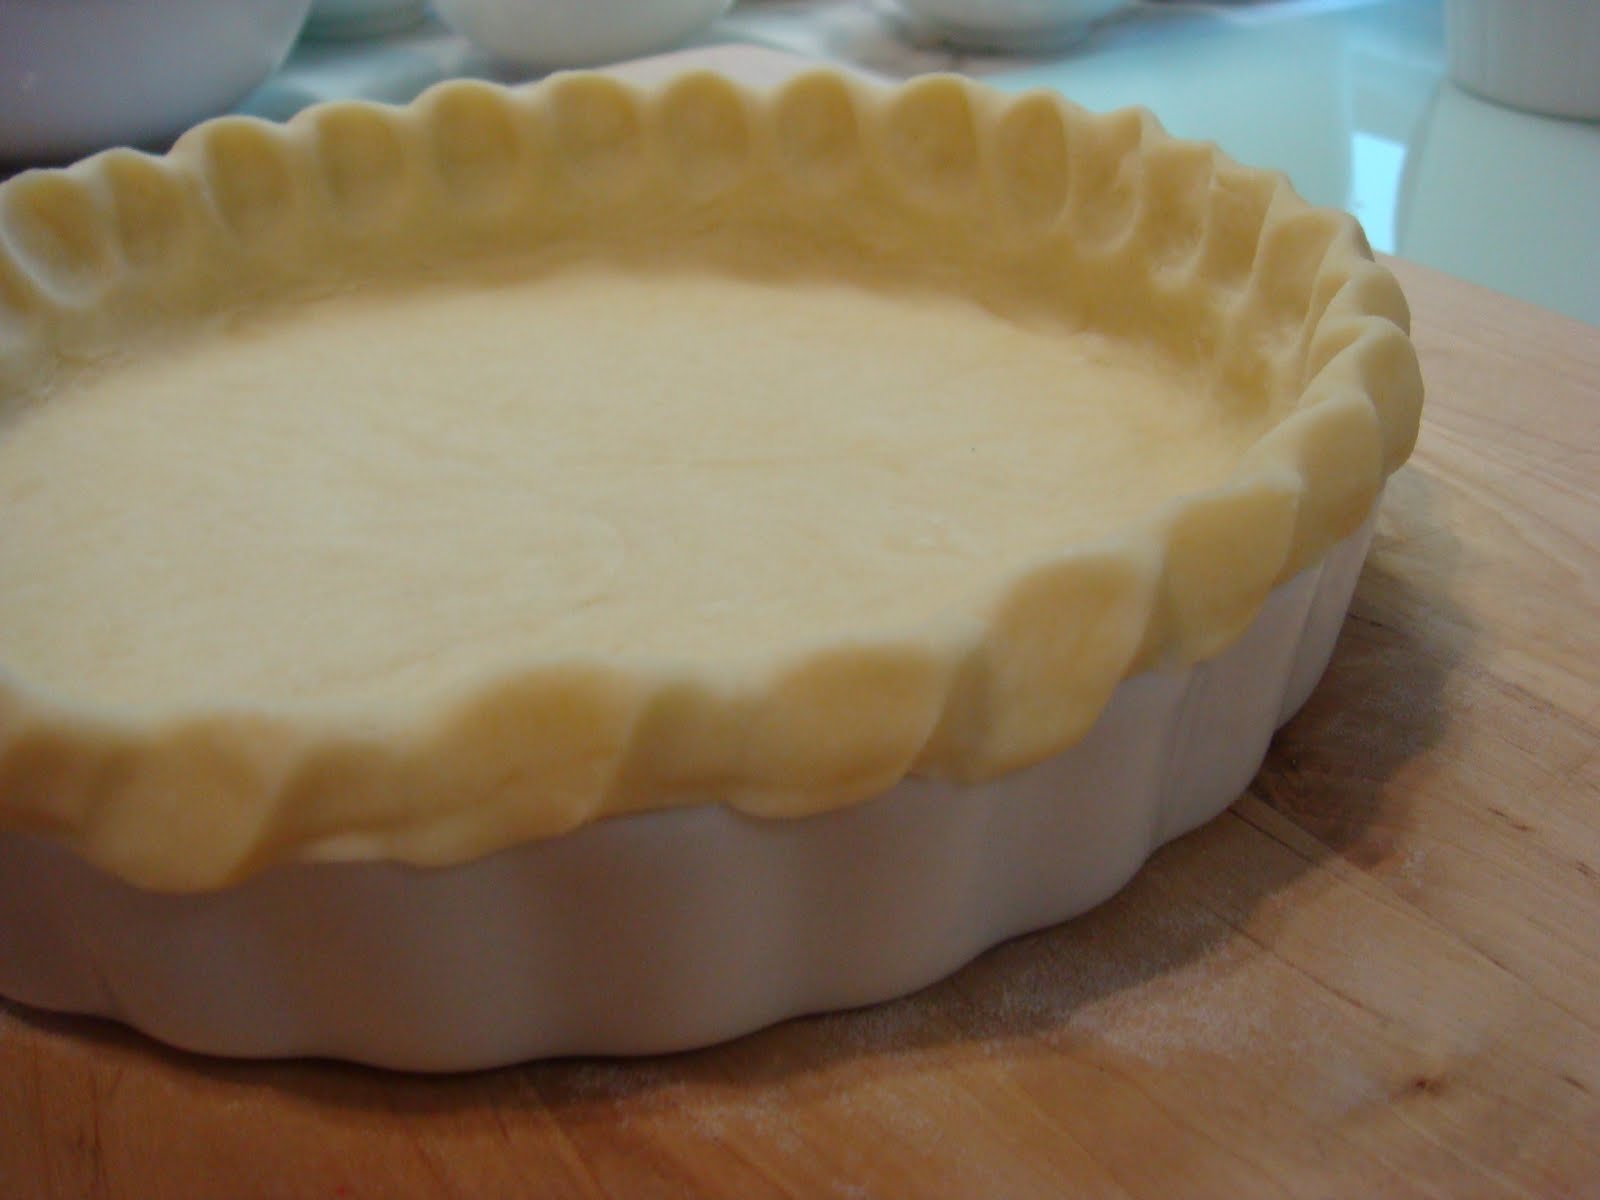
Place the dough sheet over the greased quiche dish, gently press down into the bottom. Trim the excess dough 1/4 inch from the edge and crimp with your fingers to make the edge of the crust.


Prick the bottom with a fork. Place a piece of parchment or greaseproof paper over the crust, then fill with rice/ dry beans/ ceramic or glass baking beans. Bake for 7 to 10 minutes till light golden brown.

For the filling:

  • 2 eggs
  • 240ml cream
  • 1/2 stalk leek, sliced
  • 3 mushrooms, sliced
  • 4 rashers bacon, sliced and browned
  • Salt and pepper to taste
  • 2 tablespoon butter cut into pea-sized dots

Lightly beat eggs, cream, salt and pepper in a bowl. Arrange the sliced leek, mushrooms and bacon in the crust, then pour over the egg and cream mixture. Dot with butter and bake at 190C for 25 - 30 minutes or until quiche has puffed and browned.

Monday, August 23, 2010

Cream Puffs


Little pillows of manna these little babies are.

I think these were the wise words of Yoda or some other pointy-eared person.

Choux pastry really isn't that difficult to make. With some elbow grease and a weighing scale to make sure the ingredients are exactly right, following the instructions should leave you with a perfect puff.

Choux can be deceptive buggers though. They come out of the oven all crisp and perfect, only to become wet and soggy as it cools. This is because the moisture from the uncooked centres spreads to the outside crust. To prevent this, puncture small puffs to release the steam. For larger puffs, slit into half and remove the uncooked centres. According to the legendary Julia Child, this is the only way to keep them puffs crisp and perfect.

For the choux pastry, makes about 20 small puffs.
  • 120ml water
  • 45g unsalted butter, cut into pieces
  • 1 teaspoon sugar
  • 45g plain flour
  • 2 eggs

Preheat oven to 220C. Bring water to a boil in a saucepan with the butter and sugar, and boil slowly until melted.

Remove the saucepan from heat and immediately pour in all the flour at once. Beat the crap out of it with a wooden spoon until completely blended. Return the saucepan to the stove and continue to beat for 1 - 2 minutes until the mixture leaves the sides of the pan and spoon. The paste should form a mass and an oily film will coat the pan.

Remove the saucepan from the heat and make a well in the centre of the paste with the spoon. Immediately break an egg into the centre of the well and beat the paste until the egg is absorbed. Do the same for the other egg until you get a smooth glossy paste.

This is the part where your arm will get really tired so I suggest you use an electric mixer with a paddle attachment for the job.

Spoon the paste into a pastry bag fitted with a half-inch round tip and pipe circular mounds onto a non-stick baking sheet. For large puffs, pipe them 2 inches in diameter. This will yield puffs about 3 inches in diameter. For small puffs, pipe 1 inch mounds that will yield 1.5 inch puffs.

For large puffs, bake for 20 minutes till lightly browned, then reduce temperature to 190C and bake for a further 10 - 15 minutes more. For small puffs, bake for 20 minutes till golden brown.


Remove from oven when done, and let cool completely while you make the filling.

There are plenty of options as far as fillings go. You can go quick and easy with a scoop of your favourite ice cream, chocolate whipped cream, whipped cream and strawberries, or a creamy eggy custard. The list isn't exhaustive, so go with whatever you feel like.

Here's the recipe for the custard (also known as creme patissiere):

  • 80g sugar
  • 3 egg yolks
  • 30g flour
  • 220ml whipping cream
  • 1 teaspoon vanilla extract
  • 1/2 tablespoon butter

Heat whipping cream until boiling. Beat sugar and egg yolks with a wire whisk until the mixture is pale yellow. When the whisk is lifted from the mixture, a thin ribbon should stream off the whisk. Add the flour and beat until smooth.

Pour a small amount of boiling cream into the egg mixture, whisking well. Continue to add the hot cream slowly to the egg mixture in batches, whisking well in between. This will proof the egg mixture, preventing the eggs from cooking as the eggs meet the hot liquid.

Return the egg and cream mixture to the saucepan and bring to a boil on medium heat. Keep whisking as it comes to a boil, and the mixture will start to thicken. Cook for a total of 2 - 3 minutes, taking care not to let the custard at the bottom of the pan scorch. Remove from heat, and beat in butter and vanilla. Let the custard cool completely before using.


Assembling the puffs are the easiest part. Simply open up the sliced puff shells, pipe in the filling into the bottom half and replace the top half of the shell.

I'm keeping things simple today. Just a fresh whipped cream filling with fresh diced strawberries.

Thursday, August 12, 2010

Raspberry Macarons with a Buttercream Filling


Weekends are great macaron making days. Laid-back, relaxed and stress-free. I love taking my time with them, the repetitive motions are super therapeutic and soothing.

This a a classic macaron flavour, with a fresh raspberry twist in the filling and two-toned shells. So patriotic and pretty!

I'll be doing the short version here, so for detailed step-by-step instructions and pictures of macaron technique, click here.

Macaron shells:
  • 65g almond meal
  • 80g icing sugar
  • 40g caster sugar
  • 50g egg whites, aged
  • 5 drops red food colouring

Buttercream filling:
  • 100g butter, softened to room temperature
  • 150g icing sugar, sifted
  • 10 fresh raspberries

Preheat oven to 160C and prepare 3 baking trays lined with silicon sheets.

Sift almond flour and icing sugar in a bowl. Beat room temperature egg whites and caster sugar till stiff peaks form. Add dry ingredients to meringue and mix well until batter is smooth and thick.

Divide batter into two bowls and tint one half with food colouring for a bright vibrant red. Leave the other half white.

Spoon the batter into a piping bag/gun with a 1/2-inch nozzle and pipe evenly onto the baking trays in 3cm globs, spaced about 4cm apart (the piped batter will spread about 1 cm). Let the piped batter dry till the skin forms and bake for 12 minutes.


To make the icing, beat butter till nice and smooth, then add icing sugar and beat till light and creamy. Add the raspberries and continue beating at high speed till the mixture is nice and smooth. Spoon into an icing bag and chill for 15 minutes in the fridge.

Pipe a hershey kiss-sized gob onto a white shell and sandwich with a red shell. Let sit in refrigerator overnight and warm up to room temperature before eating.

Other items on the Red, White and Ooohhh menu:

Tuesday, August 10, 2010

Boeuf Bourguignon


There's the full-on Julia Child's version, then there's my busy-working-woman-with-no-time-and-a-very-small-kitchen version.

Essential ingredients are basically the same - beef, a full-bodied red wine, bacon, onions and mushrooms. Omit the oven and enter the slow cooker for pain-free cooking.

This is the kind of dish you start in the late morning, leave it in the slow cooker and go do other things, then come back to it an hour before dinner for the final prep. A throw-together-and forget-about-it kind of dish.

Today, I'm a lazy-ass. And since it's just dinner for 2 with Miss Z, I'm skipping mashing the potatoes, and throwing them into the stew instead, along with celery, for a one-dish meal.

Serves 4:
  • 10 rashers of bacon, sliced
  • 600g of lean stewing beef, cubed
  • 1 carrot, sliced into half-inch slices
  • 1 white onion, finely diced
  • 2 tablespoons plain flour
  • 1 bottle red wine (Bordeaux, Burgundy or a Beaujolais is good)
  • 1 beef stock cube
  • 1 tablespoon tomato paste
  • 1 clove garlic, finely minced 
  • 1 stalk fresh thyme, leaves only
  • 2 bay leaves
  • 1 teaspoon wholegrain mustard
  • 1 teaspoon dijon mustard
  • 300g button mushrooms, quartered
  • 10 small pearl or small white onions, peeled and left whole
  • Freshly ground salt and pepper to taste

In a large pot, saute the bacon in 2 tablespoons of olive oil till brown and crisp over high heat. Remove from oil and set aside.

Pat dry the beef cubes, damp beef will not brown nicely. In the oil and bacon fat, sear the beef till browned and sealed, and set aside.

In the same fat, saute the onions till soft and translucent, then add the carrots and saute for a futher few minutes. Add the beef and bacon back to the pot, sprinkle on the flour and mix well, letting cook for a further 3 minutes.

Pour the entire bottle of wine in, topping up with some water to make sure the ingredients are just barely covered. Add tomato paste, garlic, stock cube, mustards and herbs to the stew and mix well. bring to a boil, then turn heat down to a low simmer for 3 hours. At this point, you can also transfer to a slow cooker set on high.

3 hours later, stir in the mushrooms and onions and simmer for another 1 hour. By this time, the stock would have reduced to a thick gravy. To serve, spoon a mound of mashed potatoes into a shallow bowl making a deep well in the centre and ladle a generous serving of stew into the well. Crusty garlic bread is also great for mopping up the thick sauce.

Other items on the Red, White and Ooohhh menu:

Tuesday, June 29, 2010

Raspberry Chocolate Macarons


Alright, here's the big kahuna, the Mount Everest of baking. The delicious and dreaded macaron.

This is a tried, tested and proven recipe. Pierre Hermes and Laduree, you ain't got nuthin' on me. You may rule Paris, but I got tropical weather macarons down pat. I've tried the Canele ones, and I must say, mine are just as good, if not better (can you see my head growing bigger?). Ok, ok... maybe not better but I definitely give them a run for their money. Not bad for an amateur baker with a 2m x 2m kitchen.

First, the essential must-haves:
  • Weighing scale
  • Silicon baking sheets (Silpat) or non-stick baking paper sheets
  • Baking trays
  • Mixer or wire whisk (I don't recommend whisking the meringue by hand. It is literally too painful.)
  • Metal mixing bowls
  • Spatula (plastic or rubber)
  • Sieve
  • Large piping bag with 1/2-inch round nozzle 
  • Oven thermometer (if you don't have a digital oven)

Next, the  ingredients:
  • Egg whites - aged in the refrigerator for at least 24 hours, 48 is ideal
  • Finely ground almond powder - also called almond flour
  • Icing sugar
  • Castor sugar - the finest grain sugar available
  • 1/4 teaspoon of  cream of tartar


 Then, the basic ratios based on 1 unit of egg white of 50g:
  • 1.3 almond meal x 50g egg white (1.3 x 50g = 65g almond meal)
  • 1.6 icing sugar  x 50g egg white (1.6 x 50g = 80g icing sugar)
  • 0.8 caster sugar x 50g egg white (0.8 x 50g = 40g caster sugar)
  • Egg white 50 gm
  • Total weight of ingredients = 235g

Preheat your oven to 160C.

Here's an important note: An oven that's too hot will cause the tops of the macaron shells to crack. If you're experiencing that problem, turn down the heat to about 150C. If you're making mini-sized petit four macarons (about 2cm in diameter or less), set the temperature at 140C.

Stack two or three heavy baking trays. Line the top tray with non-stick baking paper or silicon baking sheets. If you're not adept with piping, mark the paper with 3cm circles, spaced about 4cm apart.

Sift the icing sugar and almond meal into a bowl to remove lumps of powder. Set aside.

In a clean bowl, beat the room-temperature egg whites, cream of tartar and sugar until stiff peaks form and you have a firm, glossy and compact meringue. You'll know you have the right consistency when the peak of the meringue stands up by itself, like in the image below. If it flops over, it's known as soft peak and not done yet.


Sift the dry mixture over the meringue and fold in with a spatula using a circular motion around the bowl, scraping under the batter and folding it over. You don't need to be gentle, but don't beat the crap out of it either. The whole point is to mix in the dry ingredients quickly without over mixing the batter. It's better to under mix than over mix, because you can mix it more later if the consistency isn't right. Add colourings or flavourings at this point.


A quick note of colours and flavours. Use powder or concentrated gel colourings as it doesn't add more moisture to the batter. You didn't go through all that trouble to dry your egg whites just to put liquid back in. On flavours, use natural extracts rather than the artificial stuff. If you don't have the natural stuff, then it's better to leave it au naturel.

The final batter should be smooth and thick but flowing (often referred to as being "like magma", but like as if we've ever seen lava flowing out of a volcano before. Duh...). Basically, a ribbon of batter dropped from the spatula to the top of the batter should take about 30 seconds to disappear.


Spoon the batter into a piping bag/gun with a 1/2-inch nozzle and pipe evenly onto the baking paper/ silicon sheet in 3cm globs, spaced about 4cm apart (the piped batter will spread about 1 cm).


You'll get little peaks after piping like in the picture below. Mild peaks should settle back into the batter eventually. If they don't disappear, whack the tray repeatedly on a table until the peaks disappear. Usually the batter will spread a little and any bumps will disappear.


Let the piped batter dry so that a "skin" forms on the top  of each macaron. This can take from anywhere from 20 minutes to never in our humid weather, so have a hairdryer on standby. This post will explain why the skin is necessary and the hairdryer (yes, I know it's weird, but it works).


Bake the macarons tray by tray on the centre rack.

At the 5 minute mark the shells should have lifted and developed "feet". At the 6-7 minute mark they should be starting to colour just slightly. Rotate the baking tray if the colouring is uneven. Bake for 12 minutes in total.


Stand back and admire those pretty little feet. Yes, you're gorgeous... Yes you are!

If you are using a silicon baking sheet, allow to cool completely before removing the shells. If they stick to the sheet, place them in the freezer for awhile to help with the sticking problem.

If you're using paper, spritz a little water from a spray bottle under the paper while still hot. The steam created will help release the shells from the paper.

Lay the cooled macaron shells face up and match them according to size (this is where the anal-retentive part of me is really enjoying herself).


For the raspberry ganache filling, you will need:
  • 85g fine-quality bittersweet chocolate (60% cacao or more), finely chopped if not using buttons
  • 1/3 cup heavy cream
  • 1 tablespoon unsalted butter, softened
  • 1/2 teaspoon raspberry extract


Melt chocolate with cream and butter in a metal bowl set over a pan of lightly simmering water (bowl should not touch the water), stirring until smooth.


Remove bowl from heat, then add raspberry extract. Let stand at room temperature until cooled completely, spoon into a piping bag and chill for 20 minutes till firm.

Now you're almost at the home stretch and ready to assemble the macarons.

Pipe a dollop of ganache onto one side of each shell, the size of a Hershey's Kiss. Gently press down to sandwich the two sides together.


Haha... I lied. You're not at the home stretch yet.

Macarons taste best when refrigerated and eaten the next day. The process of chilling in the fridge and warming back up to room temperature allows the moisture from the filling to meld with and soften the inside of the shells to create that unmistakable crisp outside and chewy soft inside.


Be patient and wait. It will be worth it. Oh yes it will.

Monday, June 28, 2010

Table for Deux at a Parisien Bistro


Cooking for 2 is surprisingly difficult. I can do 4-6 people easily but always end up with too much food when cooking for 1 or 2.

I've decided to start a menu series, as requested by Mrs O. The first is "A Table for Deux at a Parisien Bistro". Romantic and rustic, add candlelight and a good bottle of Bordeaux, and it's a perfect prelude to some nocturnal ooh-la-la.

On the menu tonight:

Appetizer: Pork Rillettes with Baguette and Cornichons
Entree: Steak with a Shallot and Red Wine Sauce
Side: Potatoes Dauphinoise
Dessert: Creme Brulee

1 day ahead, make and store in the fridge:
  • Pork Rillettes
  • Creme Brulee

1 hour ahead:
  • Prepare Potatoes Dauphinoise
  • Prepare ingredients for the steak

1/2 hour ahead:
  • Put Potatoes Dauphinoise in the oven to bake
  • Start cooking the steak

Post-Dinner and Pre-Dessert:
  • Brulee the creme and serve

Pork Rillettes


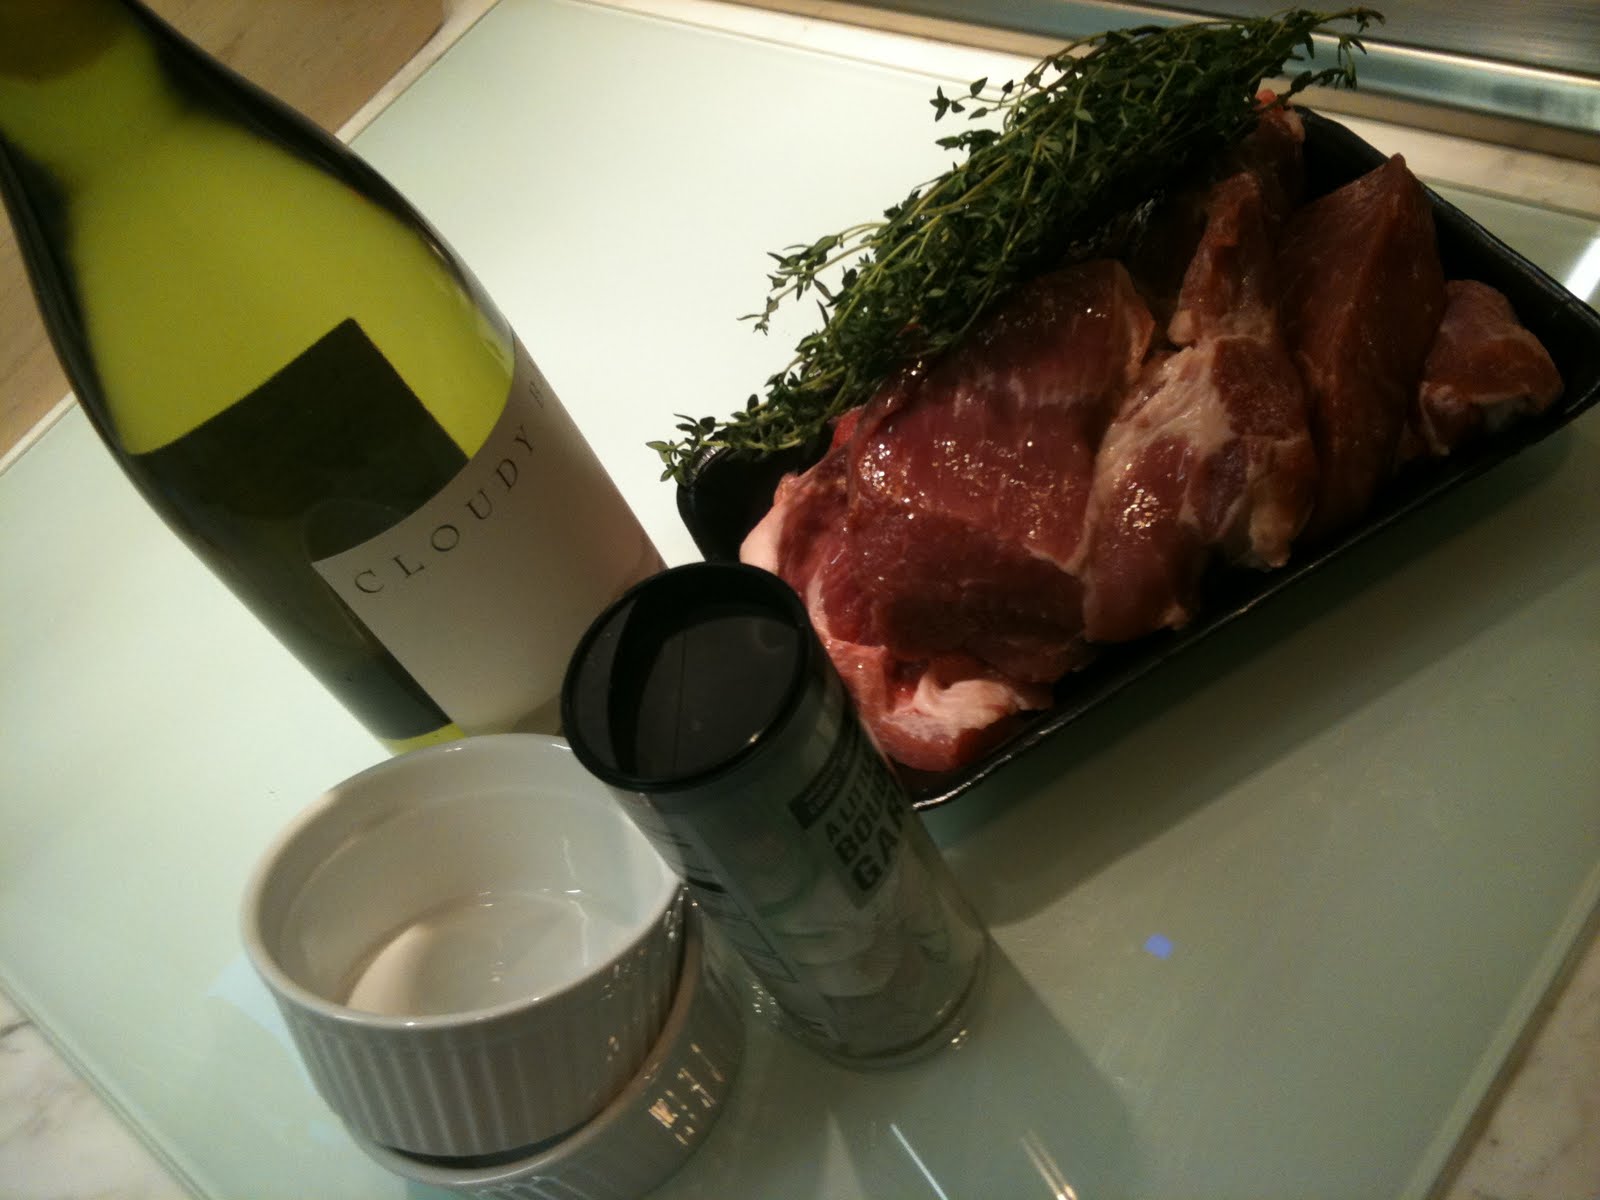
Rillettes are classic french bistro fare. It's kind of like a pate, but not so mushy and pasty. It's got a firm bite with meat strips clearly visible. This recipe uses pork but you can use chicken or duck too.

Rillettes are great as an appetizer, a light snack or as a sandwich filling. Make in advance and store in the fridge for up to a week.

Makes 5 small, 4 medium or 3 large pots:
  • 800g of pork (You can use leaner or fatty cuts depending on your preference, but some fat is required. If you are using lean cuts, then add a small amount of belly pork)
  • Bunch of fresh thyme
  • A bag of bouquet garni (optional)
  • 1 1/2 cups of dry white wine
  • 150g of butter, melted
  • Salt and pepper to taste


Place pork and herbs into a slow cooker and add just enough water to cover the meat. Alternatively, you can simmer on the stovetop at low heat. Cook for 4-5 hours until meat is falling-apart tender.

Drain the stock from the meat and set aside. Leave to cool completely.


Shred the pork into rough bits and place in a saucepan. Season with salt and pepper to taste. Add the stock and the wine and let simmer until completely absorbed by the meat. Spoon and pack into pots and top with a layer of melted butter to seal. Chill in fridge overnight.


Serve with crackers or crusty baguette, with a side serving of cornichons and pickled onions.

The rest of the Table for Deux at a Parisien Bistro menu here:

Entree: Steak with a Shallot and Red Wine Sauce
Side: Potatoes Dauphinoise
Dessert: Creme Brulee

Steak with Red Wine and Shallot Sauce

This is fail-safe and dead easy. It's beefy, hearty and guaranteed to satisfy the biggest carnivore. Make sure you use shallots and not small red onions. Shallots have a sweetness and flavour that gives the sauce a richness and complexity that regular onions just don't have.

Serves 2
  • 2 pieces of your favourite cut of beef (a typical serving is usually 220-250g per person)
  • 6-8 shallots, sliced
  • 1 cup of red wine (A Burgundy or Bordeaux is good)
  • A knob of butter
  • Sea salt and freshly ground black pepper

Wash and dry beef steaks, then season well with salt and pepper.

Heat skillet on high heat and add 1 tablespoon of olive oil to coat the pan. The secret to good steaks in a blazing hot pan. This sears the meat and seals in the juices so it stays juicy and moist.

Resist the urge to flip the steak over and over. Sear on one side, flip, and step away from the meat.

When done to your preference, set aside to rest. In the meantime, make the sauce.

In the same skillet, lower to medium heat and add a teaspoon on olive oil. Brown shallots till soft and barely brown. Add the wine and let simmer until reduced till almost dry. Add a knob of butter for some shine and gloss, and season to taste with salt and pepper.

Spoon sauce over steak and serve. Tres magnifique!

The rest of the Table for Deux at a Parisien Bistro menu here:

Appetizer: Pork Rillettes with Baguette and Cornichons
Side: Potatoes Dauphinoise
Dessert: Creme Brulee

Potatoes Dauphinoise


Creamy. Buttery. Cheesy. Carb laden. Not for the calorie-watching or faint-hearted.

Serves 2
  • 2 large or 3 medium Russet Burbank potatoes, washed, peeled and sliced thin
  • 2 cloves garlic, sliced
  • 1.5 - 2 cups cream
  • 1 cup grated cheese (Any hard cheese like gruyere or cheddar)
  • Sea salt and freshly ground black pepper to taste

Preheat oven to 160C.

Arrange the potato and garlic slices in an ovenproof baking dish. If you want to make sure you get laid, then arrange in a pretty overlapping pattern. If bedroom-boom-boom is out of the question, then just make sure it's evenly distributed, with about a half-inch of clearance to the top of the dish.

Season whipping cream with salt and pepper and pour over potatoes. The liquid should come to just under the top of the potatoes and not completely cover them. This is because the liquid will boil while in the oven and you don't want it to bubble over. Sprinkle a generous layer of grated cheese on the top and this potato puppy is ready to hit the oven.

Bake for 20 minutes until potatoes are tender, liquid has been absorbed and cheese is golden brown.

The rest of the Table for Deux at a Parisien Bistro menu here:

Appetizer: Pork Rillettes with Baguette and Cornichons
Entree: Steak with a Shallot and Red Wine Sauce
Dessert: Creme Brulee

Creme Brulee


Creme Brulee means "burnt cream" and it is the ultimate in indulgence - a silky, creamy and wobbly custard with a caramelized sugar crust. Nothing's more satisfying than hearing the crack of the sugar crust giving way through the pressure of your greedy greedy spoon.

The one thing that makes a good Creme Brulee is vanilla. Whole vanilla pods if you can find them, otherwise a pure Madagascan vanilla paste will be a good substitute.

For 2 ramekins
  • 230ml cream
  • 2 egg yolks
  • 3 tablespoons sugar
  • 1 teaspoon vanilla paste (For 6 ramekins, you can use a whole vanilla bean.)


Preheat oven to 165C.

Heat cream and sugar in a saucepan till sugar is dissolved and it comes to a light boil.

In a separate bowl, whisk the egg yolks and vanilla.

"Proof" the egg mixture with a small amount of hot cream. This helps warm up the eggs and prevent it from cooking. Whatever you do, DO NOT dump in the cream all at once, or you'll have scrambled eggs. Slowly add the rest of the cream, whisking well.


Strain the mixture into a pouring cup, making sure any large lumps are removed. Divide the mixture between two ramekins and place in a deep overproof baking dish.

Fill up with dish with water until it comes halfway up the ramekins (known as a bain marie or water bath) and bake for 20-25 minutes. The Creme Brulee should be set but still be jiggly. Refrigerate for at least 3 hours.


When ready to serve, spread a teaspoon of white caster sugar into a thin layer on top of the custard. Caramelize with a butane torch until the sugar is golden brown.

Garnish with a few blueberries, raspberries or strawberry slices and serve.

Always a crowd pleaser. Add an Espresso and it's a great finish to a classic French meal. Takes me back to a little cafe in Montmarte...


The rest of the Table for Deux at a Parisien Bistro menu here:

Appetizer: Pork Rillettes with Baguette and Cornichons
Entree: Steak with a Shallot and Red Wine Sauce
Side: Potatoes Dauphinoise