Showing posts with label Cake. Show all posts

Thursday, September 9, 2010

Chocolate Raspberry Slices


This is quick and dirty, rustled up at the last minute.

I know there are fancy schpancy methods of making sponges, what with separating eggs and all that jazz. But I'm lazy and this works just fine.

  • 3 eggs
  • 115g sugar
  • 115g flour
  • 2 tablespoons cocoa powder

Preheat oven to 180C. Mix flour and cocoa thoroughly in a bowl.

With an electric mixer, beat eggs and sugar until it has tripled in volume and is pale yellow and fluffy, about 5 - 10 minutes. Sift the flour and cocoa mixture in and gently fold until the batter is mixed.

Pour the batter into a shallow rectagular pan lined with wax paper and smooth out for an even surface and bake for 15 minutes.


Remove from the oven and let cool completely. Flip the sponge over and remove the wax paper from the cake. Slice the sponge into 3 equal parts and set aside. In the meantime, make the filling.

  • 400ml whipping cream
  • 1 cup sugar
  • 1 teaspoon vanilla paste
  • 2 cups raspberries

Whip the cream, sugar and vanilla with an electric mixer until stiff peaks form. There's your whipped cream right there. Now, on to assembling this puppy.


Spread a layer of cream on one layer of sponge, dot with 1 cup of raspberries and cover with another layer of sponge. Repeat for the rest of the layers and use the remaining cream to cover the entire cake.

To serve, cut into 2-inch wide slices.

Tuesday, August 31, 2010

Sticky Date Pudding with Toffee Sauce


This is so rich, moist and sinful, I know I'm going to hell.

A special request from GBF, discussed over dinner at Buko Nero last week. Since he, Miss Z and Miss A are coming over, we can all go to hell together and be damned happy on the journey down.

Hells yeah.

For 6 puddings:

  • 120g dates, stones removed
  • 1 teaspoon baking soda
  • 45g unsalted butter, softened
  • 85g caster sugar
  • 2 eggs
  • 85g flour
  • ¼ teaspoon allspice
  • ¼ teaspoon cinnamon
  • ¼ teaspoon freshly grated nutmeg

Preheat oven to 180ºC and grease 6 ramekins or muffin pan.

Chuck the dates in a bowl and cover with boiling water for a few minutes until softened. Drain the dates and whizz them in a food processor until you have a purée.

Meanwhile, cream your butter and sugar until pale, and add the eggs, flour, baking soda and spices. Mix together well, then fold in the puréed dates. Pour into ramekins or muffin cups till half full and bake for 30 minutes.


While the pudding is cooking, make the toffee sauce:

  • 60g unsalted butter
  • 60g brown sugar
  • 70ml cream

Put the butter, sugar and cream in a pan over a low heat until the sugar has dissolved and the sauce has thickened and darkened in colour.

Run a knife around each pudding and turn upside down to unmold. Pour some toffee sauce onto a plate and nestle a pudding in the middle of the lovely toffee puddle. Serve with a side of vanilla ice cream.

    Wednesday, August 18, 2010

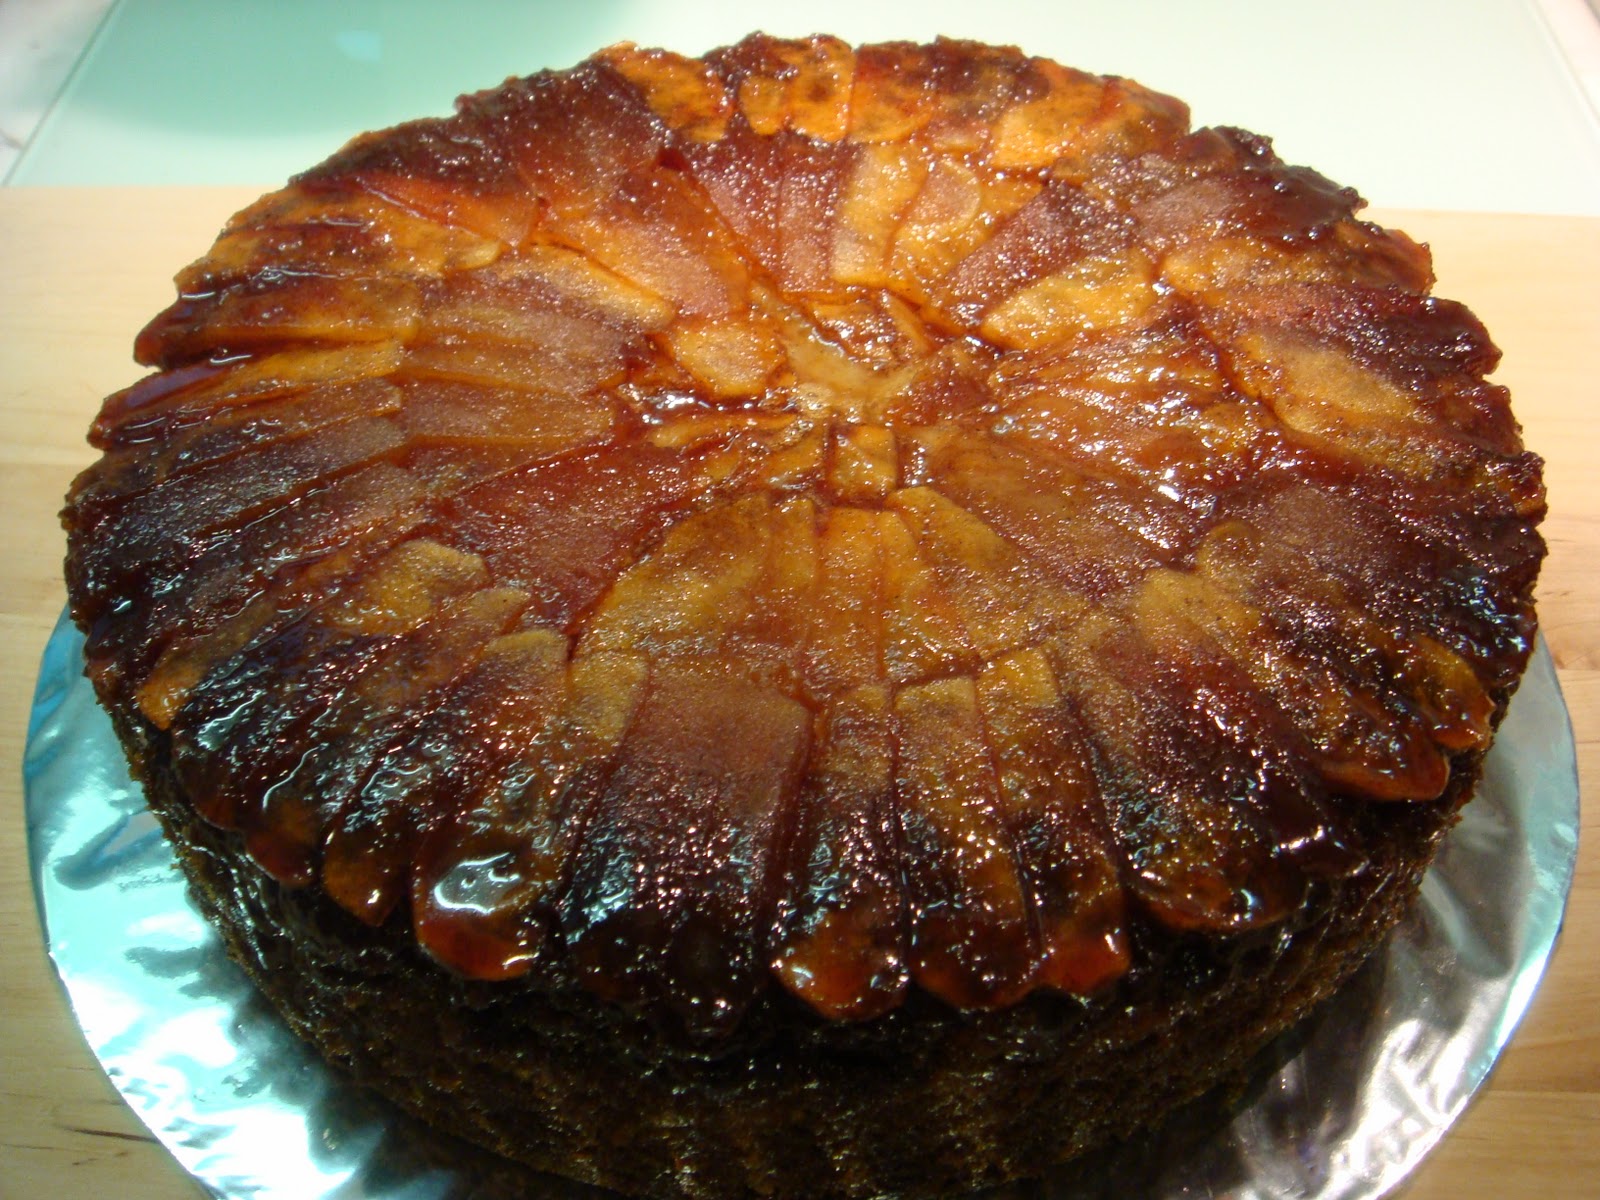
    Apple Buttermilk Cake


    This one's a doozy. I intended to make a French Apple Cake, so I bought apples. Then I realized I have this huge-ass carton of buttermilk meant for the pancakes, of which I'll use just a bit.

    So, I have apples and buttermilk to contend with, which means potential for a Frankenstein's monster.

    OK, this really can't be that bad. It's a good combination as far as leftovers go. A little tweak on a classic apple coffee cake, substituting buttermilk for regular milk, slap on the tarte tartin inspired topping, and voila! Mangy leftovers no more.

    As it turns out, it's a rich moist cake with plenty of spicy apple flavour. The upside-down apple topping really soaks into the cake and gives it a sweet caramel boost. V yum with a steaming hot cup of joe.

    • 30g unsalted butter
    • 250g sugar
    • 80ml water
    • 1 teaspoon ground cinnamon
    • 3 Granny Smith apples, peeled and thinly sliced

    Preheat oven to 175C and grease a 9-inch round cake tin.

    Melt butter in a saucepan over medium-high heat. Stir in the sugar, water and cinnamon and bring to boil. Add apples and cook until apples are just tender, about 15 minutes. Remove apples from syrup and arrange decoratively in bottom of pan. Continue boiling liquid in skillet until thick and syrupy, about 4 minutes. Pour over apples.


    Now, on to the cake batter.

    • 200g sugar
    • 110g firmly packed brown sugar
    • 115g unsalted butter, softened to room temperature
    • 2 teaspoons baking soda
    • 240ml buttermilk
    • 2 eggs
    • 280g flour
    • 1/2 teaspoon nutmeg
    • 1/2 teaspoon cinnamon
    • 1/2 teaspoon allspice
    • 2 Granny Smith apples, peeled and finely diced

    In a bowl, sift together the flour, spices and baking soda. With an electric mixer, cream butter and sugar till pale yellow. Add eggs, one at a time, beating well in between.

    Add the buttermilk, beating well and scraping down as you go. Finally, add the flour mixture and beat till you have a smooth batter. Finally, gently fold in the apples.

    Pour the batter into the cake tin and bake for 50 minutes.

    When done, flip the cake over on to a cake board and watch the caramelised glaze drip down the sides.

    Sunday, August 15, 2010

    Triple Chocolate Cake


    Chocoholics, this is your ultimate fix. The equivalent of mainlining in the world of a chocolate addict.

    Seriously, there's chocolate cakes, then there's the mother of all chocolate cakes. Imagine a intensely rich chocolate cake, sandwiched between layers of satiny whipped cream ganache to keep the cake moist, then topped off with a melting chocolate glaze. To die for.

    The recipe is courtesy of the legendary Rose Levy Beranbaum and her Cake Bible. Yes, it is indeed the bible.

    For the Devils Food Cake:
    • 55g cocoa powder
    • 240ml boiling water
    • 3 eggs
    • 2 teaspoons vanilla extract
    • 235g flour
    • 300g caster sugar
    • 2/3 teaspoon baking soda
    • 2/3 teaspoon salt
    • 225g butter, softened

    Preheat oven to 175C with rack in middle and grease a 9-inch round springform cake tins.

    Whisk together the cocoa powder and hot water until smooth and let cool to room temperature. In a mixing bowl, lightly beat eggs, about a quarter of the cocoa mixture and the vanilla extract.

    With an electric mixer, combine the dry ingredients on low speed, then add butter and the remaining 3/4 of the cocoa mixture. Keep mixing till all the ingredients are moistened, then increase to high speed for another 1.5 minutes to introduce air into the batter.

    Gradually add the egg mixture to the batter in 3 batches, beating well in between and scraping down the bowl. Pour the batter into the cake tin and bake for 20 - 30 minutes. The cake is done when the edges starts pulling away from the sides of the tin and a skewer inserted in the middle comes out clean.


    Let the cake cool in the tins for 10 - 15 minutes, then remove from tin and place on a wire rack till completely cool. In the meantime, make the whipped ganache filling.

    • 230g bittersweet chocolate, finely chopped if not using buttons or chips
    • 475ml cream
    • 1/2 teaspoon vanilla

    Melt the chocolate and 2/3 of the cream in a bowl set over lightly simmering water. Set aside to cool completely.

    With an electric mixer, whip remaining cream till beater marks start to show, then add the chocolate mixture and continue beating till soft peaks form.

    Now, on to assembling the cake.


    Slice the cake lengthwise into 3 layers. Place one layer on a wire rack and spread a layer of whipped cream ganache, followed by a layer of cake. Repeat until you get three layers of chocolate heaven. Frost the top and sides of the cake, then stick the cake into the fridge to chill while you make the chocolate glaze:

    • 110g bittersweet chocolate, finely chopped if not using buttons or chips
    • 100ml cream
    • 1 tablespoon butter

    Place chocolate into a mixing bowl. Bring cream to a boil in a saucepan till simmering. Pour hot cream over the chocolate and stir till melted. Let stand for awhile until cooled slightly but still of a pouring consistency.

    To finish off, place the cake on the wire rack over a plate or baking sheet to catch the excess glaze. Pour the glaze over the top of the cake, letting the glaze drip down the sides to cover it completely.

    Transfer to a cake board and chill for another hour before shooting up (aka eating).


    More for the last meal:

    Wednesday, August 11, 2010

    Cream Scones


    "Fancy a spot of tea luvvie?"

    Since I'm all unemployed these days, then I reckon I should do the tai-tai thing and have tea. And since nobody does tea better than the Brits, so I'm channeling Margaret Thatcher and having some scones and tea.

    Scones are dead easy to make. In fact, it's the very first thing I ever cooked, courtesy of home economics class in school. My version amps up the sin factor, with heaps of cream and butter.

    Rich and buttery, they're the perfect vehicle for lashings of homemade raspberry preserves and a massive dollop of freshly made whipped cream.

    Makes 20 scones:
    • 370g all-purpose flour
    • 40g caster sugar
    • 3 teaspoons baking powder
    • 1/4 teaspoon salt
    • 170g cold unsalted butter, cut into pieces
    • 1 egg
    • 1 egg yolk
    • 1 teaspoon pure vanilla extract
    • 225 ml cream

    Preheat oven to 200C and place the rack in the middle of the oven. Line a cookie sheet with parchment paper.

    In a large bowl, sift together the flour, sugar, baking powder and salt. Cut the cold butter into small pieces and blend into the flour mixture with a pastry blender. Alternatively, whizz in a food processor like I do. The mixture should look like coarse crumbs.

    Lightly beat egg and egg yolk. Keep half for the glaze and combine the rest with the cream and vanilla. Add this mixture to the flour mixture. Stir just until combined. Do not over mix.

    If you are using a food processor, add the liquid mixture bit by bit and pulse in between. The dough will start to mass and pull away from the sides.

    Knead dough gently on a lightly floured surface. Roll or pat the dough into a circle that is about 3cm thick. Then, using a 6cm round cookie cutter, cut the dough into rounds. Place the rounds on the prepared cookie sheet, spacing a few inches apart.

    Make an egg wash using the leftover egg and some water. Brush the tops of the scones with the egg wash. This helps to brown the tops of the scones during baking.

    Bake for about 15 - 18 minutes or until nicely browned and a toothpick inserted into the center of a scone comes out clean. Remove from oven and transfer to a wire rack to cool.

    Other items on the Red, White and Ooohhh menu:

    Thursday, August 5, 2010

    New York Cheesecake


    My favourite city, and one of my favourite desserts. The best cheesecake in NY is probably Lindy's, and here's my stab at replicating it.

    If like me, you find cheesecakes heavy and too much a few bites, then you'll really love this recipe. The sour bite of lemons counter the heavy creaminess of the cheesecake and the sour cream gives it a nice fluffiness.

    Maybe my NY dreams will come true one day, but till then, cheesecake seems to be the closest thing.
    "Concrete jungle where dreams are made of
    There's nothing you can't do
    Now you're in New York
    These streets will make you feel brand new
    Big lights will inspire you
    Hear it for New York"
    Empire State of Mind II, Alicia Keys


    • 1 cup digestive biscuits (about 10 pieces)
    • 5 tablespoons butter, melted
    • 2 (8 oz) blocks cream cheese, softened
    • 3/4 cup sugar
    • 1 tablespoon flour
    • 1 lemon, zest and juice (Didn't have any in the fridge today so replaced with 3 tablespoons bottled lime juice concentrate.)
    • 2 eggs
    • 1 egg yolk
    • 1/2 cup sour cream
    • 1/2 teaspoon vanilla extract

    Heat oven to 180C and grease a 18-inch spring-form tin.

    Whizz the digestive biscuits in a food processor until you get a fine crumb the texture of sand. Mix the digestive crumbs with the melted butter and mix well. Press into the base of the tin and set aside. Here's a little trick to get a nice flat crust: use a drinking glass to press the crumbs down and smooth out. Works like a charm!


    Blend cheese in an electric mixer till smooth. Add sugar and sour cream and blend well. Add lemon zest, juice and vanilla. Add flour and blend, scraping bowl down as you go. Add eggs one at a time, blending well in between.

    Pour into pan and bake for 15 minutes, then turn temperature down to 100C and bake another 1 hour. The cake will be still slightly wobbly when removed from oven, but don't worry, it will firm up when chilled.

    Let cool completely and chill for at least 2 - 3 hours before removing from the tin.


    With this basic recipe, you can make all sorts of variants.
    • Lemon cheesecake - 2 lemons instead of 1
    • Orange cheesecake - Juice and grated rind of 2 oranges. You can add a teaspoon of orange flower essence as well.
    • Fruit cheesecake - 2 cups of your favourite fruit, chopped into small bits
    • Mocha cheesecake - 3 tablespoons of instant coffee powder
    • Chocolate cheesecake - 3 tablespoons of cocoa powder
    • Chocolate marble cheesecake - Flavour 1/3 of the batter with 2 tablespoon cocoa powder and drizzle randomly over the white batter. Stick a skewer in and give it a couple of stirs.
    • Oreo cheesecake - 1.5 cups finely crushed Oreo cookies (without the cream filling)
    • Baileys cheesecake - 5 tablespoons Baileys liquer
    • Green tea cheesecake - 3 tablespoons of matcha green tea powder

    And if you want to have a fruit topping, simply open a can of your favourite fruit (cherries, raspberries, blueberries etc), set aside 3 tablespoons of the syrup into a small bowl and put the rest into a pot. Dissolve 2 tablespoons of cornstarch in the reserved syrup. Add to the pot then bring to a boil. When the mixture thickens up, pour over the warm cheesecake in the tin and refrigerate for 3 - 4 hours to set.

    Wednesday, August 4, 2010

    Berry Awesome Pavlova


    I've been told this is a killer recipe. I don't know what exactly the "right way" to make a pav is, but I know what I like.

    First of all, the meringue base has to be crisp on the outside, and soft and chewy on the inside.

    Second, the entire thing can't be too sweet and cloying.

    And third, the cream must be freshly made and lavishly scented with vanilla.

    That is a perfect pavlova in my insane little world.

    I've seen people go into orgasmic spasms as the bite through the layers of crisp, chewy, creamy, sweet, perfumed and tangy. Oh... My... Gawd... Gimme gimme gimme...

    • 1/2 cup caster sugar
    • 3 large egg whites, room temperature
    • 1/4 teaspoon cream of tartar
    • 1/2 teaspoon vanilla extract
    • 1 cup fresh assorted berries (strawberries, blueberries, raspberries etc)
    • 2 cups chilled heavy whipping cream
    • 3 tablespoons sugar
    • 1 teaspoon vanilla paste

    Preheat to 110C. Line a baking pan with parchment or greaseproof paper.

    Using electric mixer, beat egg whites, sugar and cream of tartar in large bowl until soft peaks form. Beat in vanilla and continue to beat until stiff peaks form. No idea what a stiff peak is? Haha... try some dirty talk or click here.

    Spoon meringue onto prepared baking sheet in a mound, and smooth into a circle. Using a spoon, make an indentation in the centre. This will help hold lots of the yummy cream filling.

    Now, the trick to getting a perfect crisp and soft meringue is the temperature. Bake the base for 1 hour 10 minutes at 110C, then crank up the heat to 150C for another 20 minutes.


    No, I don't care that my meringue isn't perfectly white. I actually like the caramelly taste of a slighty browned outside, and I like a crispy shell and not a homogenous pillow of spongy fluff. If you can't tell the difference in texture of the meringue and cream, then something is really f**ked up. And I don't care if Cordon Bleu or Aussies say it's wrong. It's my goddamn recipe.

    And, DO NOT open the oven door while the meringue is baking or you'll have to deal with a collapsed mess.

    For the whipped cream, beat cream, sugar and vanilla paste until soft peaks form. Prep berries, wash, slice, yada yada...

    Place the cooled meringue base on a plate or cake board. Lovingly spoon whipped cream into center of the meringue, then arrange berries artfully on top.

    Monday, August 2, 2010

    Molten Chocolate Cakes


    Scents and food are one of the most powerful triggers of memories. And this one always brings to mind late nights and loved ones.

    A faint air of fatigue, coupled with anticipation as the scent of chocolate wafts from my kitchen to the couch as I wait for them to bake. I'm tired, yet excited all at the same time.

    There's nothing like eating these straight out of the oven, as the warm liquid chocolate centre oozes out and melts the vanilla ice cream. Delicious, decadent and just the stuff to make memories by.

    Makes 2 cakes
    • 2 oz fine bittersweet chocolate
    • 2 tablespoons dutch processed cocoa powder
    • 1/4 cup sugar
    • 1/4 cup unsalted butter
    • 2 egg
    • 2 teaspoons plain flour

    Butter 2 ramekins and set aside. Preheat oven to 180C.

    Whisk cocoa powder and sugar together until evenly blended. Melt chocolate and butter in a bowl over gently simmering water until smooth.

    Remove chocolate from the heat and whisk in the cocoa-sugar mixture. Then whisk in egg yolks, then whole egg, and finally the flour.

    Divide the batter between ramekins and bake 10 to 12 minutes. The cake edges should be set but the centre will be wet and shiny. If you're not sure, stick a skewer through the cake. It will feel firm, with resistance as the skewer goes in, but when you remove it, you should see traces of wet batter on the skewer.

    Let cool for 5 mins, then loosen the cakes with a knife run around the edge of the ramekin and turn out onto plates. Serve with vanilla ice cream and eat asap!

    Monday, July 5, 2010

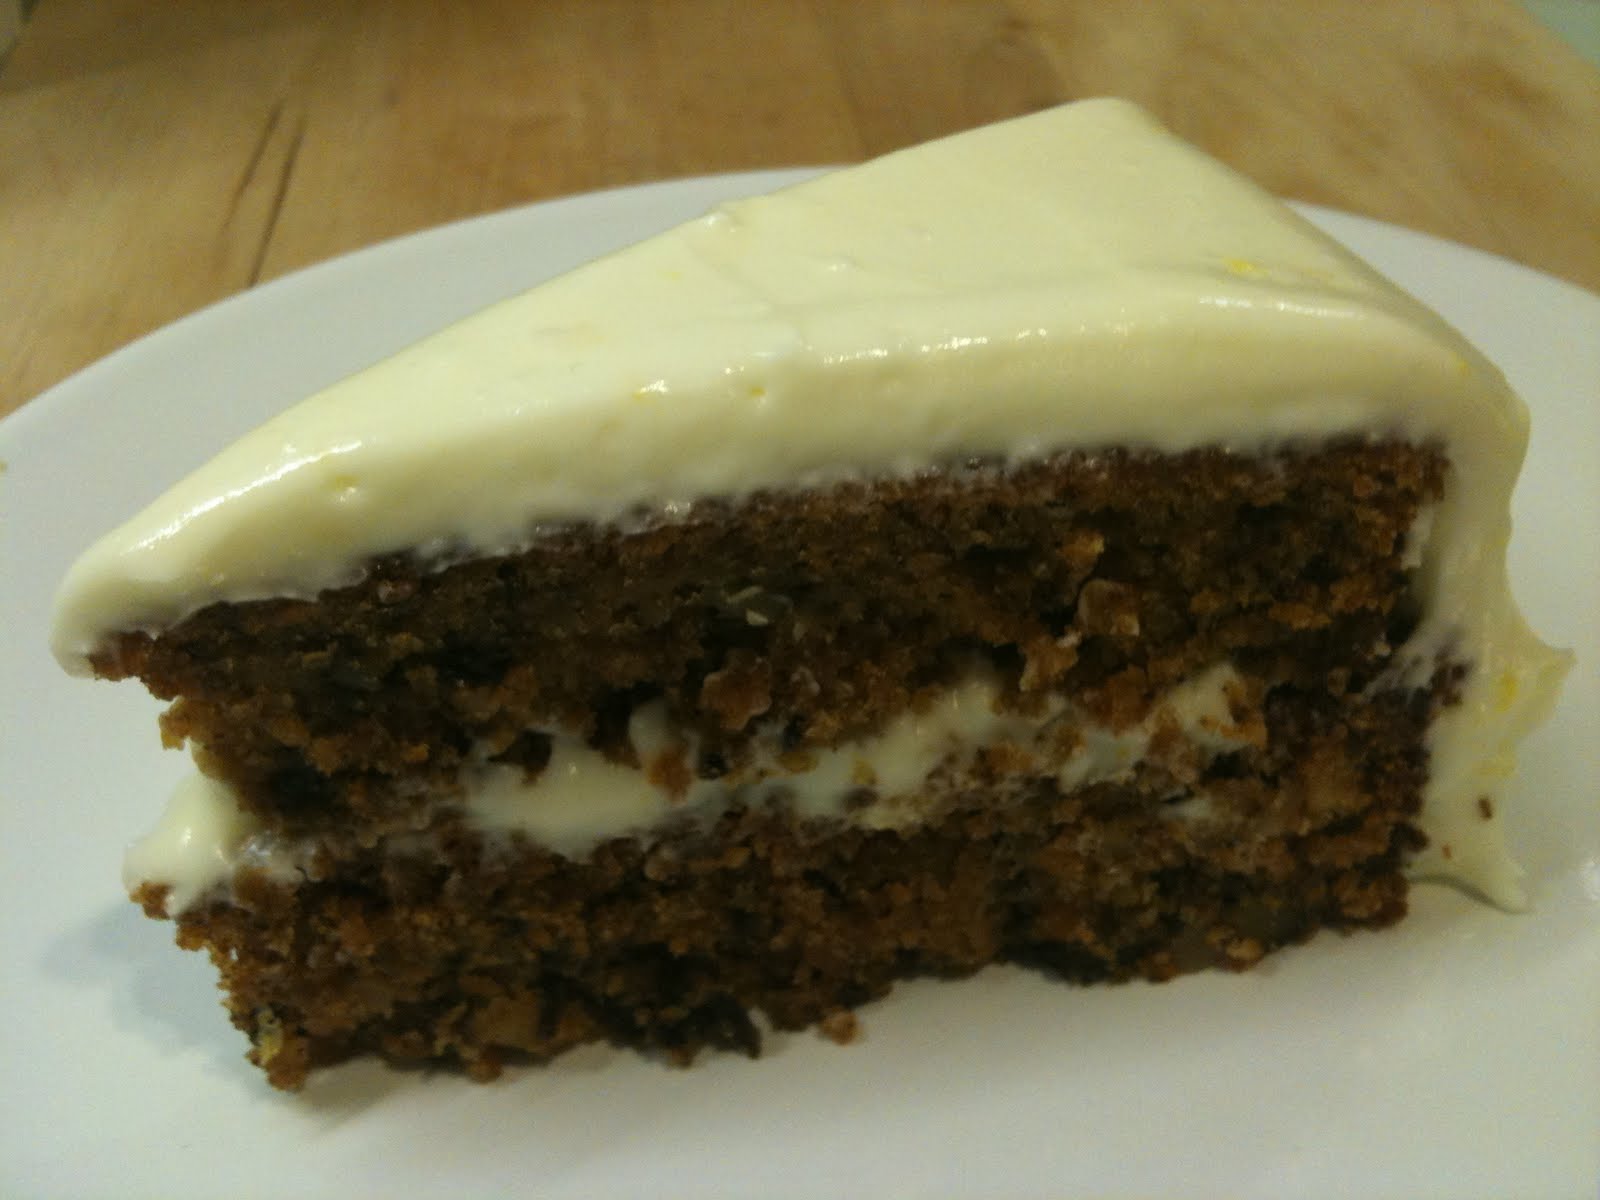
    Homestyle Carrot Cake with Lemon Cream Cheese Frosting


    Moist, spicy and tangy... It's like a party in your mouth!

    This is a long-time favourite from way back when. The secret to making this cake go from good to OMFG is using freshly grated whole nutmeg. The aroma is so heady that it makes you want to plunge headfirst into the batter.

    The second secret is using good cream cheese for the frosting. Resist the urge to get a huge block of generica on the cheap. Use original philly and you'll taste the difference.

    Finally, don't be shy about the frosting. Slap it on thick and good. But if you don't want frosting, the carrot cake is good on its own too.

    Makes an 1-inch/ 20cm cake:

    For the cake:
    • 1 ²∕₃ cups sugar
    • 1 tsp salt
    • 1 ¼ cups flour
    • 2 ¼ tsp cinnamon
    • 1 tsp nutmeg
    • ½ tsp allspice
    • 1 tsp vanilla extract
    • 1 tsp baking powder
    • ½ tsp baking soda
    • 3 (60g) eggs
    • ²∕₃ cup vegetable oil
    • 1 ½ cup grated/chopped carrot
    • ½ cup roughly chopped walnuts or pecans

    For the frosting:
    • 500g cream cheese, softened
    • 170g unsalted butter, softened
    • 1 ½ cups icing sugar, sifted
    • 1 ½ tsp vanilla extract
    • 1 lemon, grated zest and juice

    Preheat oven to 175C. Grease 2 springform round tins and line bottom with parchment paper.

    Sift together  flour, cinnamon, nutmeg, allspice, salt and baking soda and baking powder. Set aside.


    For easy wash-up, chop carrot in food processor. When fine, chuck in nuts and pulse till roughly chopped.


    Whip eggs and sugar until thick to till light yellow and runs off your beater like a fat ol' ribbon. Gradually add oil until evenly blended.


    Fold in sifted flour mixture gently. Add grated carrots and nuts until well mixed.


    Divide the batter between the 2 cake tins and bake for about 45-50 minutes. You'll know it's done when a toothpick inserted in the middle comes out clean. Let cool completely before you start frosting.

    On to the frosting:


    Blend cream cheese till nice and smooth. Add cubes of butter, blending well in between.


    Sift in icing sugar and blend till fully incorporated.


    Finally, mix in vanilla, lemon juice and zest. You should get a smooth creamy icing with no lumps. Cover with cling wrap and chill for an hour to let it firm up a bit.


    To assemble the cake, spread a layer of icing between the two cake layers and frost all over. Chill for 2 hours in the fridge so the icing sets firm.

    For a step-by-step picture guide on cake frosting, click here.


    If you can resist, eat it the next day. This cake just seems to taste better when left overnight. It also keeps well. Up to 4-5 days if whole. However, if you've already sliced it, make sure you cover it so that it doesn't dry out in the fridge.

    Cake Frosting Basics

    Frosting can be a little daunting for first timers, but hey, a cake that tastes good no matter how ugly it looks. Don't worry about it looking perfectly smooth the first time. The more you practice, the better you'll get.

    A few tips to make it easier:
    • A rotating frosting plate helps you turn the cake more easily and creates smoother surfaces.
    • Always make sure the cake is completely cool before cutting or frosting. Chilling in the fridge makes the cake firmer, easier to handle and less likely to break.
    • Always slice your cake with a serrated bread knife, not a regular knife.
    • An icing knife is a must.

    The first step is the prepare the cake for frosting. What you want to achieve is a relatively flat and crumb-less surfaces.

    Place a plate over one cake tin and flip over. Remove paper from the bottom of the cake. Place a cake board over the bottom of the cake and flip over again. Now you have the first layer sitting nicely on the cake board.


    If the cake has risen in such a way that the top is domed, use a bread knife to level it out. Brush off crumbs and set aside.

    Do the same for the other cake layer and set aside.

    No sweat so far?

    To create the sandwich layers, slap a quarter of the icing onto the bottom layer, using an icing knife or spatula and spread evenly.


    Place the top layer flat side up, sandwiching the icing between the two layers of cake. Basically, the two slightly domed sides go in the middle, with the icing filling up the gaps in between. There are 2 reasons for this. First, it gives you a stable flat bottom and a pretty flat top. Second, the gaps hold lots of icing so it makes for a generous iced center.

    In this demonstration, I've baked a single cake and sliced it in half. If you're doing the same, place the top half of the cake flat side down on the cake board. This means the slightly domed side is the one you ice.

    Spread on a thick layer of icing, making sure you put more icing on the sides to create a flat surface.

    Then place the other layer flat side up. This means that the cut side is touching the frosting.


    The first thing we do in icing the outside of the cake is to "seal" the cake. This means we place a very thin layer of icing on to seal the crumbs, then place in the fridge to set. Then, a thick final layer of frosting goes on. This is done so that the final frosted cake is smooth and crumbless.

    Spread a very thin layer of icing on the top of the cake surface. You'll see the crumbs mix in with the icing. Don't worry about it at this point.

    With your icing knife, take globs of icing and spread onto the sides. Just make sure the sides are coated and don't worry about it being a little uneven for now.

    Place into the fridge for 30 minutes and you're almost there...


    When the "sealed" cake has set, take half of the remaining icing and spread it evenly across the top of the cake. As you spread and smoothen, some of the icing should ooze over the sides.

    Use a paper towel and clean off your icing knife.

    Take small globs of icing with your knife and coat the sides, making sure the icing layer is straight.

    Once you've got a layer of icing onto the whole cake, you can now start smoothing and evening out the whole thing.

    OK... start with the top. Sweep the knife in long strokes so it's evened out. Wipe down knife again.

    For the sides, place the tip of the knife onto the cake board, holding it parallel to the cake. Run it along the cake in a continuous stroke around a quarter of the cake, being careful not to exert too much pressure. You don't want to mash and scrape off all the icing, so a light touch to smooth it out is all that's needed.

    Wipe down knife again and repeat quarter by quarter.


    There you go, a decently iced cake!

    Saturday, July 3, 2010

    Strawberries and Fresh Cream Cake


    Food porn alert!

    I could wax lyrical about this cake ad nauseum. Especially since it's a miserable rainy day, the thought of light fluffy vanilla-scented butter cake, sandwiched between layers of fresh cream and tart-sweet strawberries is enough to lighten my mood.

    The cake is delicate, using egg whites instead of yolks or whole eggs to give it a lightness. The butter and milk moistens the cake and gives it a rich flavour.

    The fresh cream frosting is pure unadulterated and shameless. Simply pure cream, with sugar, a hint of vanilla and some cornstarch to stabilise it for frosting, it's so good you can eat it straight from the bowl.

    For the cake, you'll need:
    • 135g egg whites (from approximately 4 eggs)
    • 1 cup milk, separated into 1/4 and 3/4 cups
    • 2.5 tsp vanilla extract
    • 300g sifted cake flour
    • 300g caster sugar
    • 1 tbsp + 1 tsp baking powder
    • 3/4 tsp salt
    • 170g butter, softened and cubed

    Preheat oven to 180C.

    Grease two 9-inch round springform cake tin and line the bottom with parchment or greaseproof paper.

    In a medium bowl, lightly whisk together egg whites, 1/4 cup of milk and vanilla.


    Add the butter and remaining 3/4 cup milk and mix on low speed until the dry ingredients are moistened. Increase speed to medium and beat for another 1.5 minutes. This adds air to the batter and helps create the volume and structure of the cake. As you beat, make sure to keep scraping down the sides.


    Gradually add the egg mixture in 3 batches, beating for about 20 seconds after each addition. Don't forget to keep scraping down the sides!


    Pour 1/3 of the batter into one tin and 2/3 into another. Smooth the surface with a spatula. Bake for 25 - 30 minutes or until a skewer inserted into the middle comes out clean.

    Let the cakes cool on racks for 10 minutes. You'll notice that the sides will shrink away from the tin as it cools. Once the cakes are cool enough to handle, run a knife or spatula around the sides of the cake to make sure nothing sticks.

    Remove the springform sides, and transfer to a cake board.

    Now, on to the strawberries and cream:
    • 500g of fresh small strawberries
    • 40g icing sugar
    • 3 teaspoons cornstarch
    • 3 cup cream
    • 1.5 teaspoon vanilla

    Slice thinly or dice half the strawberries. This will go in between the layers so if you prefer chunks, dice them instead of slicing. Trim off the leaves of the other half and cut into halves. This will be used to decorate the top of the cake.


    To make the whipped cream, refrigerate your mixing bowl and beater in the fridge for at least 15 minutes. Cold equipment ensures the stability and integrity of the whipped cream. Ever seen melted whipped cream? Pretty nasty...

    Mix sugar and cornstarch together in a small saucepan, then gradually add one quarter of the cream, using a wire whisk to mix out all the lumps. Transfer to stovetop on medium heat. Keep stirring, and stirring, and the mixture will thicken. Remove from heat and let cool to room temperature.

    In a mixing bowl, beat the remaining cream and vanilla until traces of beater marks begin to show distinctly.

    Be careful not to overbeat or what you'll end up with is literally butter. Which, isn't all that bad... if that happens, just add fine caster sugar and keep going until you see it form a curd-like mass. Pack it all into a pot and you have homemade clotted cream (which is like a creamy butter). Oh yes, and start on the whipped cream all over again, and this time, pay attention!

    Add the cornstarch and sugar mixture in a steady stream to the whipped cream, beating constantly. Beat until stiff peaks form when you raise the beater.

    Chill in fridge for 30 minutes.

    OK, now to assemble the cake. Frosting beginner? Click here for a step-by-step picture guide on frosting cakes.


    Slice the thicker cake into 2 layers.

    Lay the thinner cake on a cakeboard and spread with a layer of cream. Place a layer of sliced or diced strawberries and cover with the next layer. Repeat until you have 3 berry creamy layers.


    Once the layers are assembled, brush off extra crumbs off the top of the cake. Then frost all over with cream. Decorate with strawberry halves and chill for another hour to set the cake before serving.