Showing posts with label Intermediate. Show all posts

Monday, September 13, 2010

Country Chicken Pie

Darn it! Forgot to take photos. I'll post the recipe and redux it another day.

It's a pie-a-thon. Between the leftover Key Lime Pie and today's chicken pie, I'm all pied out. Use storebought pastry if you don't want to make it from scratch and it's a quick pie fix.

  • 500g all-purpose flour
  • 2 teaspoons salt
  • 1/2 teaspoon sugar
  • 450g cold butter, cut into 1/2 inch bits
  • 1 cup iced water, plus more as needed

Whizz the flour, butter, salt and sugar in a food processor or mixer with a dough hook until it resembles breadcrumbs. Then, dump in all the water at one and continue mixing until the dough starts massing around the blade/hook and pulls away from the sides. Pull the dough on a floured surface and knead lightly so that it comes together and roll into a ball. Cover with cling wrap and let it chill in the fridge while you make the filling.

  • 1 large chicken breast, skin removed and cut into 1-inch cubes
  • 1 carrot, cubed
  • 8 mushrooms, sliced
  • 2 small potatoes, cubed
  • 1 onion, diced
  • 2 tablespoons plain flour
  • 1 teaspoon dijon mustard
  • 1 teaspoon chopped thyme
  • 2 cups chicken stock
  • Freshly ground salt and pepper to taste

Roll the chicken cubes in flour till evenly coated. Heat 2 tablespoons of olive oil in a pot and sear the chicken until brown. Add the onions and fry till soft and translucent. Throw in the carrots and potatoes and give it a stir, then add the remaining flour and continue stirring till everything is mixed well. Pour in the chicken stock until the meat and veg are covered.

Add the mushrooms, mustard, thyme and pepper to the stew and bring to a boil. Reduce heat to low and let simmer for 1 - 2 hours till vegetables are tender.

Once stew is cooked, add salt to taste and remove from heat and let cool to room temperature.

Now, to assemble the pie.

Grease a 10-inch pie tin. Using 2/3 the dough and roll out evenly until you have a circle with a 3-inch edge larger than your pie tin. Gently press the dough sheet into the pie tin, leaving the edges untrimmed.

Roll out the remaining dough into a circle with a 1-inch clearance for the top. Pour the cooled filling into the pie tin, and place the dough sheet on top and press the edges of the top and bottom crust together gently.

Trim the dough so you have a 1/2 inch clearance of dough, then pleat the edges inward to form a nice crust. You can also use the back of a fork to create pretty lines.

Pierce a few holes in the top of the pie to let steam vent and brush over an egg wash (1 beaten egg with 1 tablespoon water).

Bake pie at 200C for 30 minutes until crust is golden brown.

Wednesday, September 8, 2010

Taiwanese Beef Noodle Soup


So much for healthy eating. An interstitial on Food Network came on last night about Taiwanese Beef Noodles and a bulb went off in my head.

OK, it may be a stretch but it's kind of healthy. I didn't add too much oil and it's a soup nonetheless. I'll keep deluding myself into thinking this is healthy. Ohm ohm ohmmm....

Serves 2:

  • 300g beef brisket, cut into cubes
  • 1 tablespoon chilli bean paste
  • 3 shallots finely sliced
  • 1 knob of ginger, peeled and sliced
  • 1 spring onion, cut into half
  • 1 star anise
  • 1 cinnamon stick
  • 4 whole peppercorns
  • 3 tablespoons Chinese rice wine
  • 1 tablespoon dark soy sauce
  • 1 beef stock cube
  • 2 large bowls of water
  • Light soy sauce to taste
  • 2 servings narrow kway teow

In a large pot, heat 3 tablespoons oil over high heat. Sear beef cubes till browned and set aside.

In the remaining oil, saute ginger, anise, whole peppercorns and cinnamon stick till fragrant, then add shallots and continue sauteing until soft and translucent. Add the bean paste and saute, then pour in the water, followed by rice wine, dark soy sauce and stock cube. Throw in the spring onions and bring to a boil. Turn down the heat to low and simmer for 3 hours until beef is soft and tender.

When soup stock is ready, season with light soy sauce to taste, strain and set the beef aside. Parboil the kway teow in boiling water until tender and drain. Place noodles in a bowl, add meat and ladle soup over.

Tuesday, August 31, 2010

Sticky Date Pudding with Toffee Sauce


This is so rich, moist and sinful, I know I'm going to hell.

A special request from GBF, discussed over dinner at Buko Nero last week. Since he, Miss Z and Miss A are coming over, we can all go to hell together and be damned happy on the journey down.

Hells yeah.

For 6 puddings:

  • 120g dates, stones removed
  • 1 teaspoon baking soda
  • 45g unsalted butter, softened
  • 85g caster sugar
  • 2 eggs
  • 85g flour
  • ¼ teaspoon allspice
  • ¼ teaspoon cinnamon
  • ¼ teaspoon freshly grated nutmeg

Preheat oven to 180ºC and grease 6 ramekins or muffin pan.

Chuck the dates in a bowl and cover with boiling water for a few minutes until softened. Drain the dates and whizz them in a food processor until you have a purée.

Meanwhile, cream your butter and sugar until pale, and add the eggs, flour, baking soda and spices. Mix together well, then fold in the puréed dates. Pour into ramekins or muffin cups till half full and bake for 30 minutes.


While the pudding is cooking, make the toffee sauce:

  • 60g unsalted butter
  • 60g brown sugar
  • 70ml cream

Put the butter, sugar and cream in a pan over a low heat until the sugar has dissolved and the sauce has thickened and darkened in colour.

Run a knife around each pudding and turn upside down to unmold. Pour some toffee sauce onto a plate and nestle a pudding in the middle of the lovely toffee puddle. Serve with a side of vanilla ice cream.

    Guinness Beef Pie


    Beef and booze, all wrapped up into buttery pastry. Artery clogging and oh so sinful.

    It's quintessential pub grub and I've been meaning to make it for ages. I'm amazed at how similar it is to Boeuf Bourguignon in terms of technique and ingredients. Substitute Guinness for wine and it's basically the same thing. Goes to show that good food is good food no matter where you are in the world.

    Since I'm doing a pie, I'm using more flour for a thicker gravy. If you want to have it as a stew, use 2 tablespoons of flour instead of 3.

    And if you can't be arsed with making your own pastry, store-bought shortcrust or puff pastry works just as well.

    • 800g beef brisket, cut into 1/2-inch cubes
    • 1 onion, finely diced
    • 3 cloves of garlic, minced
    • 3 small carrots, diced
    • 2 potatoes, diced
    • 8 mushrooms, sliced
    • 1 spring of rosemary, finely chopped
    • 1 sprig of thyme, finely chopped
    • 2 bay leaves
    • 1 330ml can of Guinness
    • 1 beef stock cube
    • 3 tablespoons flour
    • 1 tablespoon butter
    • Olive oil
    • Freshly ground salt and pepper to taste
    • 1.5 portion of shortcrust pastry
    • 1 beaten egg with 1 tablespoon water

    Wash and pat dry beef cubes. Roll them around in some flour till evenly coated and set aside.

    In a large pot, heat olive oil over high heat and sear the beef cubes till browned and set aside.

    In the same pot, turn the heat down to medium and saute onions and garlic till soft and translucent. Add the butter, carrots and potatoes and saute for a few minutes. Next, add the beef cubes, sprinkle the flour over and mix well.

    Pour in the Guinness and top up with water till ingredients are covered, add the stock cube and herbs and season with freshly ground black pepper and salt to taste. Bring to a boil, then turn the heat down to low and simmer for 2 hours till meat is tender.

    Add mushrooms to the stew and cook for a further 10 minutes. In the meantime, roll out the shortcrust pastry and preheat the oven to 200C.


    To assemble the pie, pour the stew into an ovenproof baking dish and cover the pie with the pastry. Trim the edges so that you have a 1.5 inch perimeter. Scrunch the edges down into the side of the dish and use the back of a fork to make little lines.

    Pierce a few holes in the top of the pie and brush with the egg and water mixture. Bake for 15 - 20 minutes until pastry is golden brown and serve immediately.

    Thursday, August 26, 2010

    Roast Chicken with Lemon & Thyme


    Today I'm going back to basics because there's nothing as delicious as a perfectly roasted chicken.

    Over the years, I've picked up techniques from people and books, and combined them into what I think makes for a great recipe.

    • 1 chicken
    • 1 lemon
    • 3 cloves garlic, smashed and peeled
    • 3 tablespoons olive oil
    • 3 sprigs of thyme
    • 1 tablespoon roasted garlic paste
    • Freshly ground salt and black pepper
    • 1 cup chicken stock

    Remove leaves from one stalk of thyme and finely chop, putting the rest aside. In a large bowl, whisk together the olive oil, juice of half the lemon (save the skin), thyme, garlic paste, salt and pepper.

    Wash and clean the chicken, removing the head and feet. Make sure the chicken is patted dry with paper towels, both inside and out.

    Squeeze the juice of the other half of the lemon into the cavity of the chicken, rubbing well. Stuff in the cloves of garlic, remaining two sprigs of thyme and the lemon rinds into the cavity. Using a skewer, "sew" the skin to close the cavity.

    Stuffing the cavity with the lemon and herbs keeps the bird moist and as the chicken cooks, imparts a rich lemon and herb flavour to the meat.


    Now, you want to truss the chicken. Trussing keeps the wings and legs close to the chicken and the wingtips tucked under. This allows the chicken to cook evenly, without the wings and legs drying out, as well as prevents the wing tips from burning.

    First, tie a loop of twine around the neck of the chicken. Then cross over the back and loop around the wing tips.


    Make another cross and bring the twine to the front of the chicken. Bring the leg ends together and tie off with the twine.


    Place the prepared chicken in the bowl of marinating liquid and coat well all around. Leave the chicken breast down and cover with cling film. Leave to marinate in the fridge for 2 hours.

    Preheat the oven to 160C. Prepare a baking dish with a small wire rack at the bottom and pour in the chicken stock.


    The reason I like the bird elevated is that the bottom cooks nice and crisp. I really hate for the bottom to swim around in the juices and get all soggy.

    Why the chicken stock at the bottom of the pan? In the hot oven, it turns to steam, and keeps the bird moist and juicy. It also catches the drippings from the chicken for a nice jus to go with the roasted bird.

    Roast at 160C for 1 hour, making sure you rotate it every now and then so it roasts evenly. Use the leftover marinade to baste. In the last 15 minutes, crank up the temperature to 190C so the skin gets golden and crisp.

    When done, remove from oven and let the chicken rest for 15 minutes. In the meantime, pour the juices from the roasting pan into a saucepan and boil until reduce until thick for a nice jus.

    Tuesday, August 24, 2010

    Leek, Mushroom and Bacon Quiche


    Ack. It's the curse of the fridge clean-out day, plus the sheer laziness of not wanting to go to the supermarket.

    I thought I'd do quiche again, seeing that the earlier post didn't have too many pictures. And besides, I love quiche, and it will make a good lunch for tomorrow as well. I'm going to do the short version here, so click here for more details on technique and excessive blah blah blah.

    For the shortcrust dough:

    • 125g all-purpose flour
    • 1/2 teaspoon salt
    • 110g cold unsalted butter, cut into 1/2 inch bits
    • 1/4 cup iced water, plus more as needed

    Dump in all the dry ingredients into the food processor or mixer with a dough hook, throw in the butter and shortening. Whizz it around until the mixture resembles fine breadcrumbs.

    Add the water slowly, until the dough starts to clump onto the blade or hook into a single mass. Remove and place onto a floured surface. Knead lightly until it forms a consistent ball. Roll it up into a ball and cover with cling wrap. Chill an hour in the fridge before using.


    Preheat oven to 190C and grease a quiche tin. Roll out the dough in a circle 2 inches larger than the quiche tin on a floured surface.


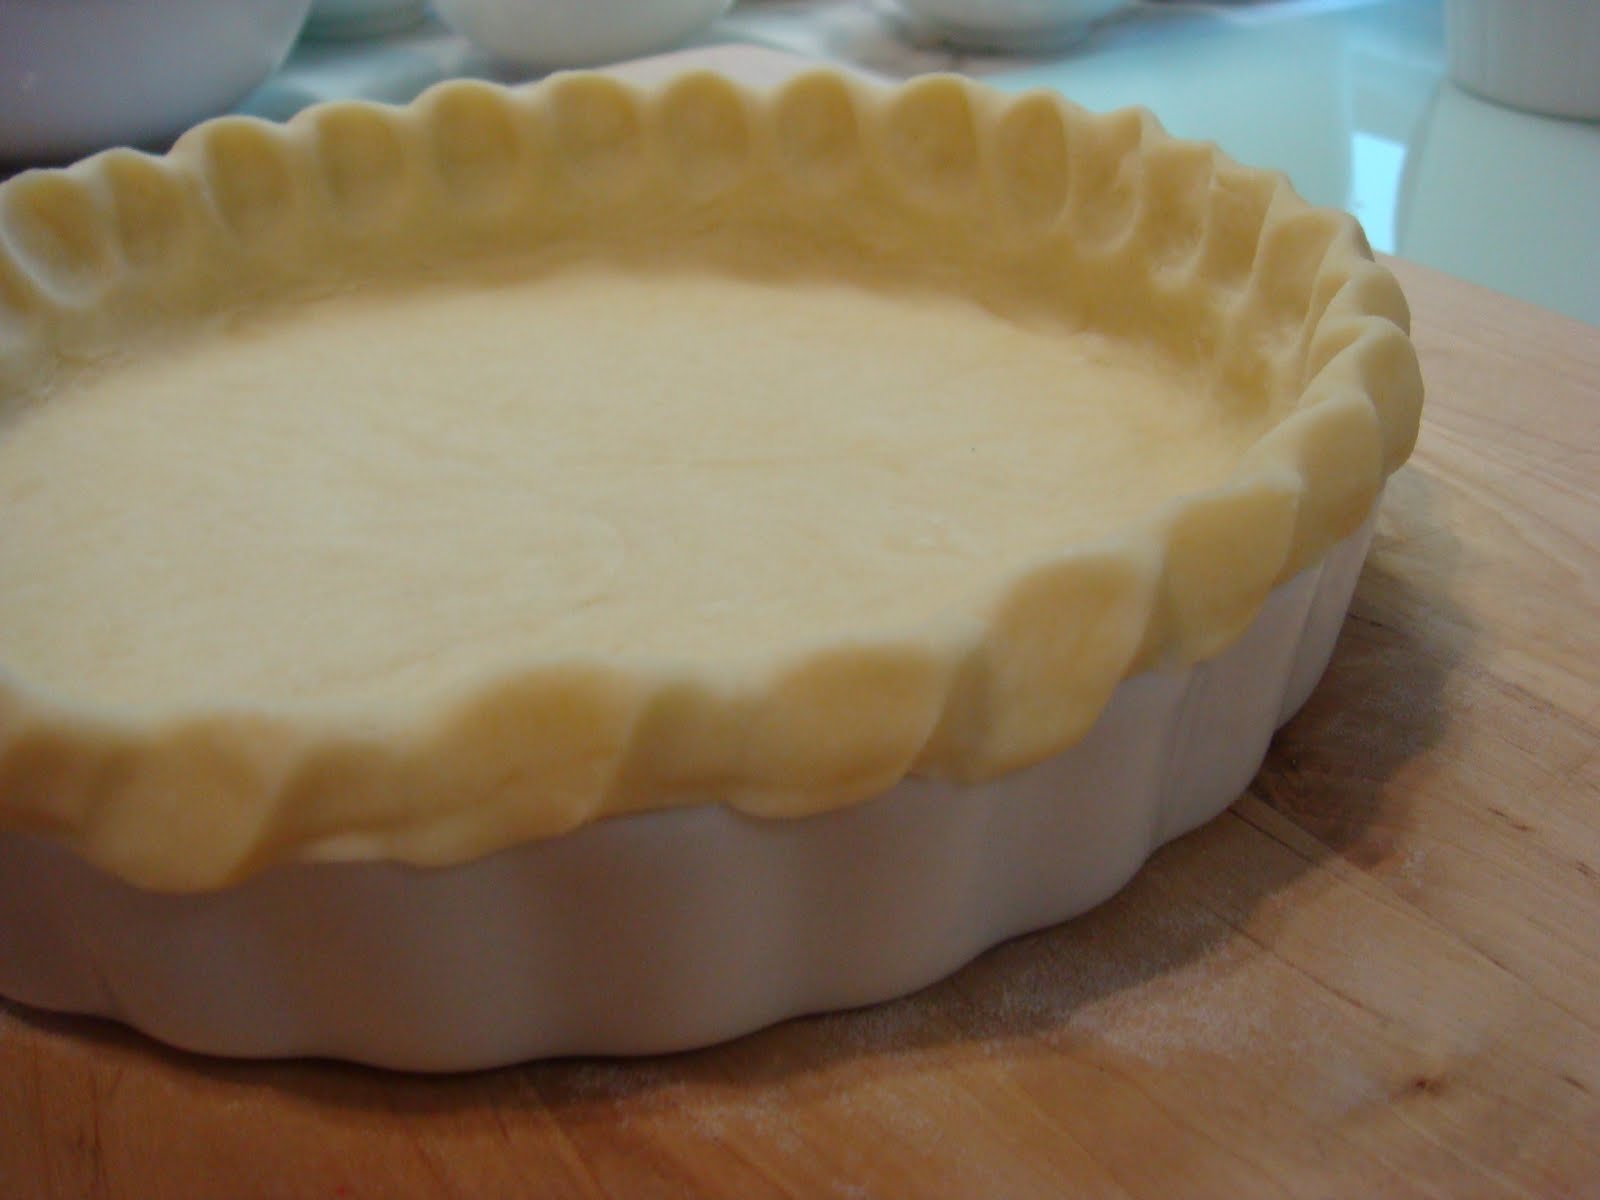
    Place the dough sheet over the greased quiche dish, gently press down into the bottom. Trim the excess dough 1/4 inch from the edge and crimp with your fingers to make the edge of the crust.


    Prick the bottom with a fork. Place a piece of parchment or greaseproof paper over the crust, then fill with rice/ dry beans/ ceramic or glass baking beans. Bake for 7 to 10 minutes till light golden brown.

    For the filling:

    • 2 eggs
    • 240ml cream
    • 1/2 stalk leek, sliced
    • 3 mushrooms, sliced
    • 4 rashers bacon, sliced and browned
    • Salt and pepper to taste
    • 2 tablespoon butter cut into pea-sized dots

    Lightly beat eggs, cream, salt and pepper in a bowl. Arrange the sliced leek, mushrooms and bacon in the crust, then pour over the egg and cream mixture. Dot with butter and bake at 190C for 25 - 30 minutes or until quiche has puffed and browned.

    Monday, August 23, 2010

    Cream Puffs


    Little pillows of manna these little babies are.

    I think these were the wise words of Yoda or some other pointy-eared person.

    Choux pastry really isn't that difficult to make. With some elbow grease and a weighing scale to make sure the ingredients are exactly right, following the instructions should leave you with a perfect puff.

    Choux can be deceptive buggers though. They come out of the oven all crisp and perfect, only to become wet and soggy as it cools. This is because the moisture from the uncooked centres spreads to the outside crust. To prevent this, puncture small puffs to release the steam. For larger puffs, slit into half and remove the uncooked centres. According to the legendary Julia Child, this is the only way to keep them puffs crisp and perfect.

    For the choux pastry, makes about 20 small puffs.
    • 120ml water
    • 45g unsalted butter, cut into pieces
    • 1 teaspoon sugar
    • 45g plain flour
    • 2 eggs

    Preheat oven to 220C. Bring water to a boil in a saucepan with the butter and sugar, and boil slowly until melted.

    Remove the saucepan from heat and immediately pour in all the flour at once. Beat the crap out of it with a wooden spoon until completely blended. Return the saucepan to the stove and continue to beat for 1 - 2 minutes until the mixture leaves the sides of the pan and spoon. The paste should form a mass and an oily film will coat the pan.

    Remove the saucepan from the heat and make a well in the centre of the paste with the spoon. Immediately break an egg into the centre of the well and beat the paste until the egg is absorbed. Do the same for the other egg until you get a smooth glossy paste.

    This is the part where your arm will get really tired so I suggest you use an electric mixer with a paddle attachment for the job.

    Spoon the paste into a pastry bag fitted with a half-inch round tip and pipe circular mounds onto a non-stick baking sheet. For large puffs, pipe them 2 inches in diameter. This will yield puffs about 3 inches in diameter. For small puffs, pipe 1 inch mounds that will yield 1.5 inch puffs.

    For large puffs, bake for 20 minutes till lightly browned, then reduce temperature to 190C and bake for a further 10 - 15 minutes more. For small puffs, bake for 20 minutes till golden brown.


    Remove from oven when done, and let cool completely while you make the filling.

    There are plenty of options as far as fillings go. You can go quick and easy with a scoop of your favourite ice cream, chocolate whipped cream, whipped cream and strawberries, or a creamy eggy custard. The list isn't exhaustive, so go with whatever you feel like.

    Here's the recipe for the custard (also known as creme patissiere):

    • 80g sugar
    • 3 egg yolks
    • 30g flour
    • 220ml whipping cream
    • 1 teaspoon vanilla extract
    • 1/2 tablespoon butter

    Heat whipping cream until boiling. Beat sugar and egg yolks with a wire whisk until the mixture is pale yellow. When the whisk is lifted from the mixture, a thin ribbon should stream off the whisk. Add the flour and beat until smooth.

    Pour a small amount of boiling cream into the egg mixture, whisking well. Continue to add the hot cream slowly to the egg mixture in batches, whisking well in between. This will proof the egg mixture, preventing the eggs from cooking as the eggs meet the hot liquid.

    Return the egg and cream mixture to the saucepan and bring to a boil on medium heat. Keep whisking as it comes to a boil, and the mixture will start to thicken. Cook for a total of 2 - 3 minutes, taking care not to let the custard at the bottom of the pan scorch. Remove from heat, and beat in butter and vanilla. Let the custard cool completely before using.


    Assembling the puffs are the easiest part. Simply open up the sliced puff shells, pipe in the filling into the bottom half and replace the top half of the shell.

    I'm keeping things simple today. Just a fresh whipped cream filling with fresh diced strawberries.

    Tuesday, August 17, 2010

    Panfried Foie Gras with a Balsamic Raspberry Reduction


    This is simple, yet utterly decadent.

    Personally, I don't eat foie gras because I have peasant tastebuds, but since GBF loves it, I'm going to spoil him today.

    The thing that makes foie gras great is it's rich, fatty and buttery flavour, but it can be too much, so often a bit of of an acid contrast is needed to liven it up. I chose raspberries for two reasons. One, I have leftover frozen raspberries from jam making day. Two, it has a strong flavour that won't disappear in the foi gras. But mostly because I have leftovers.

    • 2 pieces goose or duck foie gras, cleaned
    • 10 raspberries
    • 2 tablespoons water
    • 1 tablespoon balsamic vinegar
    • 1 tablespoon honey
    • Pinch of salt

    In a saucepan, combine raspberries, water, vinegar, honey and salt. Bring to boil, stirring constantly to break up and liquify the berries. Once the sauce has reduced by half into a thick liquid, strain to remove seeds.

    The key to frying foie gras is a very hot pan and quick cooking. If you let the foie gras cook too long, you'll end up with a puddle of very expensive goose fat. In a smoking hot skillet, add a tablespoon of olive oil. Sear one side for 2 minutes until golden brown, then turn and do the other side.

    Once cooked, remove from pan and drizzle over the reduction. Garnish with a side of greens and serve.

    More for the last meal:

    Lemon Meringue Pie


    No rain today. Instead, it's retarded hot outside so I reckon something bright and sunny is the perfect thing to bake.

    Lemon meringue pie isn't all that common here, and I don't know why that is. It's a great play on contrasting flavours and textures that come together so nicely. The slightly bland and crisp pie shell with a tart creamy custard, topped off with a sweet fluffy meringue. Luuurvely.

    First, make the crust. If you can't be arsed, go ahead and use frozen pastry or even ready-made pie crust. Hey man, I ain't judging...

    • 135g flour
    • 1/4 teaspoon salt
    • 90g cold unsalted butter, cut into pieces
    • 50ml cold water

    Preheat oven to 175C.

    Combine flour and salt in in an electric mixer. Add the butter and use dough hook attachment to beat until pea-sized nuggets form.


    Add the water and continue to mix until dough just comes together.

    Turn out the dough onto a lightly floured surface. Roll dough out into a circle that's 3cm larger than the pie tin. Line the greased pie tin with the dough and lightly prick the bottom with a form. Place a layer of baking paper and fill with baking beans or rice to weigh the shell down.


    Bake for 30 minutes till golden brown. Let the pie shell cool completely while you make the filling.

    • 385ml water
    • 180g sugar
    • 1/4 teaspoon salt
    • 1 lemon, juice and zest
    • 35g cornstarch
    • 2 egg yolks
    • 20g butter

    Combine 3/4 of the water, sugar, lemon juice and zest in a saucepan and bring to a boil. In a separate bowl, lightly whisk together remaining water, cornstarch and egg yolk.

    When the lemon juice mixture comes to a boil, temper the mixture with the yolk and cornstarch mixture. Put the combined mixture back on the stove on medium heat and boil until thickened. Once that happens, remove from heat immediately and stir in the butter.

    Pour the filling into the pie shell and let cool to room temperature before chilling in the fridge for a further 1 hour.


    • 2 egg whites
    • 200g caster sugar
    • 1/4 teaspoon cream of tartar

    Beat the egg whites, sugar and cream of tartar until stiff peaks form. Pipe onto filled pie and bake at 220C for 3 minutes until meringue is lightly browned. If you have a butane torch, skip the oven altogether and simply burn the tops before serving.

    More for the last meal:

    Tuesday, August 10, 2010

    Boeuf Bourguignon


    There's the full-on Julia Child's version, then there's my busy-working-woman-with-no-time-and-a-very-small-kitchen version.

    Essential ingredients are basically the same - beef, a full-bodied red wine, bacon, onions and mushrooms. Omit the oven and enter the slow cooker for pain-free cooking.

    This is the kind of dish you start in the late morning, leave it in the slow cooker and go do other things, then come back to it an hour before dinner for the final prep. A throw-together-and forget-about-it kind of dish.

    Today, I'm a lazy-ass. And since it's just dinner for 2 with Miss Z, I'm skipping mashing the potatoes, and throwing them into the stew instead, along with celery, for a one-dish meal.

    Serves 4:
    • 10 rashers of bacon, sliced
    • 600g of lean stewing beef, cubed
    • 1 carrot, sliced into half-inch slices
    • 1 white onion, finely diced
    • 2 tablespoons plain flour
    • 1 bottle red wine (Bordeaux, Burgundy or a Beaujolais is good)
    • 1 beef stock cube
    • 1 tablespoon tomato paste
    • 1 clove garlic, finely minced 
    • 1 stalk fresh thyme, leaves only
    • 2 bay leaves
    • 1 teaspoon wholegrain mustard
    • 1 teaspoon dijon mustard
    • 300g button mushrooms, quartered
    • 10 small pearl or small white onions, peeled and left whole
    • Freshly ground salt and pepper to taste

    In a large pot, saute the bacon in 2 tablespoons of olive oil till brown and crisp over high heat. Remove from oil and set aside.

    Pat dry the beef cubes, damp beef will not brown nicely. In the oil and bacon fat, sear the beef till browned and sealed, and set aside.

    In the same fat, saute the onions till soft and translucent, then add the carrots and saute for a futher few minutes. Add the beef and bacon back to the pot, sprinkle on the flour and mix well, letting cook for a further 3 minutes.

    Pour the entire bottle of wine in, topping up with some water to make sure the ingredients are just barely covered. Add tomato paste, garlic, stock cube, mustards and herbs to the stew and mix well. bring to a boil, then turn heat down to a low simmer for 3 hours. At this point, you can also transfer to a slow cooker set on high.

    3 hours later, stir in the mushrooms and onions and simmer for another 1 hour. By this time, the stock would have reduced to a thick gravy. To serve, spoon a mound of mashed potatoes into a shallow bowl making a deep well in the centre and ladle a generous serving of stew into the well. Crusty garlic bread is also great for mopping up the thick sauce.

    Other items on the Red, White and Ooohhh menu:

    Thursday, August 5, 2010

    New York Cheesecake


    My favourite city, and one of my favourite desserts. The best cheesecake in NY is probably Lindy's, and here's my stab at replicating it.

    If like me, you find cheesecakes heavy and too much a few bites, then you'll really love this recipe. The sour bite of lemons counter the heavy creaminess of the cheesecake and the sour cream gives it a nice fluffiness.

    Maybe my NY dreams will come true one day, but till then, cheesecake seems to be the closest thing.
    "Concrete jungle where dreams are made of
    There's nothing you can't do
    Now you're in New York
    These streets will make you feel brand new
    Big lights will inspire you
    Hear it for New York"
    Empire State of Mind II, Alicia Keys


    • 1 cup digestive biscuits (about 10 pieces)
    • 5 tablespoons butter, melted
    • 2 (8 oz) blocks cream cheese, softened
    • 3/4 cup sugar
    • 1 tablespoon flour
    • 1 lemon, zest and juice (Didn't have any in the fridge today so replaced with 3 tablespoons bottled lime juice concentrate.)
    • 2 eggs
    • 1 egg yolk
    • 1/2 cup sour cream
    • 1/2 teaspoon vanilla extract

    Heat oven to 180C and grease a 18-inch spring-form tin.

    Whizz the digestive biscuits in a food processor until you get a fine crumb the texture of sand. Mix the digestive crumbs with the melted butter and mix well. Press into the base of the tin and set aside. Here's a little trick to get a nice flat crust: use a drinking glass to press the crumbs down and smooth out. Works like a charm!


    Blend cheese in an electric mixer till smooth. Add sugar and sour cream and blend well. Add lemon zest, juice and vanilla. Add flour and blend, scraping bowl down as you go. Add eggs one at a time, blending well in between.

    Pour into pan and bake for 15 minutes, then turn temperature down to 100C and bake another 1 hour. The cake will be still slightly wobbly when removed from oven, but don't worry, it will firm up when chilled.

    Let cool completely and chill for at least 2 - 3 hours before removing from the tin.


    With this basic recipe, you can make all sorts of variants.
    • Lemon cheesecake - 2 lemons instead of 1
    • Orange cheesecake - Juice and grated rind of 2 oranges. You can add a teaspoon of orange flower essence as well.
    • Fruit cheesecake - 2 cups of your favourite fruit, chopped into small bits
    • Mocha cheesecake - 3 tablespoons of instant coffee powder
    • Chocolate cheesecake - 3 tablespoons of cocoa powder
    • Chocolate marble cheesecake - Flavour 1/3 of the batter with 2 tablespoon cocoa powder and drizzle randomly over the white batter. Stick a skewer in and give it a couple of stirs.
    • Oreo cheesecake - 1.5 cups finely crushed Oreo cookies (without the cream filling)
    • Baileys cheesecake - 5 tablespoons Baileys liquer
    • Green tea cheesecake - 3 tablespoons of matcha green tea powder

    And if you want to have a fruit topping, simply open a can of your favourite fruit (cherries, raspberries, blueberries etc), set aside 3 tablespoons of the syrup into a small bowl and put the rest into a pot. Dissolve 2 tablespoons of cornstarch in the reserved syrup. Add to the pot then bring to a boil. When the mixture thickens up, pour over the warm cheesecake in the tin and refrigerate for 3 - 4 hours to set.

    Nonya Kaya


    Kaya making is an assertion of my Peranakan roots. It also requires a very specific mindset and mood. One must be very calm, zen and patient, so pick a day where you have jack-all to do.

    Seeing that insomnia has been my best friend lately, making kaya at midnight seems like a perfectly reasonable thing to do. But I digress...

    The mantra for the kaya-making day is "slow and gentle" - lovemaking, as opposed to f**king. There is a pick-up on the tempo at the end though, for a grand finish. You'll see what I mean... Just keep reading.

    Right, now on to the kaya. Ingredients are simple enough. Coconut milk, eggs, sugar and pandan leaves. Proportions are a snap to remember: it's a 1:1:1 ratio of coconut milk, eggs and sugar.

    But my spin on kaya is gula melaka. It gives it a smoky caramelly flavour that is just to die for. If you don't like gula melaka then replace with sugar... but hey, you don't know what you're missing.


    • 400g of coconut milk (use the ones found in the chiller, tetrapak or tinned milk ain't so great)
    • 200g white sugar
    • 200g gula melaka, chopped fine
    • 400g eggs (approximately 15 eggs)
    • 20 stalks pandan leaves, washed, dried and tied into bundles

    Break eggs into a bowl and gently whisk. What you want to do is combine the whites and yolk but not add air into it.

    Next, mix the white sugar and gula melaka in a large metal bowl. Add coconut milk and eggs and gently stir. Once again, the whole point is to mix well, not beat the living shit out of it.

    Leave it for awhile to let any larger lumps of gula melaka melt, until you get a consistent liquid with no big lumpy bits. The smaller lumps will melt when on the heat, so don't worry too much about them.

    Heat a large saucepan of water, about 1/3 full and bring to a gentle simmer. Add the pandan leaves and place the metal bowl over the water and start stirring with a wire whisk.


    Be careful with the heat. The water shouldn't be on a crazy boil, with steam escaping everywhere and the bowl rattling over the pan. There shouldn't be steam escaping and the bowl should sit firmly on the pan.

    Basically, from here onwards, it's just stir, stir and more stir every few minutes for the next hour or so. The liquid will slowly thicken into a custardy consistency. It helps to have the TV on, or put your significant other on stirring duty.

    And yes, if you go to the loo for a pee or a smoke break, it'll be ok. It's kaya, not a time bomb.


    Halfway through, pour the fairly thick liquid through a sieve to remove lumps and bits of pandan leaves, then return to heat and keep stirring. Check occasionally that the water hasn't dried up and top up when necessary.


    When the kaya is starting to really thicken, remove the pandan leaves. From this point onwards, you may release your pent-up frustration and whisk more vigorously.

    The kaya is done when it's thick enough to coat the whisk like so:


    Remove from heat and let cool. As it cools, whisk the crap out of it periodically. Why? Because it's already caused you so much grief, the bastard deserves it.

    No, not really. First off, it breaks up lumps and gives the kaya a smooth creamy texture. Second, it just helps it cool faster.

    Make sure you let the kaya cool completely to room temperature before sealing it and refrigerating. Sealing a hot jar will cause water to evaporate and collect on the kaya and it'll go bad real quick.

    Let it refrigerate for at least a day for the flavours to come together before eating. It will also thicken up a bit more for the right spreading consistency.

    I told you it isn't hard... Just long and tedious, but infinitely satisfying.

    "Slow and gentle... Sloooooooow and gentle... Now harder... Harder... YEAHHHHH!!!!"

    Other items on the Childhood Comforts menu:

    Monday, July 5, 2010

    Raspberry Chocolate Tart with Gingersnap Crust


    Oooh... This one is utterly evil. I once saw a show on TV that explains the science of why some foods taste so good together. But I really don't need science to know that the balance of the bitter and sweet of the chocolate, the tartness of the raspberries, and the spiciness of the ginger are perfect complements to each other.

    Apart from looking really pretty, the way the flavours layer on your tongue and mouth is also amazing. As you bite down, the raspberries hit your tongue with the tartness, then the bittersweet of the chocolate explodes all over the place, finally finishing off with the spicy crunch of the gingered crust.

    To die for...

    • About 40 gingersnaps (to yield 1 1/2 cups finely ground)
    • 4 tablespoons melted unsalted butter
    • 3 ½ cups fresh raspberries
    • 8 ounces semisweet or bittersweet chocolate, finely chopped if not using chips or buttons
    • 1 ¼ cups heavy cream
    • Raspberry jam (optional)
    • Small pinch salt

    Preheat the oven to 160C and grease the sides and bottom of a 9 1/2-inch fluted tart pan with a removable bottom.

    In a food processor, grind the gingersnaps until they're the texture of sand. Transfer to a bowl, add the melted butter, and work it in by squishing the mixture together with your hands. Press into the sides and bottom of the greased tart pan.


    A little trick to get the crust evenly flat in the pan is to use a glass cup. Press the glass cup down gently, smoothing out the bottom of the crust as you squish the excess to the sides of the tin. Then press the cup against the sides for a perfectly flat side. Voila!

    Refrigerate the crust for 20 minutes until firm, then bake the tart crust on the baking sheet until fragrant and light golden brown, about 15 minutes Make sure you check and rotate if needed to make the sure the crust doesn't get too dark. Set on a rack to cool

    Meanwhile, whizz 1 cup of the berries through a food processor. Strain the pulp through a strainer to get rid of the seeds and bits. You'll have about 1/2 cup puree; set it aside and discard the contents of the strainer.

    Put the chocolate in a medium bowl. Heat the cream just until boiling. Pour the hot cream over the chopped chocolate and whisk to blend. Stir in the raspberry puree and the salt.


    Spread a thin layer of raspberry preserves on the bottom of the cooled tart shell, then pour in the chocolate mixture (known as a ganache).

    Refrigerate until the ganache is fairly firm, about 1 hour. Arrange the remaining raspberries on top of the ganache; they should completely cover the surface. Chill until the ganache is completely firm, about 30 minutes, and serve.

    Monday, June 28, 2010

    Chorizo and portobello risotto with prosciutto crunch

    Risotto has a bad rep for being difficult to make. Which is totally undeserved as far as I'm concerned.

    Like most things in life, it needs some care and attention, which doesn't necessarily mean being difficult. The science behind risotto is simple. The constant stirring and the gradual addition of liquids coaxes out the starches from the rice grains. This is what gives you the creamy texture of the dish.

    This is a western take of one of my favourite childhood meals. A typical after-school lunch would be a simple plain porridge with bits of seasoned pork, topped with crumbled deep fried crispy vegetarian salted fish. That stuff is near impossible to buy, and it's such a treat because my Grand Aunt from Penang would make it and send it over.

    It's simply layers of sheets of beancurd skin and fermented beancurd paste. It's arduous to make because each layer had to be completely sun-dried before the next layer went on. It could take up to a month to make, depending on whether the weather was cooperative. When deep fried, it puffs up into a crispy, pungent, salty little pillow of melt-in-your-mouth scrumptiousness.

    This risotto dish is inspired by the blend of contrasting textures and flavours from my childhood. It combines the creamy velvet of the risotto, with the chorizo lending a spicy kick, topped with the contrasting crunch of crispy and salty proscuitto in every bite.

    Serves 4 as entree, 8 as appetiser
    • 2 tbsp extra virgin olive oil
    • 2 cups sliced chorizo
    • 3 cups sliced portobello or any other mushrooms you prefer
    • 8 slices of prosciutto
    • 1 onion, thinly sliced
    • Fresh thyme
    • 1.5 cups dry white wine
    • 6 cups chicken broth
    • 1/2 cup butter
    • 4 garlic cloves, minced
    • 2 cups arborio rice (or any short grain rice)
    • 1 cup grated parmesan reggiano
    • Salt and pepper to taste

    Heat olive oil in a skillet and brown chorizo. Add mushrooms and thyme and saute until tender. Chuck in the booze and simmer until liquid is absorbed and reduced by about half. Set aside.

    Preheat oven to 160C. Spread out the prosciutto slices on a non-stick baking sheet for 10-12 minutes until crispy. Drain on paper towels to remove excess oil and set aside.

    Get all your ingredients ready and stand by to stir for at least 20 minutes. Putting the TV on usually helps to distract you from the lactic acid building up in your bicep. Switch arms every once in awhile, you really don't want lopsided arms.

    On medium heat, melt butter and cook onions and garlic till tender and translucent. Dump in the rice and stir it around for a couple of minutes. Turn heat down to low.

    Now, the trick from here is to add liquid cup by cup, stirring gently until each cup of liquid is absorbed before adding the next. There are no shortcuts here, just patience and a watchful eye. There are no hard and fast rules either, just keep adding liquid and stirring until the rice grains are cooked al dente.

    As you stir and add liquid, the mixture will become creamier. This is a sign that the rice grains are absorbing the liquid and the starch is being released. When the risotto is done, stir in the mushroom mixture and half a cup of grated parmesan and mix well.

    Season with sea salt and freshly ground black pepper to taste. Garnish with a sprinkle of grated cheese and top with a crispy slice of prosciutto.

    This is my favourite rainy weather dish - curled up in front of the TV and wrapped up in a blanket. The ultimate comfort food.

    Beer butt chicken


    I have a theory about how this recipe came about.

    Some skanky chef ho probaby got tanked on beer in a sleazy bar, picked up a random dude and got laid hard in a one night stand. The next morning, she woke up with a blazing hangover and a really sore ass. She looked around and one-night-stand guy was gone. It was probably the best lay in her life, and she was devastated knowing that she'll never see (and screw) him again. And so, she created a dish to remember him for all eternity.

    The alternative backstory is that some guy put together all his favourite things ever - beer, buttf*cking and chicken. I think this is the more probable of the two.

    Here's what you need for a drunken anal taste delight (pardon the puns, I simply can't resist):
    • One big fat juicy chicken
    • 1/2 cup dry salt and spice rub (This is basically a combination of sea salt and spices. I like rosemary, chilli flakes, paprika, thyme, coriander and ground black pepper, but you can use any spices you prefer. If you can't be arsed, then use any store-bought marinade.)
    • 1 tbsp dijon mustard
    • 2 tbsp of honey
    • 3 tbsp olive oil
    • 1 can of beer (Different types of beers give different flavours, so experiment. I personally like a dark wheat beer and Guinness as it gives a rich and deep flavour. Using Coke is also an alternative, but if you do, don't add honey and include a generous dash of bourbon.)
    • 1 cup of garlic butter (Make this by mincing 3-4 garlic cloves and mixing into softened butter.)

    Wash and clean the chicken. Slide a finger between the skin and the breast meat to make as large a pocket as possible, being careful not to tear the skin. Stuff in the garlic butter in the pocket, using your hands to squeeze the butter over as much of the breast meat as possible and even out the layer of butter. This helps keep the breast meat moist as the chicken cooks and gives it a killer garlic kick.

    Rub the salt and spice mix liberally over and inside the chicken. Add the olive oil, honey, mustard and half a can of beer and massage that chicken good.

    Let him soak in the tub for at least a couple of hours in the fridge, overnight if you have the time.

    Preheat the oven to 160C.

    Stuff the beer can with the remaining beer up his butt and stand it up on a roasting pan or dish. The trick is to make a "tripod" with the can and the two legs. You'll find that the law of physics will prevail and you'll have a surprising stable bird.

    Roast at 160C for 1 hour 15 mins, making sure you rotate it every now and then so it gets an even tan. Use the leftover marinade to baste. In the last 15 minutes, crank up the temperature to 190C so the skin gets golden and crisp.

    Remove from oven and let rest for 10 minutes. This helps to juices return back into the meat. In the meantime, get cracking on the gravy.

    Remove can from butt and pour all the juices into a saucepan. Mix 1 tablespoon of cornstarch with as little water as possible to make a paste and add to roasting juices. Bring to a boil and the gravy will thicken. Chuck in a knob of butter for some gloss and you're ready to chow down.

    Sunday, June 27, 2010

    I quiche you not. It's that easy.


    Repeat after me. "Quiches and pastry are not scary and difficult to make".

    With a food processor, you'll be able to whip up a quiche in under an hour flat. 10 minutes if you make the pastry ahead and store in the fridge so you have it on hand whenever a quiche attack hits you. Or if you prefer, simply use frozen shortcrust pastry. It works just as well.

    Here's what you need for a basic shortcrust dough:
    • 2 cups all-purpose flour
    • 1 tsp salt
    • 1/4 tsp sugar
    • 6 oz cold butter, cut into 1/2 inch bits
    • 4 tbsp cold shortening (you can replace this with butter if you like a richer more buttery crust)
    • 1/2 cup iced water, plus more as needed

    Dump in all the dry ingredients into the food processor, throw in the butter and shortening. Whizz it around until the mixture resembles fine breadcrumbs.

    So far so easy right?

    Add the water slowly, flicking the food processor on and off. Keep adding water until the dough starts to clump onto the blade into a single mass.

    Once that happens, remove from food processor and place onto a floured surface. Knead lightly until it forms a consistent ball. Roll it up into a ball and cover with cling wrap. Resist the urge to over handle the dough or the heat from your hands will melt the butter and you'll end up with an oily mess. Chill for at least 2 hours in the fridge before using.

    The refrigerated dough keeps well for a few days. But if you want it to last for several weeks, wrap it in an airtight plastic bag and freeze.

    To bake the crust:

    Heat oven to 190C.

    To line the quiche tin/pan, simply roll out the dough on a floured surface. The dough circle should be about 2 inches larger than your quiche tin.

    Place the sheet over the greased quiche dish, gently press down into the bottom. Trim the excess dough 1/4 inch from the edge and roll it up to make the edge of the crust. It doesn't have to be a fancy pattern, a thicker edge is needed as the dough will shrink slightly and pull away when it's baked. All you need is a little "lip" to keep the filling from spilling out.

    Prick the bottom with a fork. Place a piece of parchment or greaseproof paper over to form a little basket, then fill with rice/ dry beans/ ceramic or glass baking beans. This helps to weigh down the bottom of the crust so that the hot air won't cause it to puff up.

    Bake for 7 to 10 minutes till light golden brown.

    Now, onto the basic filling:
    • 3 large eggs
    • 1.5 cups of cream
    • Salt and pepper to taste
    • 2 tbsp butter cut into pea-sized dots

    Beat eggs, add cream and seasonings. That's your basic quiche mixture. You can add any other kinds of seasonings, spices and herbs that you like.

    At this point, add the other ingredients to the empty pastry shell. Pour on the egg and cream mixture and dot with butter. Bake at 190C for 25 - 30 minutes or until quiche has puffed and browned.

    Here's a whole list of quiche variations you can make with the basic recipe:
    • Quiche Provencal - Slices of fresh tomato
    • Quiche Lorraine - Lightly browned strips of bacon
    • Quiche Fromage - Cubes of any cheese you like
    • Quiche Oignons - Browned caramelized onions

    Or my personal favourite, the "The Kitchen Sink" - browned bacon, cheese cubes, slices of leek, onion and mushroom. Good hot or cold, perfect as a snack, and even doubles up as a hearty lunch with a side salad.