Showing posts with label Advanced. Show all posts

Thursday, September 16, 2010

Pretty in Pink Raspberry Macarons


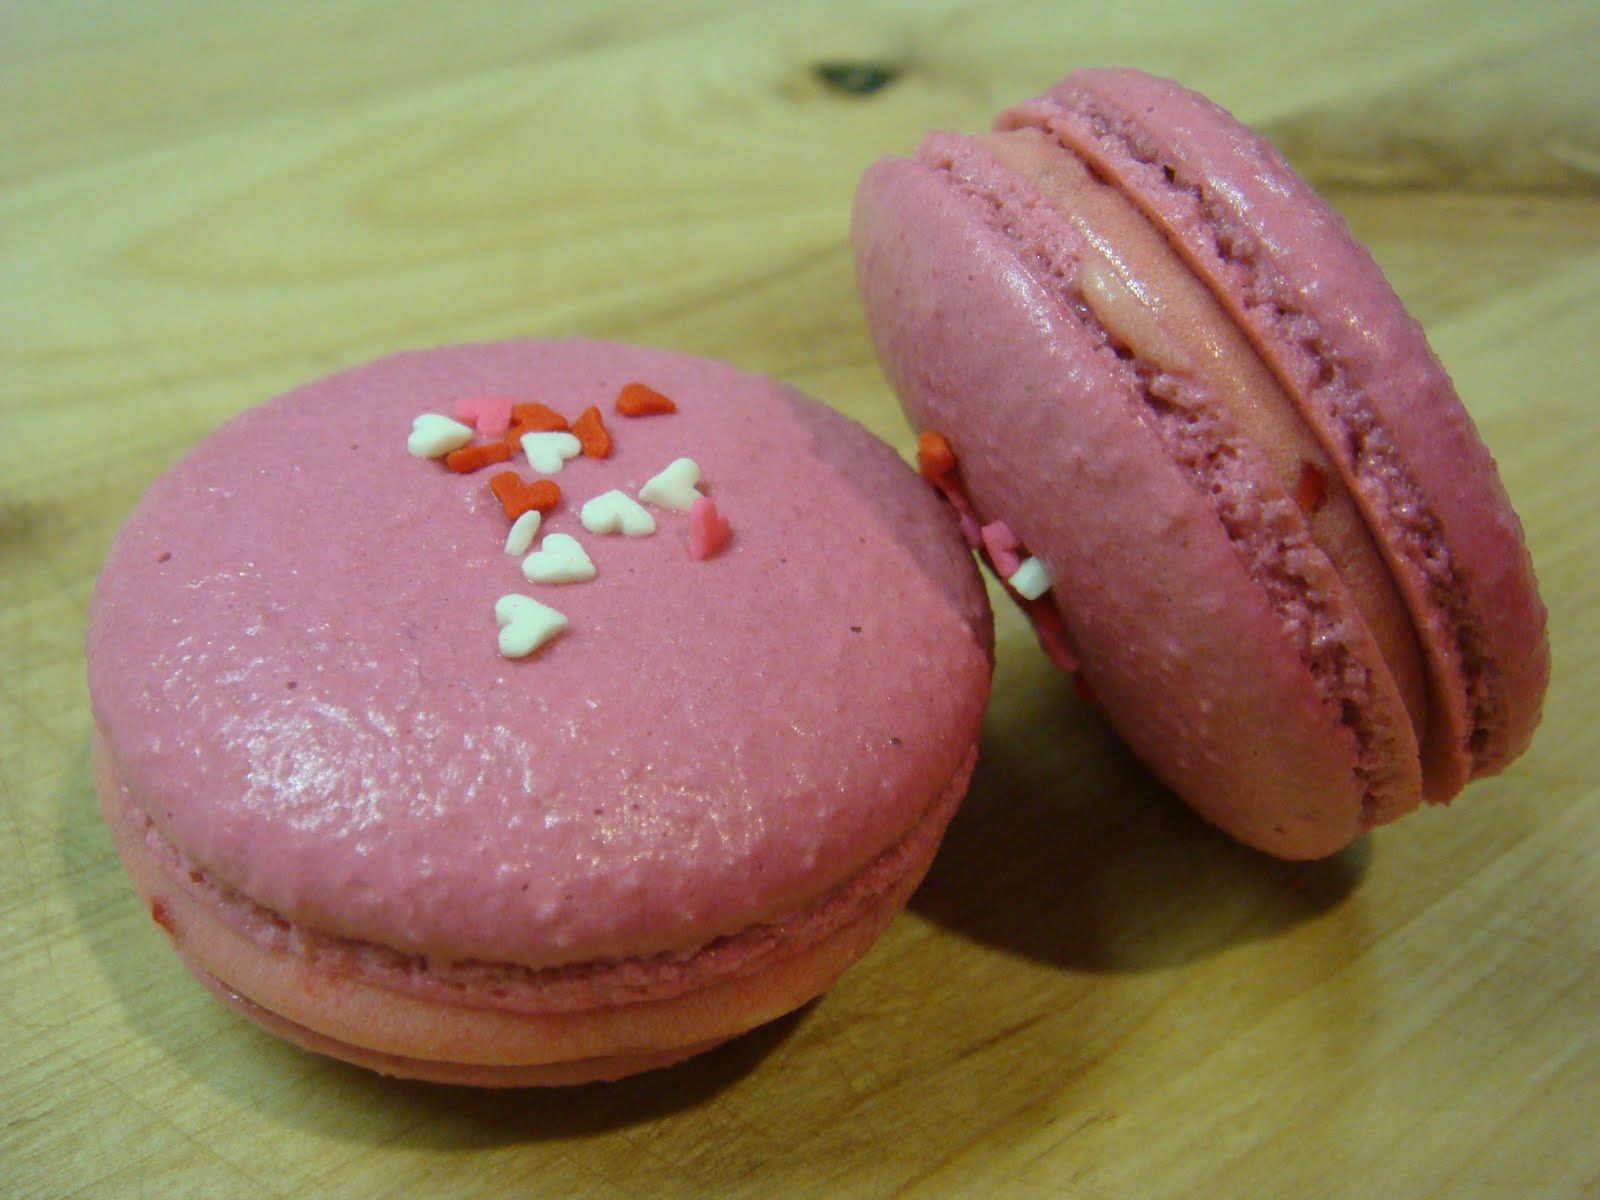
I'm reduxing raspberry macarons just because they're so yummy. Instead of two-toned shells, It's pretty-in-pink with lots of heart-shaped sprinkles.

Use 2 - 3 drops of red food colouring, and don't forget the sprinkles!
Perfect feet and smooth shiny tops.
Smooth creamy raspberry buttercream
Assembled and ready to eat

Citron Vanilla Macarons


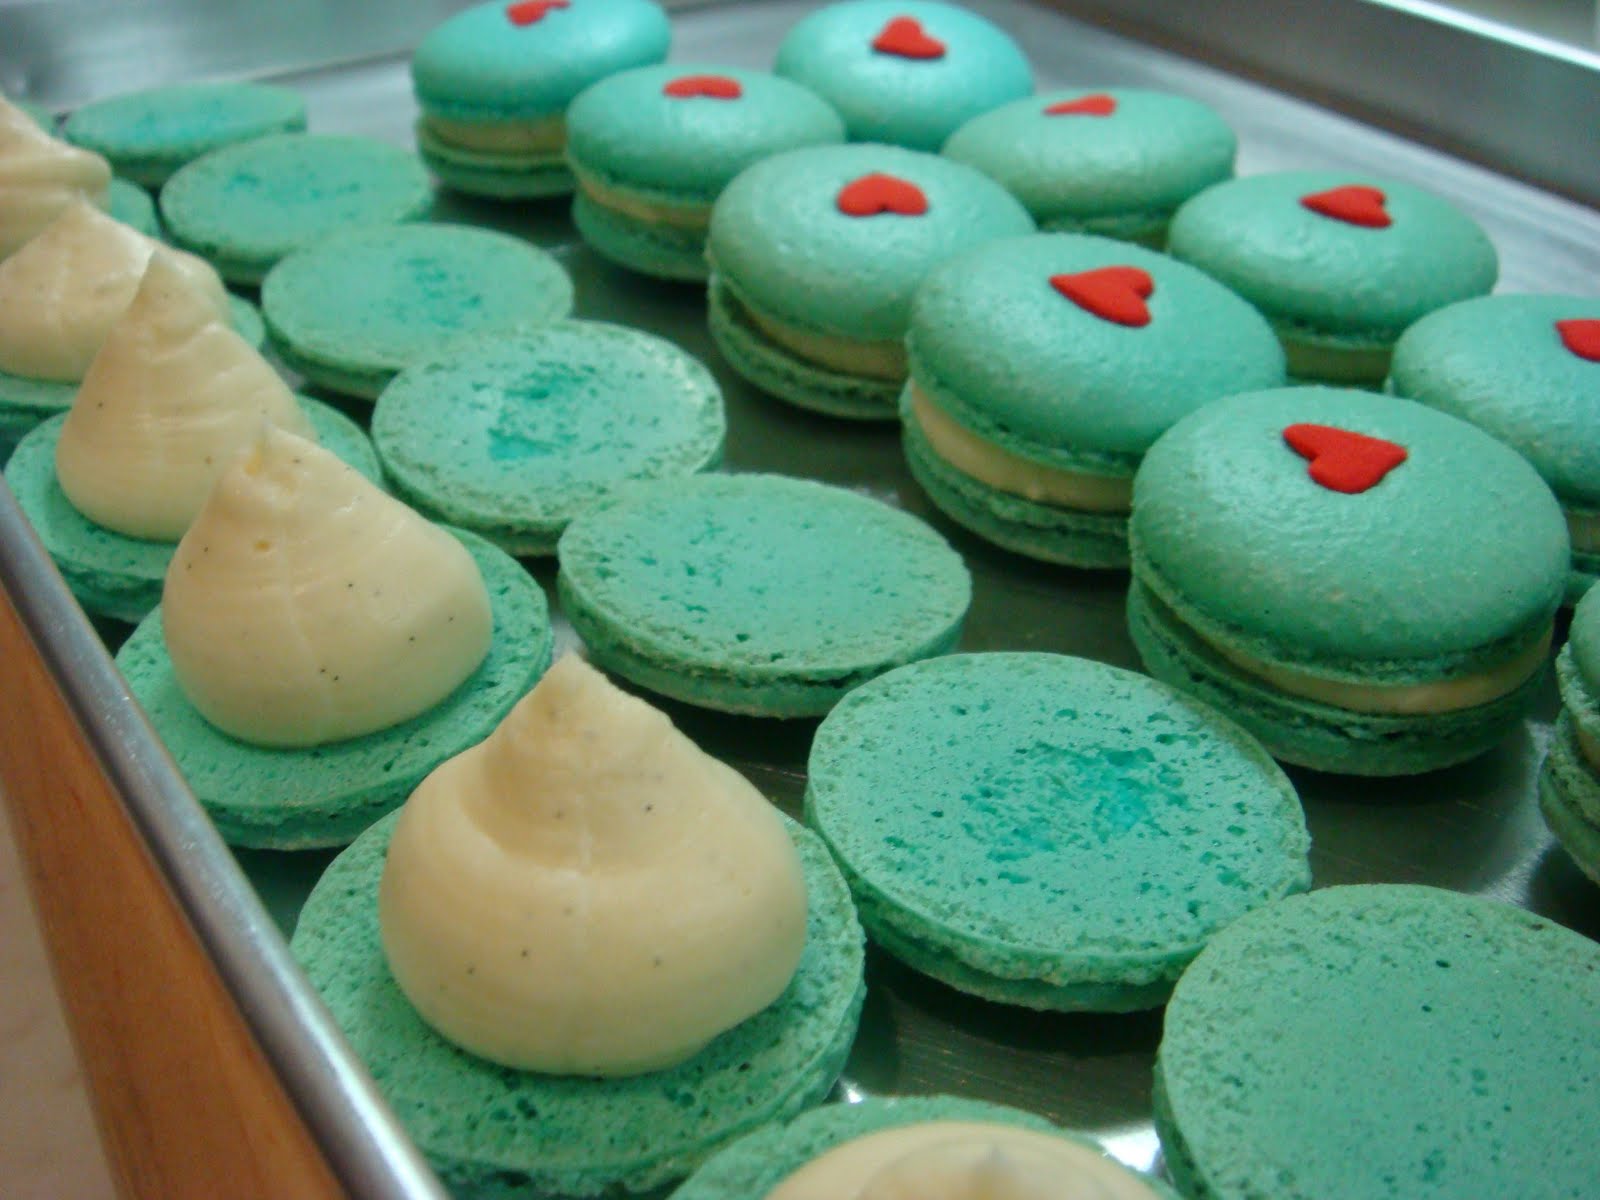
Just in the mood for prettiness today. I'm not going to mess around with new flavours so I'll split the batch and make classic citron vanilla in a Tiffany's shade of blue with white buttercream. With the other half, I'll redux pretty-in-pink raspberry macarons.

Macaron shells:
  • 65g almond meal
  • 80g icing sugar
  • 40g caster sugar
  • 50g egg whites, aged
  • 1/2 teaspoon lemon oil
  • 3 drops sky blue food colouring

Preheat oven to 160C and prepare 2 baking trays lined with silicon sheets.

Sift almond flour and icing sugar in a bowl. Beat room temperature egg whites and caster sugar till stiff peaks form. Add dry ingredients to meringue and mix well until batter is smooth and thick. Add the lemon oil and tint the batter a pastel shade of blue.

From Tiffany's with love
Spoon the batter into a piping bag/gun with a 1/2-inch nozzle and pipe evenly onto the baking trays in 3cm globs, spaced about 4cm apart (the piped batter will spread about 1 cm). Scatter sprinkles of your choice (or none at all) and let the piped batter dry till the skin forms. Bake for 12 minutes.


Buttercream filling:
  • 100g butter, softened to room temperature
  • 150g icing sugar, sifted
  • 2 teaspoons vanilla bean paste

Beat butter till nice and smooth, then add icing sugar and vanilla paste and beat till light and creamy. Spoon into an icing bag and chill for 15 minutes in the fridge.


Pipe a hershey kiss-sized gob onto each shell and sandwich with another. Let sit in refrigerator overnight and warm up to room temperature before eating.

Wednesday, September 15, 2010

After Eights Macarons


Inspired by those thin mint choclates, I'm undecided about whether I'm eating macarons or toothpaste. Some folks love them, some hate them. I guess it all depends on how much you like mint.

A little unconventional as far as macaron flavours go, but what the heck. I like them. They're cute and pretty, and I can skip brushing my teeth afterwards.

I'll be doing the short version here, so for detailed step-by-step instructions and pictures of macaron technique, click here.

Macaron shells:

  • 65g almond meal
  • 80g icing sugar
  • 40g caster sugar
  • 50g egg whites, aged
  • 3 drops green food colouring
  • Green metallic sugar sprinkles

Preheat oven to 160C and prepare 3 baking trays lined with silicon sheets.

Sift almond flour and icing sugar in a bowl. Beat room temperature egg whites and caster sugar till stiff peaks form. Add dry ingredients to meringue and mix well until batter is smooth and thick. Tint the batter a pastel shade of green.

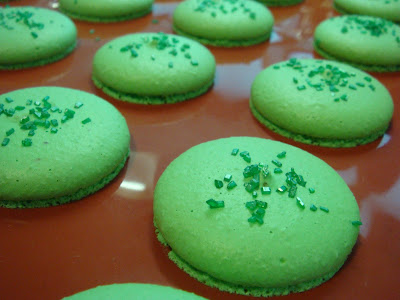
I love those sprinkles.
Spoon the batter into a piping bag/gun with a 1/2-inch nozzle and pipe evenly onto the baking trays in 3cm globs, spaced about 4cm apart (the piped batter will spread about 1 cm). Scatter metallic green sprinkles and let the piped batter dry till the skin forms. Bake for 12 minutes.

Aren't those feet so pretty?
Mint chocolate ganache:

  • 85g fine-quality bittersweet chocolate (60% cacao or more), finely chopped if not using buttons
  • 1/3 cup heavy cream
  • 1 tablespoon unsalted butter, softened
  • 1/2 teaspoon mint extract

Melt chocolate with cream and butter in a metal bowl set over a pan of lightly simmering water (bowl should not touch the water), stirring until smooth.

Remove bowl from heat and let cool a little, then add mint extract and stir well. Let stand at room temperature until cooled completely, spoon into a piping bag and chill for an hour till firm.


Pipe a dollop of ganache onto one side of each shell, the size of a Hershey's Kiss. Gently press down to sandwich the two sides together. Let sit in refrigerator overnight and warm up to room temperature before eating.

Sunday, August 15, 2010

Triple Chocolate Cake


Chocoholics, this is your ultimate fix. The equivalent of mainlining in the world of a chocolate addict.

Seriously, there's chocolate cakes, then there's the mother of all chocolate cakes. Imagine a intensely rich chocolate cake, sandwiched between layers of satiny whipped cream ganache to keep the cake moist, then topped off with a melting chocolate glaze. To die for.

The recipe is courtesy of the legendary Rose Levy Beranbaum and her Cake Bible. Yes, it is indeed the bible.

For the Devils Food Cake:
  • 55g cocoa powder
  • 240ml boiling water
  • 3 eggs
  • 2 teaspoons vanilla extract
  • 235g flour
  • 300g caster sugar
  • 2/3 teaspoon baking soda
  • 2/3 teaspoon salt
  • 225g butter, softened

Preheat oven to 175C with rack in middle and grease a 9-inch round springform cake tins.

Whisk together the cocoa powder and hot water until smooth and let cool to room temperature. In a mixing bowl, lightly beat eggs, about a quarter of the cocoa mixture and the vanilla extract.

With an electric mixer, combine the dry ingredients on low speed, then add butter and the remaining 3/4 of the cocoa mixture. Keep mixing till all the ingredients are moistened, then increase to high speed for another 1.5 minutes to introduce air into the batter.

Gradually add the egg mixture to the batter in 3 batches, beating well in between and scraping down the bowl. Pour the batter into the cake tin and bake for 20 - 30 minutes. The cake is done when the edges starts pulling away from the sides of the tin and a skewer inserted in the middle comes out clean.


Let the cake cool in the tins for 10 - 15 minutes, then remove from tin and place on a wire rack till completely cool. In the meantime, make the whipped ganache filling.

  • 230g bittersweet chocolate, finely chopped if not using buttons or chips
  • 475ml cream
  • 1/2 teaspoon vanilla

Melt the chocolate and 2/3 of the cream in a bowl set over lightly simmering water. Set aside to cool completely.

With an electric mixer, whip remaining cream till beater marks start to show, then add the chocolate mixture and continue beating till soft peaks form.

Now, on to assembling the cake.


Slice the cake lengthwise into 3 layers. Place one layer on a wire rack and spread a layer of whipped cream ganache, followed by a layer of cake. Repeat until you get three layers of chocolate heaven. Frost the top and sides of the cake, then stick the cake into the fridge to chill while you make the chocolate glaze:

  • 110g bittersweet chocolate, finely chopped if not using buttons or chips
  • 100ml cream
  • 1 tablespoon butter

Place chocolate into a mixing bowl. Bring cream to a boil in a saucepan till simmering. Pour hot cream over the chocolate and stir till melted. Let stand for awhile until cooled slightly but still of a pouring consistency.

To finish off, place the cake on the wire rack over a plate or baking sheet to catch the excess glaze. Pour the glaze over the top of the cake, letting the glaze drip down the sides to cover it completely.

Transfer to a cake board and chill for another hour before shooting up (aka eating).


More for the last meal:

Thursday, August 12, 2010

Raspberry Macarons with a Buttercream Filling


Weekends are great macaron making days. Laid-back, relaxed and stress-free. I love taking my time with them, the repetitive motions are super therapeutic and soothing.

This a a classic macaron flavour, with a fresh raspberry twist in the filling and two-toned shells. So patriotic and pretty!

I'll be doing the short version here, so for detailed step-by-step instructions and pictures of macaron technique, click here.

Macaron shells:
  • 65g almond meal
  • 80g icing sugar
  • 40g caster sugar
  • 50g egg whites, aged
  • 5 drops red food colouring

Buttercream filling:
  • 100g butter, softened to room temperature
  • 150g icing sugar, sifted
  • 10 fresh raspberries

Preheat oven to 160C and prepare 3 baking trays lined with silicon sheets.

Sift almond flour and icing sugar in a bowl. Beat room temperature egg whites and caster sugar till stiff peaks form. Add dry ingredients to meringue and mix well until batter is smooth and thick.

Divide batter into two bowls and tint one half with food colouring for a bright vibrant red. Leave the other half white.

Spoon the batter into a piping bag/gun with a 1/2-inch nozzle and pipe evenly onto the baking trays in 3cm globs, spaced about 4cm apart (the piped batter will spread about 1 cm). Let the piped batter dry till the skin forms and bake for 12 minutes.


To make the icing, beat butter till nice and smooth, then add icing sugar and beat till light and creamy. Add the raspberries and continue beating at high speed till the mixture is nice and smooth. Spoon into an icing bag and chill for 15 minutes in the fridge.

Pipe a hershey kiss-sized gob onto a white shell and sandwich with a red shell. Let sit in refrigerator overnight and warm up to room temperature before eating.

Other items on the Red, White and Ooohhh menu:

Saturday, August 7, 2010

Prawn and Pork Rib Noodle Soup


It's all about the stock baby! Or in more colloquial terms, "Hae Mee baby!"

Simmer for hours and hours and hours and you'll get a rich, thick, cloudy broth of porky prawny goodness.

The aromatic herbs give the broth a deep character, and the garnishings complete the dish with a spicy and fragrant kick.

It's a bit of a bitch to prepare, so save this for weekends. Be warned, the soup will need to simmer for about 5 - 6 hours, so start in the morning for dinner.

This will essentially be my Friday project, so I'm hoping GBF, Miss Z, Mr DB, Miss A and Mr P will enjoy my toiling over a hot stove. Well, not quite, more like watching TV and golfing as I let the slow cooker do it's job.

Serves 4
  • 24 prawns
  • 500g pork ribs
  • 200g of lean pork
  • 80g ikan bilis (dried anchovies)
  • 4 cloves of garlic, chopped
  • 1 star anise
  • 5 cloves
  • 1 stick cinnamon
  • 1 teaspoon whole black peppercorns
  • 1/2 teaspoon five spice powder
  • 1 tablespoon dark soy sauce
  • 2 teaspoons brown sugar
  • 1 teaspoon ground white pepper
  • 4 tablespoons oil
  • 1.2 litres water
  • 300g yellow noodles
  • 300g bee hoon (rice vermicelli)
  • 50g kang kong, blanched
  • 50g beansprouts, blanched
  • 2 fishcakes, sliced
  • Fried shallots
  • Sliced fresh red chillies
  • Chilli powder

Remove heads from prawns and shell, keeping the tails on. Reserve them for the stock. Make a deep slit along the top of the prawns and remove the black vein. Set aside in fridge.

In a large pot, heat the oil over high heat. Chuck in star anise, cloves, cinnamon, peppercorns and five-spice powder and sizzle till fragrant. You may want to use the pot lid as a shield, those spices have a tendency to crackle and pop something real bad.

Add pork ribs and lean pork and sear, then add prawn head and shells. Add the ikan bilis and garlic and sprinkle over the brown sugar. Fry for a further 5 minutes, then add water.

Bring to a boil, then turn down heat until the broth is gently simmering. At this point, you can also transfer to a slow cooker. Let simmer for 5 - 6 hours until the pork ribs are falling apart tender.

Remove the meat and strain the broth to remove the herbs, spices, prawn shells and other grimy bits. Skim off the scum from the surface as well.

Return the pork ribs to the broth. Slice and set aside the lean pork.

To assemble the dish, cook the yellow noodles and vermicelli in boiling water, drain and place in bowl. Add some beansprouts, kang kong, fishcake slices and lean pork slices.

Boil raw prawns in hot broth till just cooked and arrange 6 prawns in each bowl. Add a few pieces of pork ribs and ladle hot broth over the entire majestic scrummilicious damn thing.

Garnish with heaps of fried shallots, sliced red chiilies and a dash of chilli powder.

What can I say? I'm in prawny porky heaven.

Other items on the Childhood Comforts menu:

Thursday, August 5, 2010

Project Gnocchi

Alright... I'm giving this one last shot. Fingers and toes crossed that I don't bomb again.

Since I've never tasted the sweet sweet taste of gnocchi success, I'm trying out this recipe. Hopefully, I will be making gnocchi like an Italian grandmother soon.

Since this is a trial run, I'm going to start with a small batch. This is the final proportions I came to for 2 small servings:

  • 225g starchy potatoes
  • 1/2 an egg (as a novice, I'll start with a little more)
  • 1 cup flour
  • Pinch of salt

Although the recipe calls for much less flour, I found the dough to be way to sticky and simply not coming together. So I added more and it seemed to work out just fine.

Right... Boiled the potatoes, mashed them and let them cool. So far, so good.


Spread them out on a floured board, drizzle egg, 3/4 cup flour over and a sprinkle of salt. Then I used a icing knife to scrape and fold, scrape and fold...


Keep adding flour until the dough becomes firm enough to handle, then knead gently. You'll end up with a pretty decent looking ball of dough.


Roll into long strips and cut into 2cm long pieces.


Press the back of a fork into the lumps of dough to make little lines...


At this point, the tension is killing me. Will they hold up? Or fall apart? Or will they be too rubbery? I really can't take the humiliation of defeat AGAIN. My ego is too fragile and may not survive.

I fire up a pot of salted water and as it boils, the suspense mounts...

One lone gnocchi drops into the pot...

As it hits the water, it sinks to the bottom and I'm staring at it intently. It doesn't dissolve... That's a good sign.

I stick a fork into the water and give it a gentle nudge... It holds up ok...

Finally, it floats to the surface, which means it's done.

Tentatively, I fish it out and prepare to give it the taste test. Not much of one since I seldom eat gnocchi, but what the hell.

It's soft with a slight bite to it, with a distinct potato flavour. It's not bad, tastes about right. So, I drop the rest in and toss it with leftover bolognese sauce.

Success! I have conquered the evil potato pillows and am rewarded with dinner. I still don't know why gnocchi is such a big deal. It seems like an awful lot of trouble for something that tastes so subtle. All in all, a rather anti-climactic night. Fuggit... I win and that's all that matters.

Tuesday, August 3, 2010

Portobello and Feta Ravioli


I reckon it's high time I popped the cherry on my virgin pasta machine. Making fresh pasta is really therapeutic, what with all the kneading and bashing of the dough.

That said, it's probably a good idea to attempt this with 2 essential pieces of equipment: an electric mixer with a dough attachment and a pasta rolling machine.

If you're a real masochist and want to attempt this by hand, you can try, but I guarantee it will be painful beyond belief. The last time I attempted it was in Bangkok and the results weren't pretty. But then again, I was using an empty wine bottle as a rolling pin in an unfamiliar kitchen so I shouldn't have been that surprised.

It's a good idea to start with the filling first so it has time to cool down.

  • 150g feta cheese
  • 20 baby portobellos
  • 1/2 teaspoon of oregano
  • Freshly ground black pepper
  • 2 tablespoons butter

Slice the mushrooms while heating up a saucepan on medium heat. Melt butter and add mushrooms, letting it sweat down and get as much moisture out as possible. Season with oregano and pepper and let cool completely.

When cool, drain through a wire strainer, using a spoon to force out as much liquid as possible. Chop finely, then crumble in feta cheese and mash them up into a well-mixed mixture with your hands. Set aside and start on the pasta dough

The basic ingredients for pasta dough is straightforward: Eggs and flour.

The proportions are easy to remember too: 100g of flour for every egg. Roughly 150g of dough makes for one serving.

So, for today, I'm making dinner for 3, so you'll need:
  • 400g of flour
  • 4 large eggs

To make the dough, put 300g of flour into your mixer and crack in the 4 eggs. Start beating on low and you'll start getting a sticky dough. Add the rest of the flour bit by bit and the dough is worked over by the hook until it starts to form a solid mass that pulls away from the sides of the bowl. You'll know when to stop adding flour when the dough is solid and firm and no longer sticky.

Remove from mixer and knead well for 10 minutes with your hands.

Roll out the dough into sheets with the pasta machine. Start with the thickest setting and run through, and once again on the medium setting.

To assemble the ravioli, lay out a pasta sheet and place teaspoon sized gobs of filling spaced 3cm apart. Brush the edges with water and fold the dough over and seal the filling.

You can use a round cutter to trim the edges, or a knife to trim into squares.

Before cooking, let the ravioli dry on a floured tray for at least 2 hours. An air-conditioned room helps move things along a little faster. Dry one side for an hour, then flip the lil' suckers over and dry for another hour.

To cook, boil in water till they float to the top and al dente, drain and toss with your favourite sauce. You can use a classic tomato, creamy carbonara or a hearty bolognese like I'm doing today.

Monday, July 5, 2010

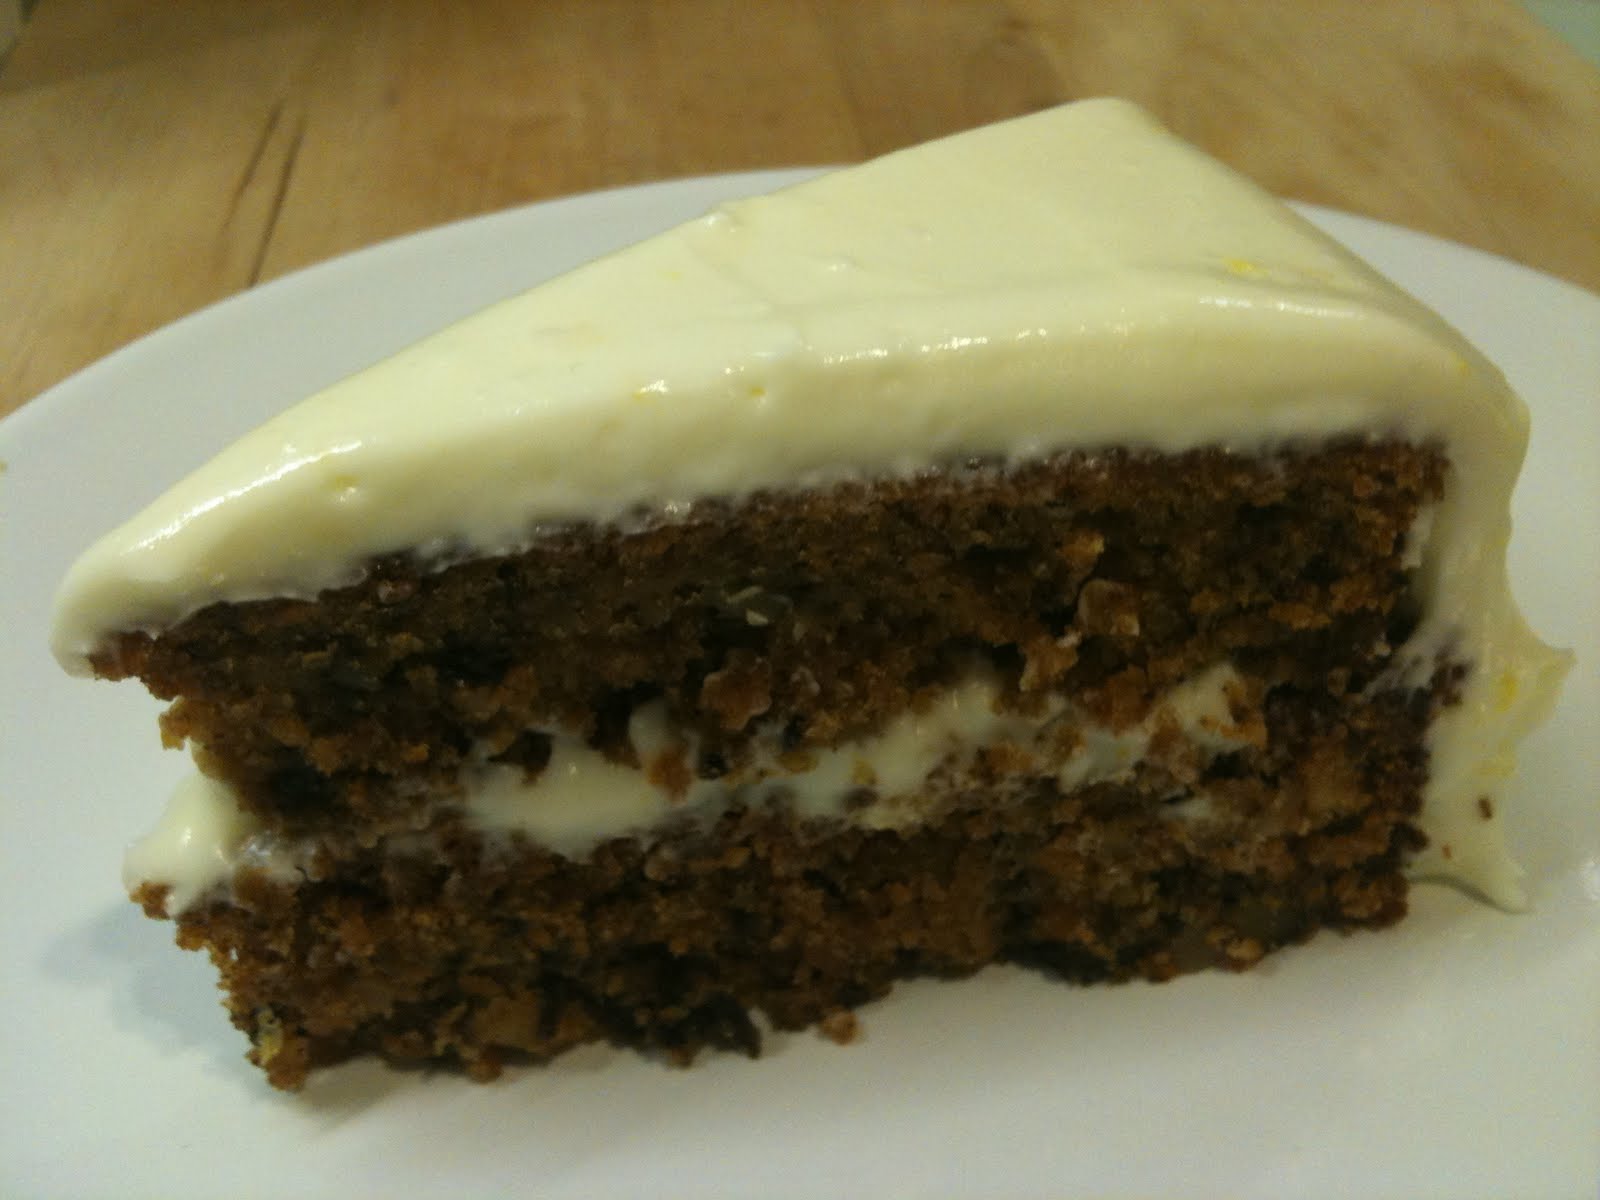
Homestyle Carrot Cake with Lemon Cream Cheese Frosting


Moist, spicy and tangy... It's like a party in your mouth!

This is a long-time favourite from way back when. The secret to making this cake go from good to OMFG is using freshly grated whole nutmeg. The aroma is so heady that it makes you want to plunge headfirst into the batter.

The second secret is using good cream cheese for the frosting. Resist the urge to get a huge block of generica on the cheap. Use original philly and you'll taste the difference.

Finally, don't be shy about the frosting. Slap it on thick and good. But if you don't want frosting, the carrot cake is good on its own too.

Makes an 1-inch/ 20cm cake:

For the cake:
  • 1 ²∕₃ cups sugar
  • 1 tsp salt
  • 1 ¼ cups flour
  • 2 ¼ tsp cinnamon
  • 1 tsp nutmeg
  • ½ tsp allspice
  • 1 tsp vanilla extract
  • 1 tsp baking powder
  • ½ tsp baking soda
  • 3 (60g) eggs
  • ²∕₃ cup vegetable oil
  • 1 ½ cup grated/chopped carrot
  • ½ cup roughly chopped walnuts or pecans

For the frosting:
  • 500g cream cheese, softened
  • 170g unsalted butter, softened
  • 1 ½ cups icing sugar, sifted
  • 1 ½ tsp vanilla extract
  • 1 lemon, grated zest and juice

Preheat oven to 175C. Grease 2 springform round tins and line bottom with parchment paper.

Sift together  flour, cinnamon, nutmeg, allspice, salt and baking soda and baking powder. Set aside.


For easy wash-up, chop carrot in food processor. When fine, chuck in nuts and pulse till roughly chopped.


Whip eggs and sugar until thick to till light yellow and runs off your beater like a fat ol' ribbon. Gradually add oil until evenly blended.


Fold in sifted flour mixture gently. Add grated carrots and nuts until well mixed.


Divide the batter between the 2 cake tins and bake for about 45-50 minutes. You'll know it's done when a toothpick inserted in the middle comes out clean. Let cool completely before you start frosting.

On to the frosting:


Blend cream cheese till nice and smooth. Add cubes of butter, blending well in between.


Sift in icing sugar and blend till fully incorporated.


Finally, mix in vanilla, lemon juice and zest. You should get a smooth creamy icing with no lumps. Cover with cling wrap and chill for an hour to let it firm up a bit.


To assemble the cake, spread a layer of icing between the two cake layers and frost all over. Chill for 2 hours in the fridge so the icing sets firm.

For a step-by-step picture guide on cake frosting, click here.


If you can resist, eat it the next day. This cake just seems to taste better when left overnight. It also keeps well. Up to 4-5 days if whole. However, if you've already sliced it, make sure you cover it so that it doesn't dry out in the fridge.

Cake Frosting Basics

Frosting can be a little daunting for first timers, but hey, a cake that tastes good no matter how ugly it looks. Don't worry about it looking perfectly smooth the first time. The more you practice, the better you'll get.

A few tips to make it easier:
  • A rotating frosting plate helps you turn the cake more easily and creates smoother surfaces.
  • Always make sure the cake is completely cool before cutting or frosting. Chilling in the fridge makes the cake firmer, easier to handle and less likely to break.
  • Always slice your cake with a serrated bread knife, not a regular knife.
  • An icing knife is a must.

The first step is the prepare the cake for frosting. What you want to achieve is a relatively flat and crumb-less surfaces.

Place a plate over one cake tin and flip over. Remove paper from the bottom of the cake. Place a cake board over the bottom of the cake and flip over again. Now you have the first layer sitting nicely on the cake board.


If the cake has risen in such a way that the top is domed, use a bread knife to level it out. Brush off crumbs and set aside.

Do the same for the other cake layer and set aside.

No sweat so far?

To create the sandwich layers, slap a quarter of the icing onto the bottom layer, using an icing knife or spatula and spread evenly.


Place the top layer flat side up, sandwiching the icing between the two layers of cake. Basically, the two slightly domed sides go in the middle, with the icing filling up the gaps in between. There are 2 reasons for this. First, it gives you a stable flat bottom and a pretty flat top. Second, the gaps hold lots of icing so it makes for a generous iced center.

In this demonstration, I've baked a single cake and sliced it in half. If you're doing the same, place the top half of the cake flat side down on the cake board. This means the slightly domed side is the one you ice.

Spread on a thick layer of icing, making sure you put more icing on the sides to create a flat surface.

Then place the other layer flat side up. This means that the cut side is touching the frosting.


The first thing we do in icing the outside of the cake is to "seal" the cake. This means we place a very thin layer of icing on to seal the crumbs, then place in the fridge to set. Then, a thick final layer of frosting goes on. This is done so that the final frosted cake is smooth and crumbless.

Spread a very thin layer of icing on the top of the cake surface. You'll see the crumbs mix in with the icing. Don't worry about it at this point.

With your icing knife, take globs of icing and spread onto the sides. Just make sure the sides are coated and don't worry about it being a little uneven for now.

Place into the fridge for 30 minutes and you're almost there...


When the "sealed" cake has set, take half of the remaining icing and spread it evenly across the top of the cake. As you spread and smoothen, some of the icing should ooze over the sides.

Use a paper towel and clean off your icing knife.

Take small globs of icing with your knife and coat the sides, making sure the icing layer is straight.

Once you've got a layer of icing onto the whole cake, you can now start smoothing and evening out the whole thing.

OK... start with the top. Sweep the knife in long strokes so it's evened out. Wipe down knife again.

For the sides, place the tip of the knife onto the cake board, holding it parallel to the cake. Run it along the cake in a continuous stroke around a quarter of the cake, being careful not to exert too much pressure. You don't want to mash and scrape off all the icing, so a light touch to smooth it out is all that's needed.

Wipe down knife again and repeat quarter by quarter.


There you go, a decently iced cake!

Saturday, July 3, 2010

Strawberries and Fresh Cream Cake


Food porn alert!

I could wax lyrical about this cake ad nauseum. Especially since it's a miserable rainy day, the thought of light fluffy vanilla-scented butter cake, sandwiched between layers of fresh cream and tart-sweet strawberries is enough to lighten my mood.

The cake is delicate, using egg whites instead of yolks or whole eggs to give it a lightness. The butter and milk moistens the cake and gives it a rich flavour.

The fresh cream frosting is pure unadulterated and shameless. Simply pure cream, with sugar, a hint of vanilla and some cornstarch to stabilise it for frosting, it's so good you can eat it straight from the bowl.

For the cake, you'll need:
  • 135g egg whites (from approximately 4 eggs)
  • 1 cup milk, separated into 1/4 and 3/4 cups
  • 2.5 tsp vanilla extract
  • 300g sifted cake flour
  • 300g caster sugar
  • 1 tbsp + 1 tsp baking powder
  • 3/4 tsp salt
  • 170g butter, softened and cubed

Preheat oven to 180C.

Grease two 9-inch round springform cake tin and line the bottom with parchment or greaseproof paper.

In a medium bowl, lightly whisk together egg whites, 1/4 cup of milk and vanilla.


Add the butter and remaining 3/4 cup milk and mix on low speed until the dry ingredients are moistened. Increase speed to medium and beat for another 1.5 minutes. This adds air to the batter and helps create the volume and structure of the cake. As you beat, make sure to keep scraping down the sides.


Gradually add the egg mixture in 3 batches, beating for about 20 seconds after each addition. Don't forget to keep scraping down the sides!


Pour 1/3 of the batter into one tin and 2/3 into another. Smooth the surface with a spatula. Bake for 25 - 30 minutes or until a skewer inserted into the middle comes out clean.

Let the cakes cool on racks for 10 minutes. You'll notice that the sides will shrink away from the tin as it cools. Once the cakes are cool enough to handle, run a knife or spatula around the sides of the cake to make sure nothing sticks.

Remove the springform sides, and transfer to a cake board.

Now, on to the strawberries and cream:
  • 500g of fresh small strawberries
  • 40g icing sugar
  • 3 teaspoons cornstarch
  • 3 cup cream
  • 1.5 teaspoon vanilla

Slice thinly or dice half the strawberries. This will go in between the layers so if you prefer chunks, dice them instead of slicing. Trim off the leaves of the other half and cut into halves. This will be used to decorate the top of the cake.


To make the whipped cream, refrigerate your mixing bowl and beater in the fridge for at least 15 minutes. Cold equipment ensures the stability and integrity of the whipped cream. Ever seen melted whipped cream? Pretty nasty...

Mix sugar and cornstarch together in a small saucepan, then gradually add one quarter of the cream, using a wire whisk to mix out all the lumps. Transfer to stovetop on medium heat. Keep stirring, and stirring, and the mixture will thicken. Remove from heat and let cool to room temperature.

In a mixing bowl, beat the remaining cream and vanilla until traces of beater marks begin to show distinctly.

Be careful not to overbeat or what you'll end up with is literally butter. Which, isn't all that bad... if that happens, just add fine caster sugar and keep going until you see it form a curd-like mass. Pack it all into a pot and you have homemade clotted cream (which is like a creamy butter). Oh yes, and start on the whipped cream all over again, and this time, pay attention!

Add the cornstarch and sugar mixture in a steady stream to the whipped cream, beating constantly. Beat until stiff peaks form when you raise the beater.

Chill in fridge for 30 minutes.

OK, now to assemble the cake. Frosting beginner? Click here for a step-by-step picture guide on frosting cakes.


Slice the thicker cake into 2 layers.

Lay the thinner cake on a cakeboard and spread with a layer of cream. Place a layer of sliced or diced strawberries and cover with the next layer. Repeat until you have 3 berry creamy layers.


Once the layers are assembled, brush off extra crumbs off the top of the cake. Then frost all over with cream. Decorate with strawberry halves and chill for another hour to set the cake before serving.

Tuesday, June 29, 2010

Raspberry Chocolate Macarons


Alright, here's the big kahuna, the Mount Everest of baking. The delicious and dreaded macaron.

This is a tried, tested and proven recipe. Pierre Hermes and Laduree, you ain't got nuthin' on me. You may rule Paris, but I got tropical weather macarons down pat. I've tried the Canele ones, and I must say, mine are just as good, if not better (can you see my head growing bigger?). Ok, ok... maybe not better but I definitely give them a run for their money. Not bad for an amateur baker with a 2m x 2m kitchen.

First, the essential must-haves:
  • Weighing scale
  • Silicon baking sheets (Silpat) or non-stick baking paper sheets
  • Baking trays
  • Mixer or wire whisk (I don't recommend whisking the meringue by hand. It is literally too painful.)
  • Metal mixing bowls
  • Spatula (plastic or rubber)
  • Sieve
  • Large piping bag with 1/2-inch round nozzle 
  • Oven thermometer (if you don't have a digital oven)

Next, the  ingredients:
  • Egg whites - aged in the refrigerator for at least 24 hours, 48 is ideal
  • Finely ground almond powder - also called almond flour
  • Icing sugar
  • Castor sugar - the finest grain sugar available
  • 1/4 teaspoon of  cream of tartar


 Then, the basic ratios based on 1 unit of egg white of 50g:
  • 1.3 almond meal x 50g egg white (1.3 x 50g = 65g almond meal)
  • 1.6 icing sugar  x 50g egg white (1.6 x 50g = 80g icing sugar)
  • 0.8 caster sugar x 50g egg white (0.8 x 50g = 40g caster sugar)
  • Egg white 50 gm
  • Total weight of ingredients = 235g

Preheat your oven to 160C.

Here's an important note: An oven that's too hot will cause the tops of the macaron shells to crack. If you're experiencing that problem, turn down the heat to about 150C. If you're making mini-sized petit four macarons (about 2cm in diameter or less), set the temperature at 140C.

Stack two or three heavy baking trays. Line the top tray with non-stick baking paper or silicon baking sheets. If you're not adept with piping, mark the paper with 3cm circles, spaced about 4cm apart.

Sift the icing sugar and almond meal into a bowl to remove lumps of powder. Set aside.

In a clean bowl, beat the room-temperature egg whites, cream of tartar and sugar until stiff peaks form and you have a firm, glossy and compact meringue. You'll know you have the right consistency when the peak of the meringue stands up by itself, like in the image below. If it flops over, it's known as soft peak and not done yet.


Sift the dry mixture over the meringue and fold in with a spatula using a circular motion around the bowl, scraping under the batter and folding it over. You don't need to be gentle, but don't beat the crap out of it either. The whole point is to mix in the dry ingredients quickly without over mixing the batter. It's better to under mix than over mix, because you can mix it more later if the consistency isn't right. Add colourings or flavourings at this point.


A quick note of colours and flavours. Use powder or concentrated gel colourings as it doesn't add more moisture to the batter. You didn't go through all that trouble to dry your egg whites just to put liquid back in. On flavours, use natural extracts rather than the artificial stuff. If you don't have the natural stuff, then it's better to leave it au naturel.

The final batter should be smooth and thick but flowing (often referred to as being "like magma", but like as if we've ever seen lava flowing out of a volcano before. Duh...). Basically, a ribbon of batter dropped from the spatula to the top of the batter should take about 30 seconds to disappear.


Spoon the batter into a piping bag/gun with a 1/2-inch nozzle and pipe evenly onto the baking paper/ silicon sheet in 3cm globs, spaced about 4cm apart (the piped batter will spread about 1 cm).


You'll get little peaks after piping like in the picture below. Mild peaks should settle back into the batter eventually. If they don't disappear, whack the tray repeatedly on a table until the peaks disappear. Usually the batter will spread a little and any bumps will disappear.


Let the piped batter dry so that a "skin" forms on the top  of each macaron. This can take from anywhere from 20 minutes to never in our humid weather, so have a hairdryer on standby. This post will explain why the skin is necessary and the hairdryer (yes, I know it's weird, but it works).


Bake the macarons tray by tray on the centre rack.

At the 5 minute mark the shells should have lifted and developed "feet". At the 6-7 minute mark they should be starting to colour just slightly. Rotate the baking tray if the colouring is uneven. Bake for 12 minutes in total.


Stand back and admire those pretty little feet. Yes, you're gorgeous... Yes you are!

If you are using a silicon baking sheet, allow to cool completely before removing the shells. If they stick to the sheet, place them in the freezer for awhile to help with the sticking problem.

If you're using paper, spritz a little water from a spray bottle under the paper while still hot. The steam created will help release the shells from the paper.

Lay the cooled macaron shells face up and match them according to size (this is where the anal-retentive part of me is really enjoying herself).


For the raspberry ganache filling, you will need:
  • 85g fine-quality bittersweet chocolate (60% cacao or more), finely chopped if not using buttons
  • 1/3 cup heavy cream
  • 1 tablespoon unsalted butter, softened
  • 1/2 teaspoon raspberry extract


Melt chocolate with cream and butter in a metal bowl set over a pan of lightly simmering water (bowl should not touch the water), stirring until smooth.


Remove bowl from heat, then add raspberry extract. Let stand at room temperature until cooled completely, spoon into a piping bag and chill for 20 minutes till firm.

Now you're almost at the home stretch and ready to assemble the macarons.

Pipe a dollop of ganache onto one side of each shell, the size of a Hershey's Kiss. Gently press down to sandwich the two sides together.


Haha... I lied. You're not at the home stretch yet.

Macarons taste best when refrigerated and eaten the next day. The process of chilling in the fridge and warming back up to room temperature allows the moisture from the filling to meld with and soften the inside of the shells to create that unmistakable crisp outside and chewy soft inside.


Be patient and wait. It will be worth it. Oh yes it will.